Excel VBA Examples
This is very thing when I started working and learning VBA Macros, I was confused where to start. We have already seen VBA Editor which has all the definitions of VBA Editor Window options and tabs. As a beginner, we always do not know the way to start the thing until we find one. This article is the solution for those who face difficulty in using and learning VBA Examples and creating Macros. We all have faced the time when certain things in Excel could have been automated using Macro. But, someone who doesn’t know how to use VBA will not able to create one. This will be a useful guide for those who are new to VBA Macro coding.
Examples of VBA in Excel for Beginners
Below are the examples of VBA in Excel:
VBA Example #1
Let’s see a simple example of using VBA Coding. For this, follow the below steps:
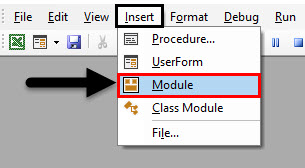
Step 1: Open a VBA Module where we will be writing our code from Insert menu tab as shown below.
Step 2: Now write the subprocedure of VBA macro in any name.
Code:
Sub VBA_Examples1()

End Sub
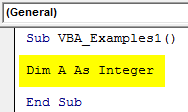
Step 3: Define a variable using DIM where we will be storing numbers as Integers.
Code:
Sub VBA_Examples1()

Dim A As Integer

End Sub
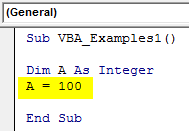
Step 4: Now give any number to the above-defined variable, as shown below.
Code:
Sub VBA_Examples1()

Dim A As Integer
A = 100

End Sub
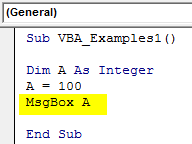
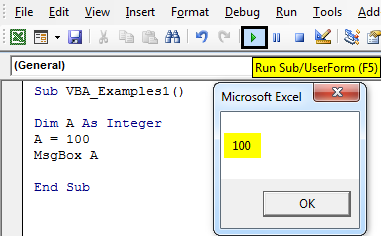
Step 5: Now we will use the message box to print the value stored in Variable A.
Code:
Sub VBA_Examples1()

Dim A As Integer
A = 100
MsgBox A

End Sub
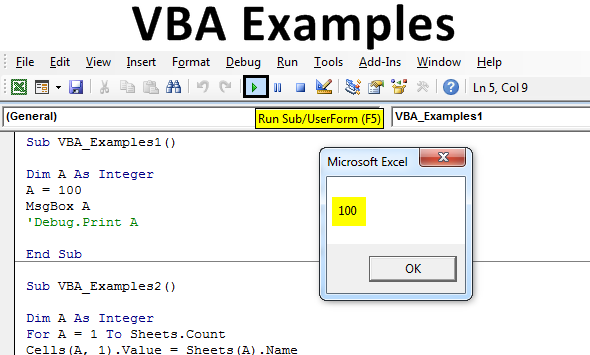
Step 6: Run the code by pressing the F8 key or by clicking on the Play Button located below the menu bar. We will see the message box with the value 100 in it.
Code:
Sub VBA_Examples1()

Dim A As Integer
A = 100
MsgBox A

End Sub
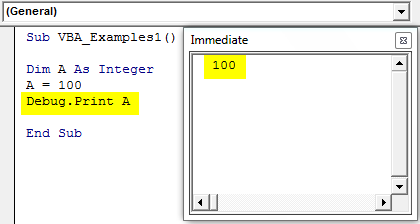
Step 7: This could have been done using Debug Print function as well, whose values are seen in Immediate Window. (Note: Press Ctrl+ G to open immediate window)
Code:
Sub VBA_Examples1()

Dim A As Integer
A = 100
Debug.Print A

End Sub
VBA Example #2
Now in this example, we will see another example where we will use the For-Next loop to print the sheet names. For this, follow the below steps:
Step 1: Open a Module and write the subprocedure as shown below. We can use any name to define this.
Code:
Sub VBA_Examples2()

End Sub
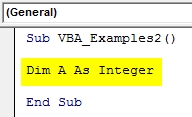
Step 2: Choose a variable as an Integer. We can choose the name variable as we did in example-1.
Code:
Sub VBA_Examples2()

Dim A As Integer

End Sub
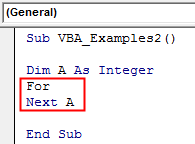
Step 3: Open a For-Next loop as shown below.
Code:
Sub VBA_Examples2()

Dim A As Integer
For
Next A

End Sub
Step 4: Select the position of cell from where we want to see the Sheet names. Here as we don’t have any header reference so we can start from cell 1.
Code:
Sub VBA_Examples2()

Dim A As Integer
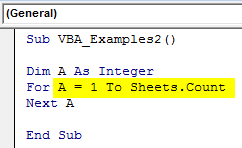
For A = 1 To Sheets.Count
Next A

End Sub
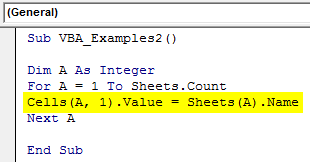
Step 5: Now we assign the variable A with cell Value to see the Sheet name as shown below.
Code:
Sub VBA_Examples2()

Dim A As Integer
For A = 1 To Sheets.Count
Cells(A, 1).Value = Sheets(A).Name
Next A

End Sub
Step 6: Now run the code by pressing the F8 key or by clicking on the Play button.
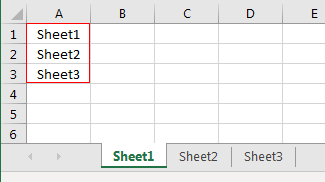
We will see, as we had 3 sheets, all named default so their name got printed from cell A1 to below till the number of Sheets we have.
VBA Example #3
In this example, we will learn how to print the numbers. This process is quite the same as we have seen in example-2. For this, follow the below steps:
Step 1: Open a Module and write the subprocedure.
Code:
Sub VBA_Examples3()

End Sub
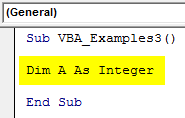
Step 2: Consider a variable using DIM as Integer. As we are using the numbers to Integer data type should be used.
Code:
Sub VBA_Examples3()

Dim A As Integer

End Sub
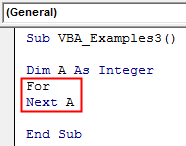
Step 3: Again open a For-Next loop as shown below.
Code:
Sub VBA_Examples3()

Dim A As Integer
For
Next A

End Sub
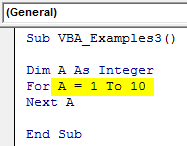
Step 4: Now select the cell range from where we want to see number till the last in For syntax.
Code:
Sub VBA_Examples3()

Dim A As Integer
For A = 1 To 10
Next A

End Sub
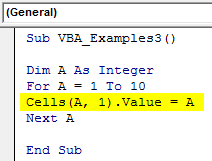
Step 5: Now fix the cell position with variable A. Here, second position vertex in Cell shows Column number. As we chose 1 so we expect to see the numbers starting from cell A1.
Code:
Sub VBA_Examples3()

Dim A As Integer
For A = 1 To 10
Cells(A, 1).Value = A
Next A

End Sub
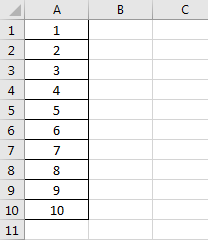
Step 6: Now run the code by pressing the F8 key or by clicking on the Play button. We will see, the numbers are generated from cell A1 to A10 starting from 1 to 10.
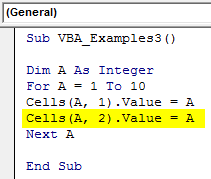
Step 7: What if we try to add these numbers in the second column? Change the column vertex from 1 to 2. Or else add another line of code as shown below.
Code:
Sub VBA_Examples3()

Dim A As Integer
For A = 1 To 10
Cells(A, 1).Value = A
Cells(A, 2).Value = A
Next A

End Sub
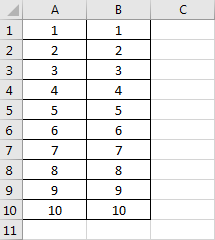
Step 8: Again run the complete code by pressing the F8 key or by clicking on the Play button. We will see the same number starting from 1 to 10 got printed in column B as well from cell B1 to B10.
VBA Example #4
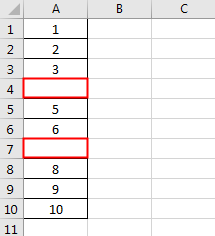
In this example, we will see how to change the color of blank cells from the selected ranges. For this, we have used the same number as we did in the above example but we have deleted some of the cells to get the output.
Step 1: Open a Module, write the subprocedure as shown below.
Code:
Sub VBA_Example4()

End Sub
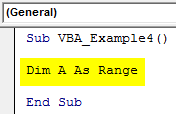
Step 2: Define a variable using DIM as Range, as we are selecting the exiting number range.
Code:
Sub VBA_Example4()

Dim A As Range

End Sub
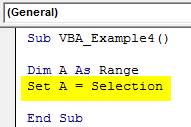
Step 3: Now set this variable as Selection
Code:
Sub VBA_Example4()

Dim A As Range
Set A = Selection

End Sub
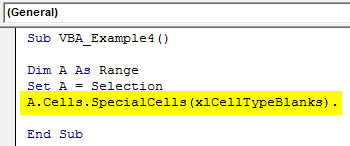
Step 4: Now select the Range of numbers using defined variable A and choose xlCellTypeBlanks to select the blank cells only.
Code:
Sub VBA_Example4()

Dim A As Range
Set A = Selection
A.Cells.SpecialCells(xlCellTypeBlanks).

End Sub
Step 5: Now to change the interior color of blank cells, use Interior.Color and choose the color by which we want to highlight the blank cells. Use vbBlue or vbGreen type to define the color. The use of vb is a must.
Code:
Sub VBA_Example4()

Dim A As Range
Set A = Selection
A.Cells.SpecialCells(xlCellTypeBlanks).Interior.Color = vbBlue

End Sub
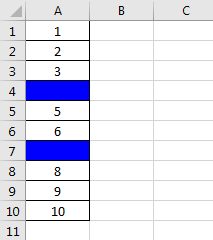
Step 6: Now select the range of cells and then run the code by pressing the F8 key or by clicking on the Play button. We will see, the cell A4 and A7 which were blank, are now highlighted with Blue color as shown below.
Pros and Cons of Excel VBA Examples
- VBA increases the efficiency of work.
- By this, we want to reduce the repetitive tasks in one go.
- We can create any type of Macro we want.
- We can also record a Macro if doing the coding is not easy.
- People who do not have coding knowledge or idea may find difficult using VBA Macro.
Things to Remember
- Beginner in VBA should keep in mind to save the code in Macro enabled excel format. This will allow us to retain the code in the same file.
- Always compile the complete code, even if the code is of one line. This will reduce our time in debugging if you face any error while after code is run.
- Always start the learning process of VBA or any other coding language with small and easy code. This will give a better understanding and confidence.
Recommended Articles
This is a guide to VBA Examples in Excel. Here we discuss some useful examples of VBA Macro code in Excel along with downloadable excel template. You can also go through our other suggested articles –
