Excel VBA FreeFile
How often, being an Excel user, you open a file and work on the same? Very frequently, right? It is again possible to automate the tasks of opening the file in Excel using a powerful tool, VBA, which allows you to write macros and ultimately automates all the tasks starting from opening a file from a given location to use, save and close it on the same path. While talking about automating the process of file opening and closing through VBA, it becomes very important to Index the file so that the system can identify which file to use at the time of execution. We have a function available within VBA named FreeFile, which serves this purpose.
What is VBA FreeFile Function?
VBA FreeFile is a function that is categorized under the VBA function, which allows the system to reserve a number for the next file to be opened under VBA File Input Output for a smooth coding experience and reducing unnecessary bugs in your code. When you open a file through VBA File IO (Input/Output), it becomes absolutely mandatory to assign a unique number to that file because you may have multiple files on the location you are about to use to read, write and opening purpose through your code. How does the system know which file out of all those you want to open? The VBA FreeFile function identifies the unique number we assign to the file and makes it available for you to open, read or write in VBA.
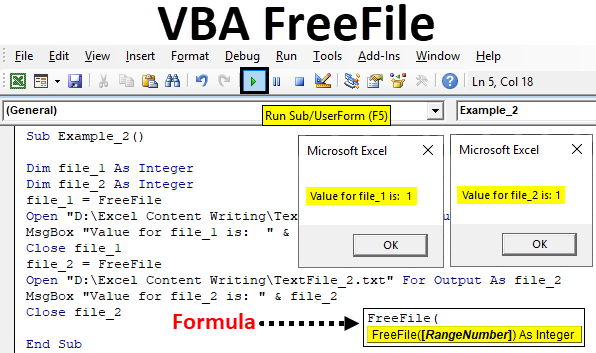
The syntax for the FreeFile function is as below:
This function only takes one argument, RangeNumber, which has the standard values as zero (0) and one (1). If you specify zero, the file number will be assigned through the range of numbers 1 to 255 stepwise for each file you open. If you specify one, the file number will be assigned through the range 256 to 511 stepwise for each file you open. If no RangeNumber specified, zero will be considered by default.
How to Use the FreeFile Function in Excel VBA?
Below are the different examples to use the FreeFile function in Excel VBA.
VBA FreeFile – Example #1
Follow the below steps to use FreeFile Function in Excel VBA.
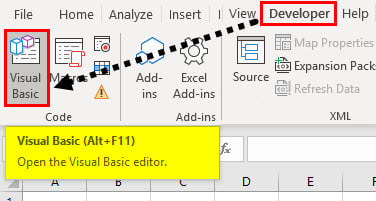
Step 1: Open a new Visual Basic Editor (VBE) by clicking on the Visual Basic button under the Developer tab present in your Excel file or by hitting Alt + F11 button simultaneously.
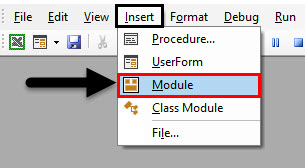
Step 2: Insert a new module in the VBE. Click on the Insert button. Select Module from the list of options available in Insert.
Step 3: Define a new sub-procedure that can hold your macro.
Code:
Sub Example_1()

End Sub
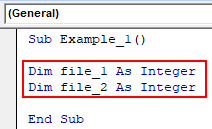
Step 4: Define two new variables, file_1, and file_2 as an integer. These two variables will hold the numbers we assign to each file we open throughout the macro.
Code:
Sub Example_1()

Dim file_1 As Integer
Dim file_2 As Integer

End Sub
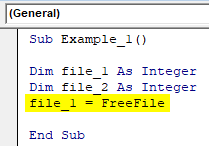
Step 5: Use the assignment operator to assign integer value 1 to the file_1 variable with the help of VBA FreeFile.
Code:
Sub Example_1()

Dim file_1 As Integer
Dim file_2 As Integer
file_1 = FreeFile

End Sub
Step 6: Now, use the Open statement, which can be used to open a file in VBA.
Code:
Sub Example_1()

Dim file_1 As Integer
Dim file_2 As Integer
file_1 = FreeFile
Open "D:\Excel Content Writing\TextFile_1.txt" For Output As file_1

End Sub
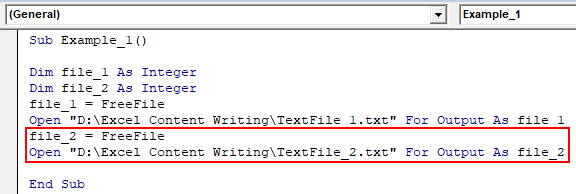
Here, we have specified the path on which the file is located. The For statement gives you options like how you want to open the file (for ex. as an output), and the As statement specifies the file number which we have specified using the FreeFile statement.
Step 7: Follow Step 5 and Step 6 to assign a new number to the second file through the file_2 variable and Open it.
Code:
Sub Example_1()

Dim file_1 As Integer
Dim file_2 As Integer
file_1 = FreeFile
Open "D:\Excel Content Writing\TextFile_1.txt" For Output As file_1
file_2 = FreeFile
Open "D:\Excel Content Writing\TextFile_2.txt" For Output As file_2

End Sub
Step 8: Now, we would like to see the numbers which actually are assigned to both of the text files. You can run each line one by one with the help of the F8 key. However, the output will not be visible to you. Neither in Excel file nor in the Immediate window. Please add the following MsgBox statement, which pops a message box up with the numbers for each file.
Code:
Sub Example_1()

Dim file_1 As Integer
Dim file_2 As Integer
file_1 = FreeFile
Open "D:\Excel Content Writing\TextFile_1.txt" For Output As file_1
file_2 = FreeFile
Open "D:\Excel Content Writing\TextFile_2.txt" For Output As file_2
MsgBox "Value for file_1 is:" & file_1 & Chr(13) & "Value for file_2 is:" & file_2

End Sub
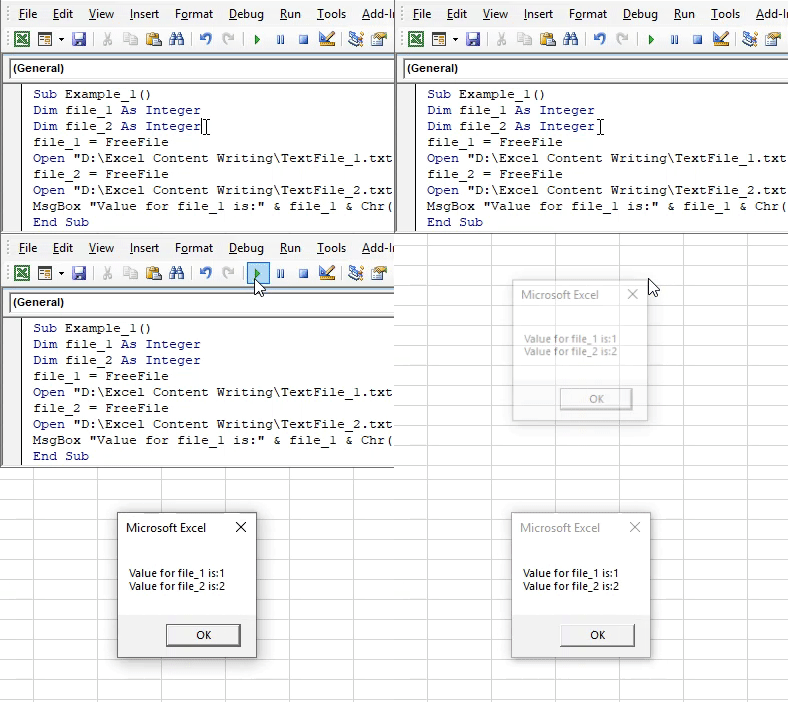
In this line of code, the first line of the message box will contain the text “value for file_1 is: “ and the numeric value assigned using the FreeFile function. Chr(13) allows the next line to appear. The next line of the message box will read “Value for file_2 is: ” and the number assigned to the second file.
Step 9: Run this code by hitting the Run button or by pressing the F5 key.
This is how the FreeFile function allows you to assign the number to the file you are going to open, read, close through VBA.
VBA FreeFile – Example #2
If we close the file we open every time, then the new file we open will always have a serial number as 1 every time it gets opened. Follow the steps below to see it through.
Step 1: Define a new sub-procedure that can hold your macro.
Code:
Sub Example_2()

End Sub
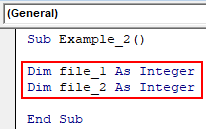
Step 2: Define two variables file_1 and file_2, as an integer inside the newly defined sub-procedure.
Code:
Sub Example_2()

Dim file_1 As Integer
Dim file_2 As Integer

End Sub
Step 3: Now, use FreeFile to assign a number to the given file and an Open statement to open that file through the location at which we have it.
Code:
Sub Example_2()

Dim file_1 As Integer
Dim file_2 As Integer
file_1 = FreeFile
Open "D:\Excel Content Writing\TextFile_1.txt" For Output As file_1

End Sub
Step 4: Use a MsgBox statement to add a message box for the number of the first files.
Code:
Sub Example_2()

Dim file_1 As Integer
Dim file_2 As Integer
file_1 = FreeFile
Open "D:\Excel Content Writing\TextFile_1.txt" For Output As file_1
MsgBox "Value for file_1 is: " & file_1

End Sub
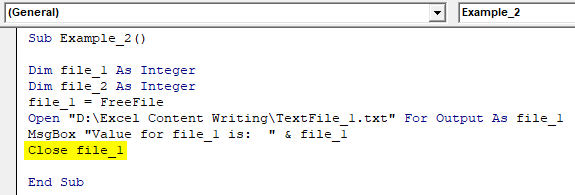
Step 5: Use a Close statement to close the first file you opened through VBA.
Code:
Sub Example_2()

Dim file_1 As Integer
Dim file_2 As Integer
file_1 = FreeFile
Open "D:\Excel Content Writing\TextFile_1.txt" For Output As file_1
MsgBox "Value for file_1 is: " & file_1
Close file_1

End Sub
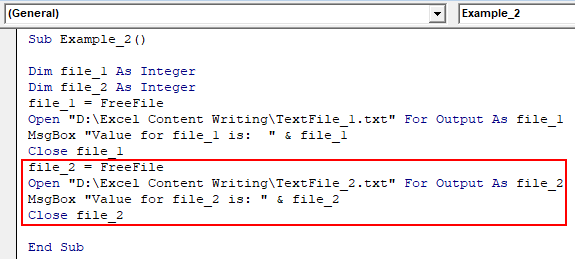
Step 6: Now, follow the same procedure as in Step 5, Step 6, Step 7 but for the second file. It includes assigning value to file_2 variable using FreeFile function and opening it with the help of Open statement, using MsgBox to display the file number for the second file and finally closing the second file.
Code:
Sub Example_2()

Dim file_1 As Integer
Dim file_2 As Integer
file_1 = FreeFile
Open "D:\Excel Content Writing\TextFile_1.txt" For Output As file_1
MsgBox "Value for file_1 is: " & file_1
Close file_1
file_2 = FreeFile
Open "D:\Excel Content Writing\TextFile_2.txt" For Output As file_2
MsgBox "Value for file_2 is: " & file_2
Close file_2

End Sub
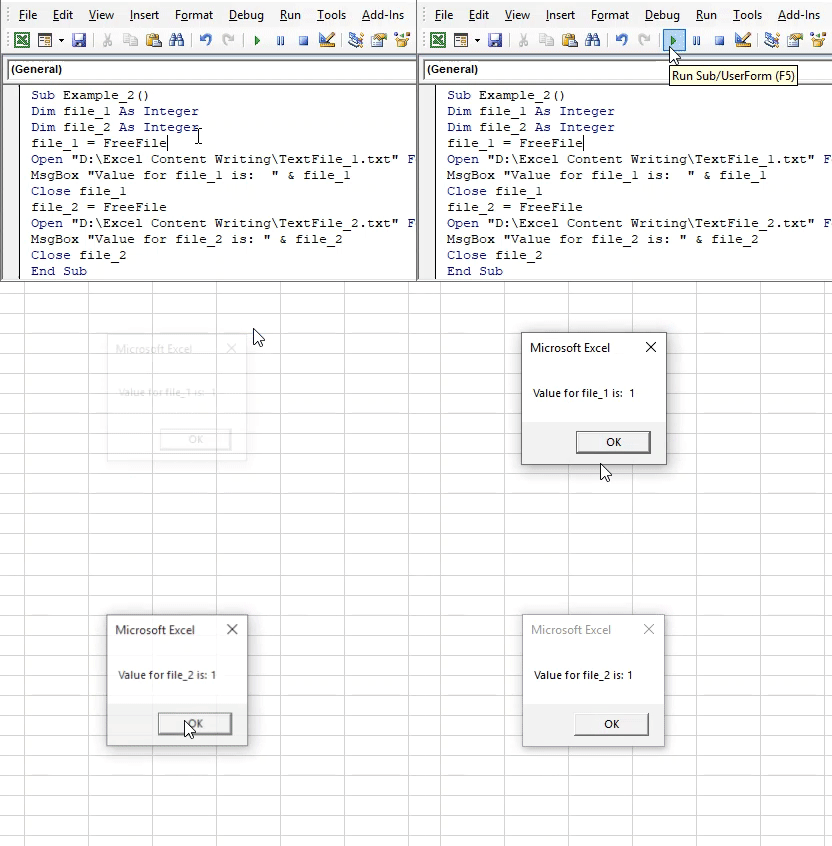
Step 7: Run this code by hitting the Run button or F5.
The first message box represents the value of file_1, which appears to be 1. The second message box represents the value of file_2, which also appears to be 1. This change is there because we have used the close statement to close the files one by one. Due to which, while initiating a new file, every time the old file and its number gets vanished from the system memory, and next file will be considered as a fresh file with numbers starting from 1.
Things to Remember
- FreeFile returns a unique integer to every file we open, read, close through VBA File IO.
- FreeFile has two values for argument RangeNumber (which is optional). Zero usually assigns the number between the range 1 to 255, and one assigns the numbers from 256 to 511.
Recommended Articles
This is a guide to VBA FreeFile. Here we discuss how the FreeFile function allows you to assign the number to the file you are going to open, read, close through Excel VBA, along with practical examples and a downloadable excel template. You can also go through our other suggested articles –
