Updated April 8, 2023
Excel VBA Join Function
VBA JOIN function is used to join together an array of substrings with the specified delimiter. Just as the word itself means it needs to join two or more strings. Now here are a few catches with it. The strings are in an array and it also uses a delimiter as the concatenate function. But the delimiter for concatenate function might be different between any two strings because we need to provide one delimiter between every two strings using the concatenate function. But in Join in VBA we need to provide delimiter only once. That delimiter is used for every string to join. But this parameter is also optional. So what happens when we do not provide a delimiter to the function? When we do not provide any delimiter to the function it takes “space” as a delimiter by default.
Syntax of Join Function in Excel VBA
Join function has the following syntax in Excel VBA:
Now let us understand the arguments for VBA Join function,
- Source Array: It is an array or set of strings which we want to join together.
- Delimiter: This is the delimiter or the character we use to differentiate between one string to another. A delimiter can be space or a comma or a full stop or any character from our computer.
The output returned by this function is a string.
How to Use Excel VBA Join Function?
We will learn how to use a VBA Join function with a few examples in Excel.
Excel VBA Join – Example #1
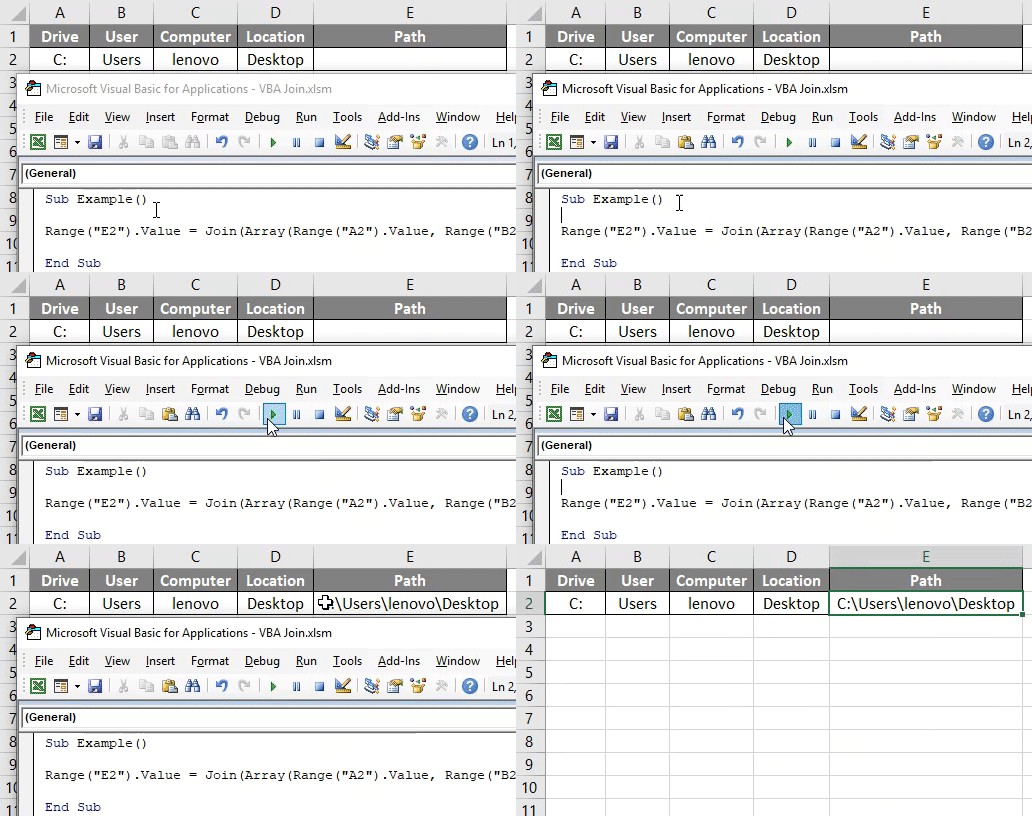
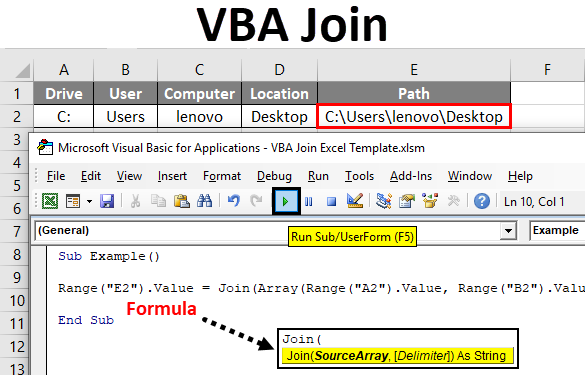
First, let us start with a basic example. We have a path of a file stored in different cells of our worksheet in sheet 1. We want a total path to that location in another cell. The path which needs to be joined together is as follows,
We want the path in cell E2. Follow the below steps to use Join Function in Excel VBA.
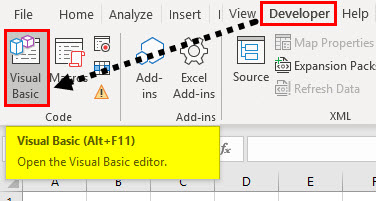
Step 1: Go to the developer’s tab and then click on visual basic to be able to get into VB Editor.
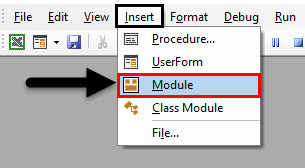
Step 2: Click on insert tab and insert a module in the VBA project.
Step 3: Now let us declare our first subprocedure as follows.
Code:
Sub Example()

End Sub
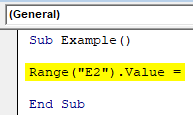
Step 4: Since we have the data with us we can simply use the range property value to join the path as follows.
Code:
Sub Example()

Range("E2").Value =

End Sub
Step 5: Use the Join function to join all the strings together with delimiter as “\”.
Code:
Sub Example()

Range("E2").Value = Join(Array(Range("A2").Value, Range("B2").Value, Range("C2").Value, Range("D2").Value),
"\")

End Sub
Step 6: Run the above code by pressing the F5 key or by clicking on the Play run button and we will have our result in cell E2 as shown below.
We can see that all the four strings are joined together with a common delimiter which is “\”.
Excel VBA Join – Example #2
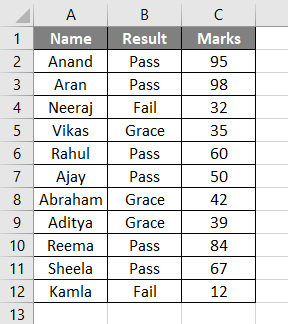
Let us move ahead with a practical example. I have Student’s Name, Marks and Pass or Fail in one sheet. We want to make a separate folder with files containing whether the student has passed or failed or has been graced. For this, we will borrow some of the concepts of FSO (File System Objects) using the join function. Well, the data looks like one as below.
Follow the below steps to use Join Function in Excel VBA.
Step 1: In the same module let us start another subprocedure as follows.
Code:
Sub Example2()

End Sub
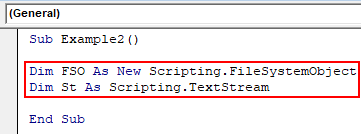
Step 2: Declare two variables as FSO and textstream which is a method of FSO as follows.
Code:
Dim FSO As New Scripting.FileSystemObject
Dim St As Scripting.TextStream
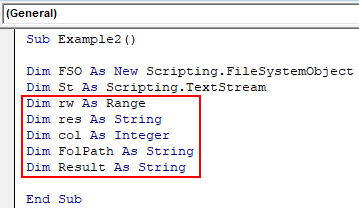
Step 3: Now let us declare some more variables, One as a range to hold the rows and another as integer to hold the columns while another as String to store the joined string value and Folder path and one to create the file names.
Code:
Dim rw As Range
Dim res As String
Dim col As Integer
Dim FolPath As String
Dim Result As String
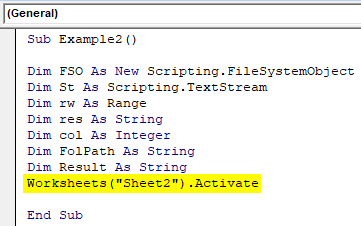
Step 4: Since we have the data in sheet 2, let us activate sheet 2 first.
Code:
Worksheets("Sheet2").Activate
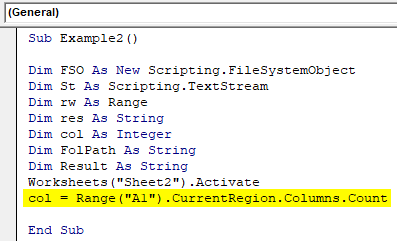
Step 5: Now let us count the number of columns we have in the data as follows,
Code:
col = Range("A1").CurrentRegion.Columns.Count
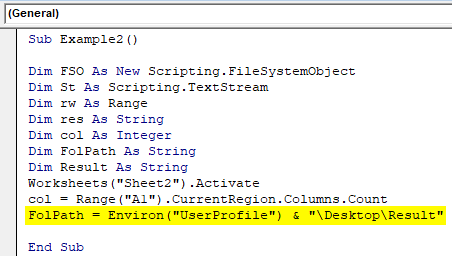
Step 6: Now let us assign a path to the Folpath using the Information function ENVIRON as follows.
Code:
FolPath = Environ("UserProfile") & "\Desktop\Result"
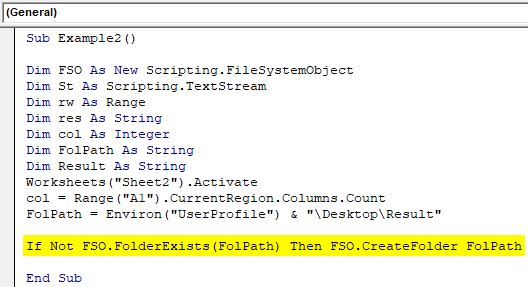
Step 7: Now let us check if the folder exists or not and if it does not then let us create one using the FSO method as follows.
Code:
If Not FSO.FolderExists(FolPath) Then FSO.CreateFolder FolPath
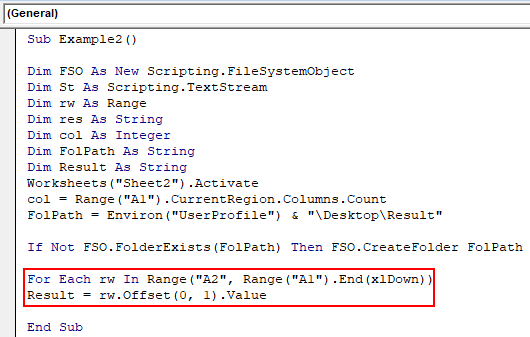
Step 8: Now let us append the names stored using the offset function as follows.
Code:
For Each rw In Range("A2", Range("A1").End(xlDown))
Result = rw.Offset(0, 1).Value
This will open the files with names simultaneously in appending mode where newer values will be the last one to append. We have used the above code so that the value of the result will be assigned one by one.
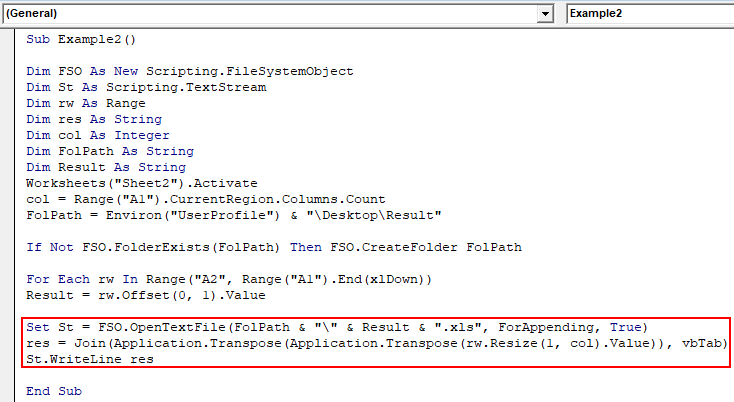
Step 9: Now since Join function uses 1-D array we will use application.transpose function with the join function to convert it in a 1-D array as follows.
Code:
Set St = FSO.OpenTextFile(FolPath & "\" & Result & ".xls", ForAppending, True)
res = Join(Application.Transpose(Application.Transpose(rw.Resize(1, col).Value)), vbTab)
St.WriteLine res
Why we have used application.transpose? Because in general array( 1-D ) range must be horizontal which means one row has many columns. Now since we have a vertical range here in column B which is the result we have used this transpose feature to convert it into a 1-D array. We have used VbTab as a delimiter so that the values are in the next cells.
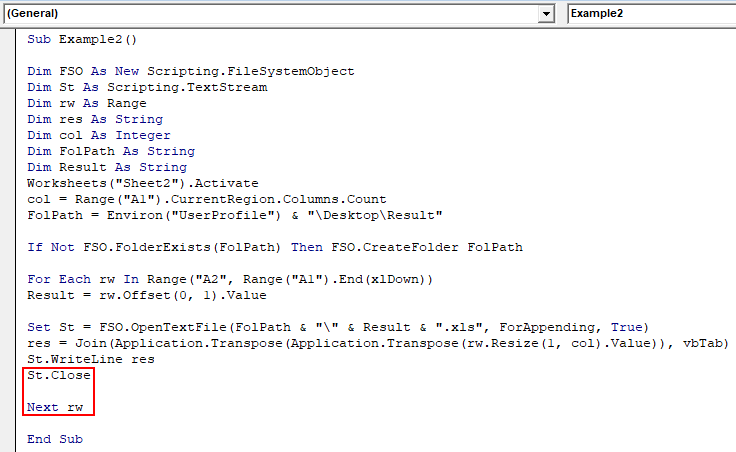
Step 10: Before ending the for loop let us close the file and then end the for a loop as follows.
The overall code looks like the one below.
Code:
Sub Example2()

Dim FSO As New Scripting.FileSystemObject
Dim St As Scripting.TextStream
Dim rw As Range
Dim res As String
Dim col As Integer
Dim FolPath As String
Dim Result As String
Worksheets("Sheet2").Activate
col = Range("A1").CurrentRegion.Columns.Count
FolPath = Environ("UserProfile") & "\Desktop\Result"

If Not FSO.FolderExists(FolPath) Then FSO.CreateFolder FolPath

For Each rw In Range("A2", Range("A1").End(xlDown))
Result = rw.Offset(0, 1).Value

Set St = FSO.OpenTextFile(FolPath & "\" & Result & ".xls", ForAppending, True)
res = Join(Application.Transpose(Application.Transpose(rw.Resize(1, col).Value)), vbTab)
St.WriteLine res
St.Close

Next rw

End Sub
Step 11: Now let us run the above code by pressing the F5 key, we can see on our desktop that a folder has been created with the name of Result as shown below.
Step 12: Open the folder we will have three files as Pass, Fail and Grace.
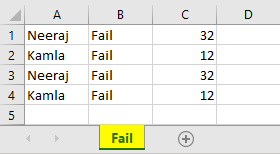
If we open any one of the files, let us just say we open Fail file we can see the data for the students who have been failed.
Things to Remember
- It is used to join a string array with a common delimiter.
- The output returned by this function is String.
- It is opposite to Split function in VBA.
- If we do not provide a delimiter to this function it takes “space” as a delimiter by default.
- The array in the argument should be a one-dimensional array. If not we can use the conventional methods of application.transpose as explained in Example 2.
Recommended Articles
This is a guide to VBA Join Function. Here we discuss how to use Join Function in Excel using VBA Code along with practical examples and downloadable excel template. You can also go through our other suggested articles –

