Introduction to Excel VBA Macros
If you are a frequent Microsoft Excel user, you must have done some routine work, like inserting cells in excel, formatting the cells every time, inserting rows or columns, inserting numbers as per our requirements, etc. These tasks might consume a lot of your time on a day-to-day basis. Is there any way to reduce the time these tasks take every now and then? In short, is there any way to automate these tasks so that you don’t need to work on them every now and then? The answer is a big YES! It is absolutely possible to automate such tasks under Microsoft Excel with the help of Macros.
What is Macro?
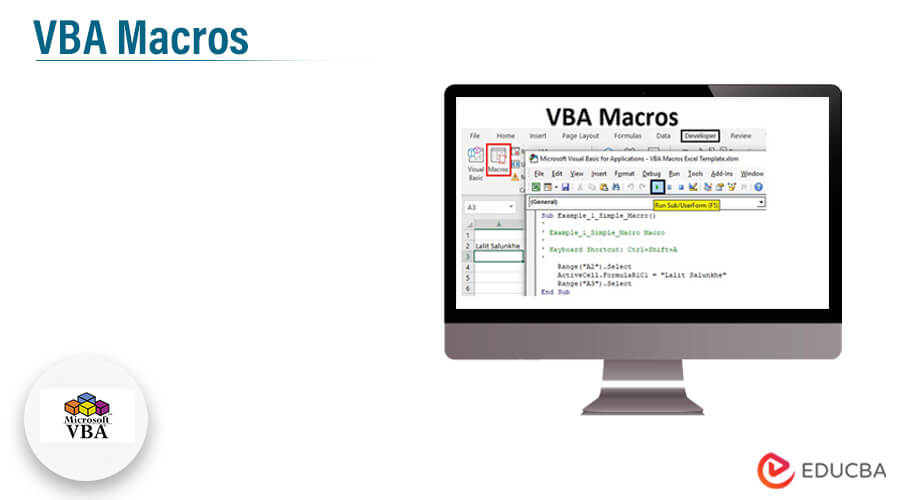
Excel is a tool that has been developed and enhanced by the community so that it can be really very handy as well as simple to use. Macro is a small piece of programming code, the same as we have in traditional programming languages such as C, C++, C#, etc. which can be used in excel to automate some of the tasks. In Excel, we have a separate environment to work on Macros. It is called Visual Basics for Applications. Within this environment, you can write, store as well as run the piece of codes using which you can automate the day-to-day stuff.
How to Enable Developer’s Tab?
Before being able to create, store and run a macro, you need to first enable Developer’s Tab. This tab contains several options associated with Macros such as recording a macro, stop recording a macro, etc. We will see step by step how to enable the developer’s tab in Excel to proceed further with creating a macro.
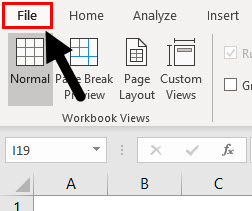
Step 1: Go to the File menu tab in the currently open Excel sheet.
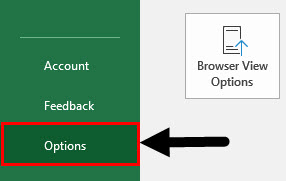
Step 2: In the File menu, click on Options situated at the last of the list of available options under the menu. It opens up a list of all options available under Microsoft Excel.
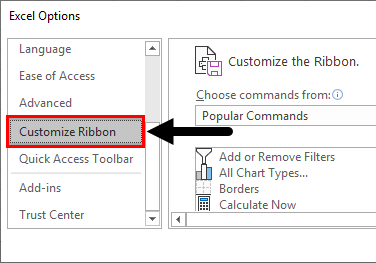
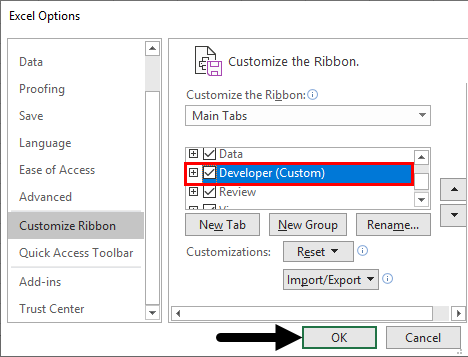
Step 3: In a window opening up named Excel Options, click on Customize Ribbon to access the ribbon customization options.
Step 4: Here in the customization options, you can see the Developer option. Checkmark it, so that it gets activated on the main ribbon of excel and can easily be accessed. Click OK after checking the Developer option.
As soon as you hit OK, you can see the Developer tab active in the Excel ribbon menu with a bunch of different options available under. See the screenshot below.
How to Record a VBA Macro?
Being a VBA automation expert, it all starts with recording a macro.
We will now record a simple macro, a one in which you can input your name and navigate to the next cell all automatically. Pretty exciting, isn’t it? Follow the steps below.
Step 1: Navigate towards the Developer tab in your current working sheet which you just enabled.
You can see the whole bunch of options available under the Developer tab. As similarly as a real-life developer or automation expert has several automating options with him.
Step 2: Choose an option called Record Macro. It allows you to record whatever tasks you do on an active excel sheet and create a macro in the backend for the same so that you can automate the stuff.
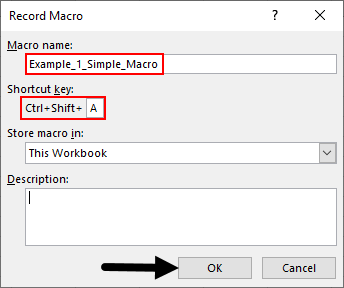
Step 3: As soon as you click on the Record Macro button, you’ll be able to see a pop-up window where you can name the macro, can add a shortcut for it and can add a description for the same as well. I will change the name of the macro and add a shortcut for it. Hit OK after all the amendments.
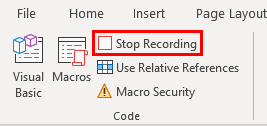
After you hit OK, your system starts to record the macro. Means, whatever tasks you are going to do in the excel sheet are being stored as a macro. You can see the Record Macro button has changed to Stop Recording. It means that the macro has started to record.
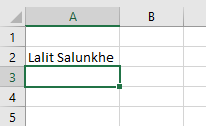
Step 4: I will enter my name in cell A2 of the Excel sheet and hit the Enter button. After that, cell A3 will automatically be selected or we can say the editor moves towards cell A3. This is the task which we are automating. Click on the Stop Recording button after all these editions.
Congratulations, our macro is created.
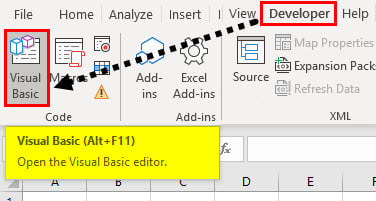
Step 5: Under the Developer tab click on the Visual Basic option to see the code we have created.
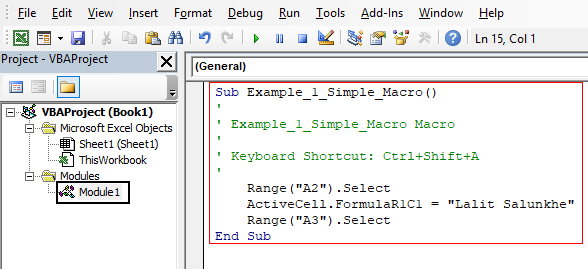
You can see the code under the Module section in Visual Basic Editor pane.
Now we will check whether the macro we have created is working fine or not.
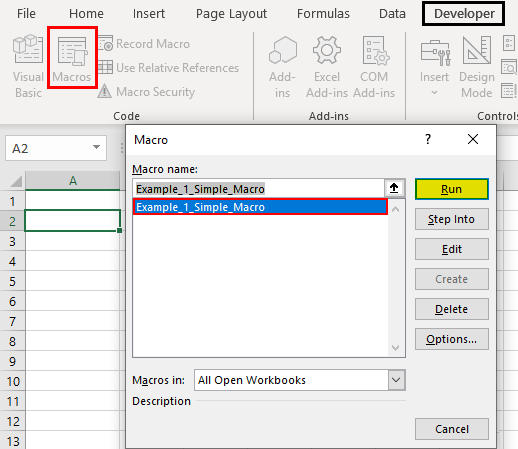
Step 6: Delete the data from cell A2. Click on the Macros button under Developer tab and run the macro.
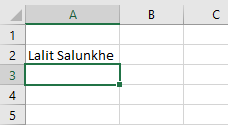
You can see that the name “Lalit Salunkhe” is inputted in cell A2 and cell A3 is selected next.
This is how we can record a macro in excel. Don’t forget to save this file as a Macro enabled file so that all the macro’s get stored in the VBE.
Creating Squared Numbers using Macro
Follow the below steps to create squared numbers using macros in Excel VBA.
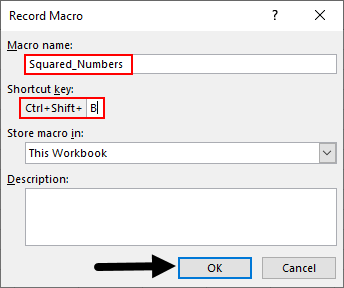
Step 1: Start Recording a macro. I gave a name to this macro as Squared_Numbers and used Ctrl + Shift + B as a shortcut for this macro. Click the OK button and the macro will start recording.
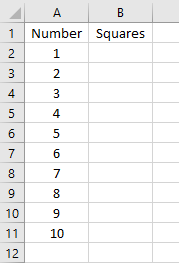
Step 2: Now, in column A, input the numbers from 1 to 10 across the cells A2:A11. These are the numbers for which we would like to have squares in column B.
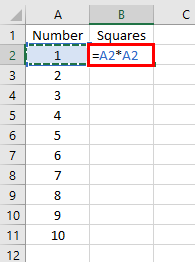
Step 3: In cell B2, use the asterisk to multiply cell A2 by itself and hence creating a formula same as of squaring a number.
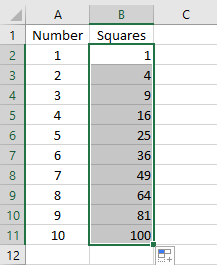
Step 4: Drag the fields down until B11.
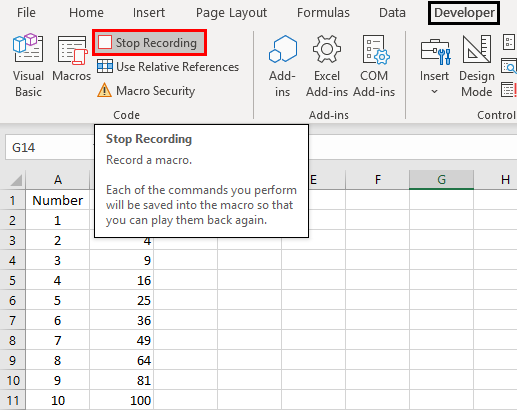
Step 5: Click on the Stop Recording button to stop the recording.
Now, in order to test whether the code is working fine or not, delete all the data across columns A and B.
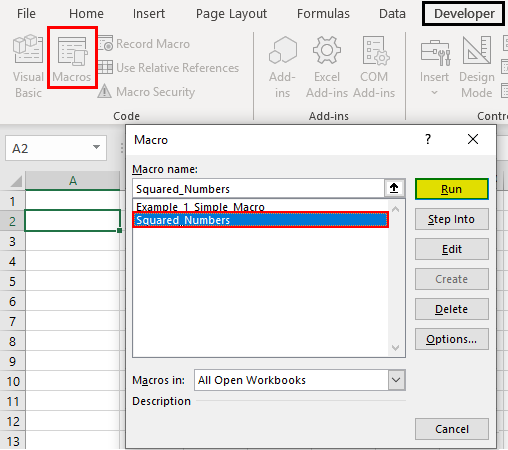
Step 6: Click on the Macros button and run the macro named Squared_Numbers.
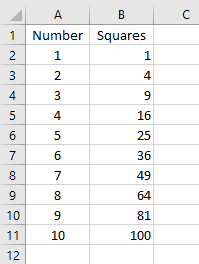
You can see the Numbers and Squares columns will get created respectively along with their column headers.
This is how we can record and use a macro.
Things to Remember About VBA Macros
- Always make sure you save the file as an Excel Macro-Enabled sheet so that the macro gets recorded in and can be used.
- It is always a good practice to record a macro as it can be used for further automation irrespective of the workbooks.
Recommended Articles
This is a guide to VBA Macros. Here we discuss how to record macros in Excel and how to create a squared number using macros along with practical examples and downloadable excel template. You may also look at the following articles to learn more –
