Excel VBA OFFSET Function
As there are two things in this word, one is VBA and other is OFFSET. In this, I’ll be explaining how to use OFFSET function using VBA (Visual Basic for Applications).
VBA – It is a programming language for those who work in Excel and other Office programs, so one can automate tasks in Excel by writing Macros.
OFFSET – It is a reference function in Excel. The OFFSET function returns a reference to a range that is a specific number of rows and columns from another range or cell. It is one of the most important notions in Excel.
Let’s consider we have a dataset which consists of columns Customer Name, Product, sales, Quantity, Discount.
Suppose on the chance that we need to move down from a particular cell to the particular number of rows and to choose that cell at that point of time OFFSET function is very useful. For example, from cell B1 we want to move down 5 cells and want to select 5th cell i.e. B6. Suppose, if you want to move down from B1 cell 2 rows and goes 2 columns to the right and select that cell i.e. cell D3.
To use OFFSET function in VBA, we have to use VBA RANGE object because OFFSET refers cells and from that RANGE object we can use OFFSET function. In Excel, RANGE refers to the range of cells.
Let’s take a look at how OFFSET is used with RANGE.
Range(“A1”).offset(5).select
How to Use the OFFSET Function in Excel VBA?
Below are the different examples to use OFFSET Function in Excel using VBA Code.
VBA OFFSET – Example #1
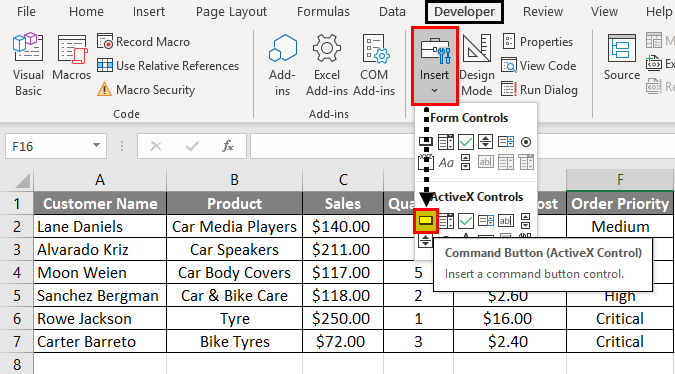
Step 1: Select the Developer Tab. Click on Insert and select the first option from ActiveX Controls. As you can see that Command Button.
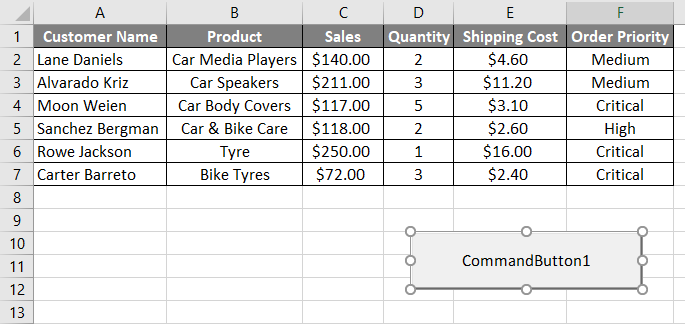
Step 2: Drag the arrow at any cell to create a Command Button.
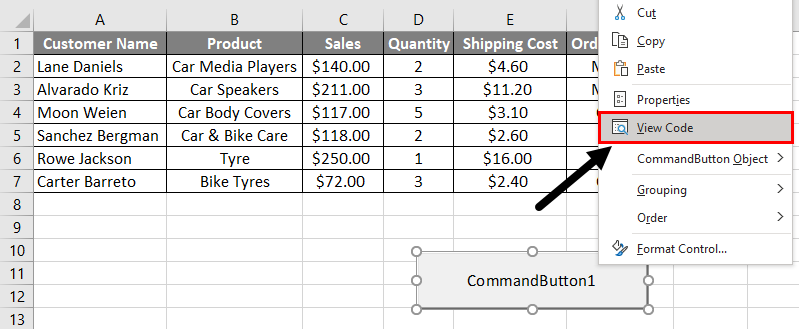
Step 3: To enter the OFFSET function, right-click on the Command Button and click on View Code.
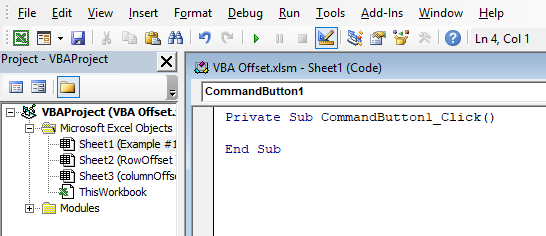
When you click on the View code, Microsoft VBA (Visual Basic for Applications) windows appears. In that window, we can see that some function is written.
Code:
Private Sub CommandButton1_Click()

End Sub
Step 4: Inside this function, we have to write our code of OFFSET for selecting cells. As mentioned in the previously we have to use OFFSET function with RANGE in VBA.
Code:
Private Sub CommandButton1_Click()

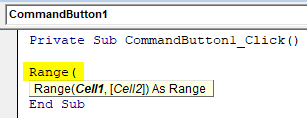
Range(

End Sub
Step 5: In this code, we have to select the 5th cell of column Product i.e. B6. Cell1 in Range is B1 because we have to move down 5 cells from cell B1 to B6 i.e 5 cells down.
Code:
Private Sub CommandButton1_Click()

Range("B1").Offset(

End Sub
OFFSET function has two arguments:
- RowOffset: How many rows we want to move from the selected row. We have to pass the number as an argument.
- ColumnOffset: How many columns we want to move from the selected row.
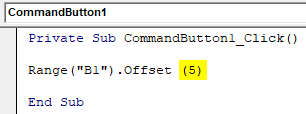
Step 6: Now I want to select cell B6 i.e I have to move down 5 cells. So, we have to enter 5 as the parameter for Row Offset.
Code:
Private Sub CommandButton1_Click()

Range("B1").Offset(5)

End Sub
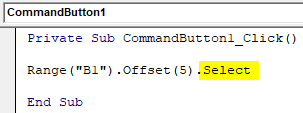
Step 7: After closing the bracket we have to put a (.) dot and write the Select method.
Code:
Private Sub CommandButton1_Click()

Range("B1").Offset(5).Select

End Sub
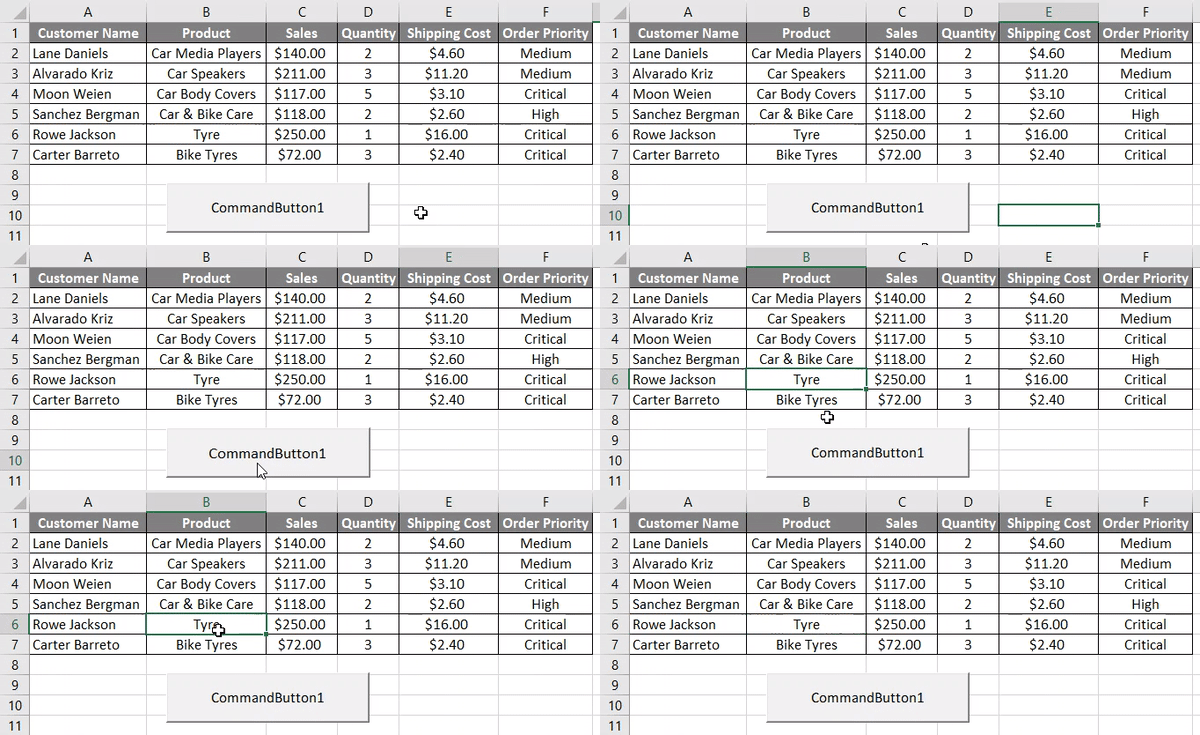
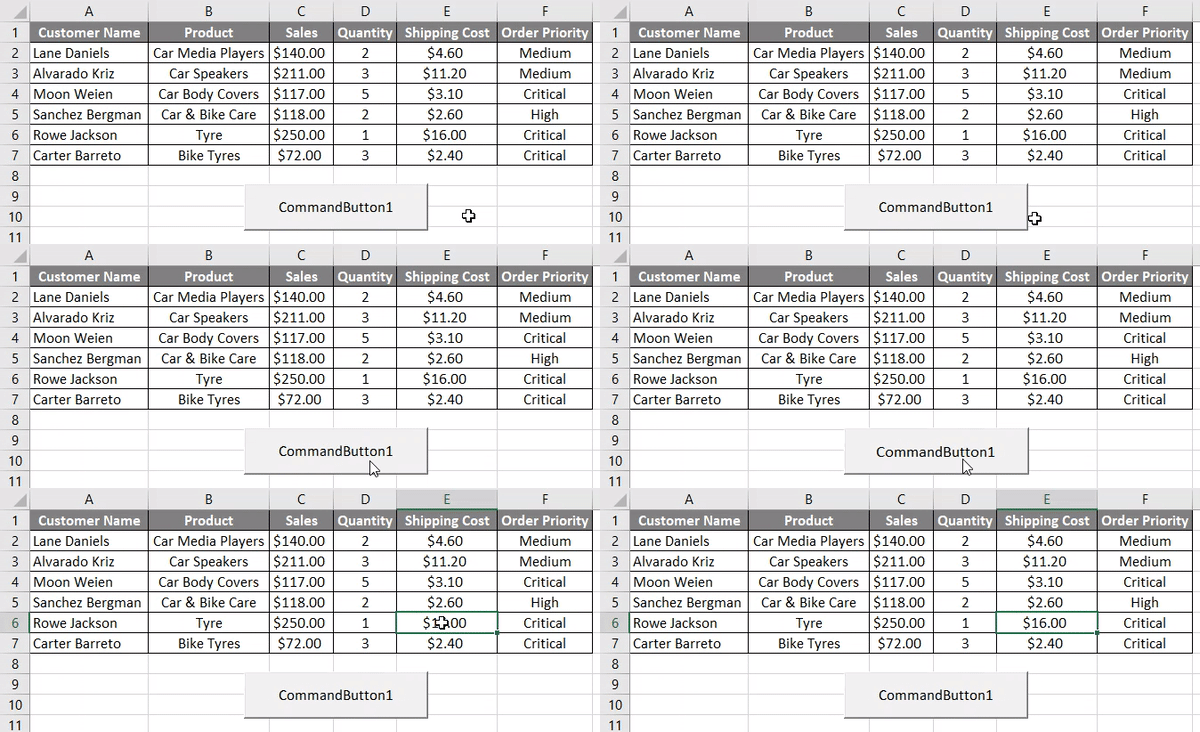
Step 8: To select the cell B6 click on the Command Button.
As we can see that cell B6 gets selected after clicking on the button.
VBA OFFSET – Example #2
In this example, we will see how to use Column OFFSET argument. We will be working on the same data. All the above steps will be the same but we need to make a change in code.
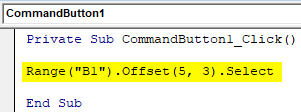
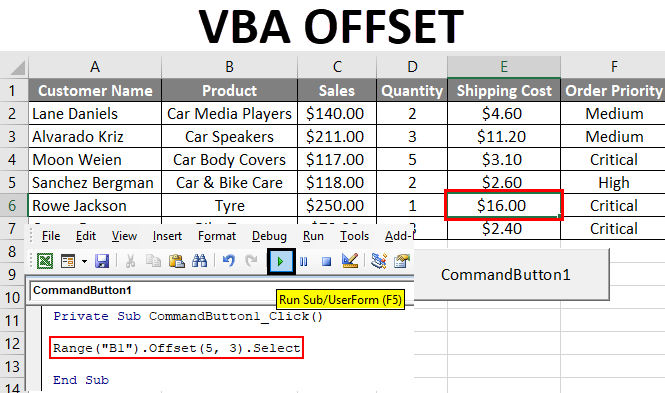
Since I want to move down 5 cells and take the right 3 columns to reach the cell E6.
Code:
Private Sub CommandButton1_Click()

Range("B1").Offset(5, 3).Select

End Sub
To select cell E6 click on the Command Button.
As we can see that cell E6 is selected after clicking on the button.
Things to Remember
- It is a reference function in Excel. The OFFSET function returns a reference to a range that is a specific number of rows and columns from another range or cell.
- VBA OFFSET is used with RANGE object in VBA.
Recommended Articles
This is a guide to VBA OFFSET. Here we discuss how to use OFFSET function in Excel using VBA code along with practical examples and downloadable excel template. You may also look at the following articles to learn more –

