Excel VBA Protect Sheet
Protecting a worksheet is an important task for those who work on Microsoft Excel very frequently. It is a task you need to protect your sheet from being edited by some other user. Suppose you are sending a report to management and then the management knowingly or by mistake changes the parameters or values through the report. It becomes hectic to identify the bug as well as at the same time the rework is something that consumes your time. In order to overcome this issue, it is always a good practice to protect a sheet/s for being edited using a password. This option helps you by not allowing a user to make any changes within the sheet/s. You also can share the password with the person who is intended as well as authorized to make the changes. Though Excel has Protect Worksheet option within it through the Review tab present at the Excel ribbon, it becomes hectic when you have more than one-sheets to protect. It will consume ample of your time protecting each sheet one by one. Instead, it is a good practice to write a VBA code which can protect either single or multiple sheets from your workbook for being edited.
Syntax of VBA Protect Sheet
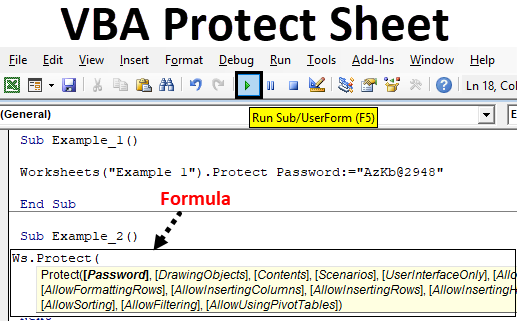
This built-in VBA function associated with Worksheet, allows you to protect the sheet with the help of password. The syntax for VBA Protect Sheet function is as below:
All the parameters are optional in this function which you can guess through the squared brackets mentioned for each of them.
- Password: Specifies password for the sheet. If not provided, sheet will be protected without a password and the user can edit it without being asked for a password.
- DrawingObjects: Optional arguments which allow you to protect different shapes of the worksheet. Takes Boolean values. By default set to FALSE.
- Contents: Optional argument. Protects all objects. By default values is set to TRUE.
- Scenarios: Protects all different scenarios. Default value is set to TRUE.
- UserInterfaceOnly: It protects the user interface but not the macros. The default value is TRUE if the macro is ignored, as well as the user interface will be protected.
- AllowFormattingCells: Default value is set to FALSE due to which user can’t format the cells of the sheet. If set TRUE, the user can format the cells from the sheet.
- AllowInsertingColumns: Default value set to FALSE. If set TRUE, user can insert a column into the sheet.
- AllowInsertingRows: Default value is set to FALSE. If set TRUE, user can insert rows into the sheet.
- AllowInsertingHyperlinks: Default value is set to FALSE. If set TRUE, user can insert hyperlinks in the sheet.
- AllowDeletingColumns: Default value is set to FALSE. If set TRUE, user can delete any column from the sheet.
- AllowDeletingRows: Default value is set to FALSE. If set TRUE, user can delete any number of rows from the sheet.
- AllowSorting: Default value is set to FALSE. If set TRUE, the user can sort the data present in the sheet.
- AllowFiltering: Default value is set to FALSE. If set TRUE, the user can filter the data present in the sheet.
- AllowUsingPivotTables: Default value is set to FALSE. If set TRUE, user can use and modify the pivot tables.
How to Protect Sheet in Excel VBA?
Below are the different examples to protect sheet in Excel using VBA Protect.
VBA Protect Sheet – Example #1
Suppose we have a sheet named as “Example 1” in a workbook named “VBA Protect Sheet”. We want this sheet to be protected with a password. For this, follow the below steps:
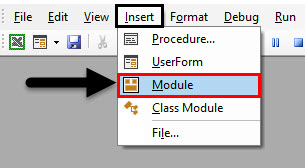
Step 1: Insert a new module in Visual Basic Editor (VBE). Click on Insert > select Module.
Step 2: Define a new sub-procedure within the module.
Code:
Sub Example_1()

End Sub
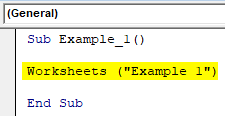
Step 3: Now we have to use the Protect function which can be applied on an object called Worksheet. Start the code with Worksheets object and type the name of a worksheet within parentheses which you want to be protected.
Code:
Sub Example_1()

Worksheets("Example 1")

End Sub
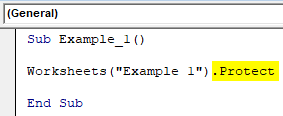
Step 4: Now, put a dot after the closing parentheses and use Protect keyword which initiates the process of protecting the sheet named “Example 1”.
Code:
Sub Example_1()

Worksheets("Example 1").Protect

End Sub
You can stop here while protecting a sheet. As all the arguments are optional, your sheet still will be protected but will not ask the user to input the password before editing and will be same as an unprotected sheet. You surely would not want it this way. Therefore add a strong password to protect this sheet in the next step.
Step 5: Enter Password keyword and use a strong password to protect this sheet.
Code:
Sub Example_1()

Worksheets("Example 1").Protect Password:="AzKb@2948"

End Sub
We will only use the first argument of the function which is called as Password and for rest all arguments we will go with the default values.
Step 6: This is it, you can run this code by hitting F5 or Run button and can see that the file is now protected and will ask user the password as soon as he/she tries to edit any of the cells.
This is how we protect a sheet using VBA Protect function.
VBA Protect Sheet – Example #2
Now, we want to protect all the sheets present in a workbook. For this, follow the below steps:
Step 1: Define a sub-procedure in the module.
Code:
Sub Example_2()

End Sub
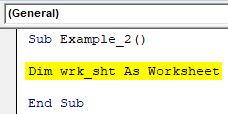
Step 2: Define a new variable as worksheet using Dim.
Code:
Sub Example_2()

Dim wrk_sht As Worksheet

End Sub
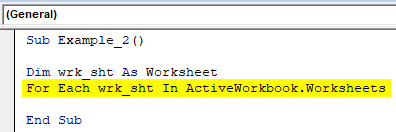
Step 3: Start a For loop. This loop should run until the last Worksheet of Active Workbook.
Code:
Sub Example_2()

Dim wrk_sht As Worksheet
For Each wrk_sht In ActiveWorkbook.Worksheets

End Sub
This line of code selects each worksheet of the active workbook and stores it under variable wrk_sht for each iteration of the loop. Loop ends as soon as the last sheet of the workbook is selected and stored in the variable wrk_sht. We need to define an operation for this loop. It surely will be protecting the sheet using a password.
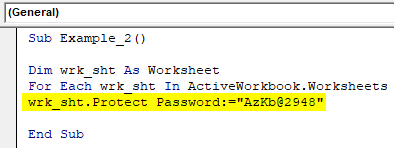
Step 4: Now, use Protect function to protect the sheets getting stored under wrk_sht variable for every iteration of For loop.
Code:
Sub Example_2()

Dim wrk_sht As Worksheet
For Each wrk_sht In ActiveWorkbook.Worksheets
wrk_sht.Protect Password:="AzKb@2948"

End Sub
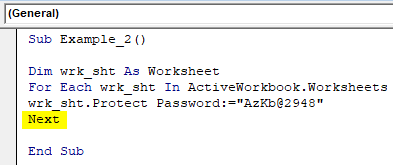
Step 5: Use the Next statement, it allows the loop to run till each worksheet gets protected.
Code:
Sub Example_2()

Dim wrk_sht As Worksheet
For Each wrk_sht In ActiveWorkbook.Worksheets
wrk_sht.Protect Password:="AzKb@2948"
Next

End Sub
If you run this code, each worksheet of the active workbook will be protected by password and you need to input it every time you want to edit the sheets.
Things to Remember
- It is recommended to use a password while you protect a sheet. Otherwise, the user will not be prompted to input a password and can directly edit the file though you have protected it.
- It is recommended to remember the password. Otherwise forgetting of the same will never ever allow you to edit the file. You may have to go through the various methods if you lose the password and those methods are beyond the scope of this article.
Recommended Articles
This is a guide to VBA Protect Sheet. Here we discuss how to protect or lock sheets using VBA Protect function in Excel along with practical examples and downloadable excel template. You can also go through our other suggested articles –

