Excel VBA Save As
If you are a frequent user of Microsoft Excel, you must have used Save As function under it, which allows you to save the currently opened workbook with a different name or different format (Excel Macro-enabled, CSV, PDF, etc.). You can also save the file in a different folder using this method. However, is it possible to use the same function under VBA? The answer is an absolute Yes! We are having Save As function under VBA as well which helps us to do all these above-mentioned tasks along with some additional benefits (obviously automating things is one of the benefits). In this article, we are going to have a look into different examples for VBA SAVE AS function.
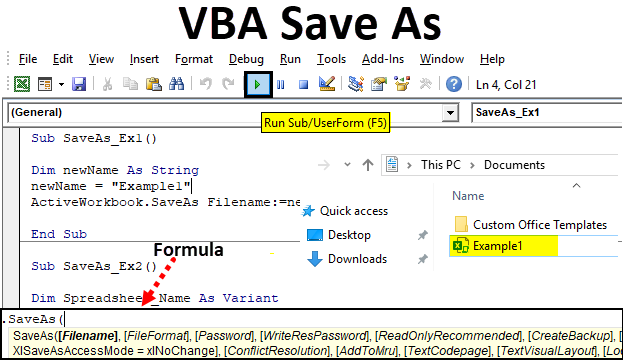
Formula for Save As function in Excel VBA
Let us look below the formula for Save As function in VBA.
Where,
- FileName – Name of the workbook to be saved.
- FileFormat – File format in which the file needs to be saved (Ex. Pdf, CSV, etc.)
- Password – Password to protect the workbook (The workbook can’t be accessible without a password)
- WriteResPassword – Write reservation password for the workbook.
- ReadOnlyRecommended – Recognizes whether the workbook is saved in Read-Only format or not.
- CreateBackup – Determines whether a backup file for the workbook is created or not.
- AccessMode – Recognizes the access mode for the workbook.
- ConflictResolution – Recognizes the conflicts that pop-up when the workbook is shared and is used by more than one user.
- AddToMru – Checks if the workbook is added under recently used file or not.
- Local – Checks if the workbook is saved with the laws of Excel (local language) or with VBA laws (US – English).
Hush! Lots of arguments right? But what if I tell you, all these arguments are optional and can be skipped while using VBA SAVE AS function. However, it is true that these are the arguments that make VBA SaveAs more flexible function to use. “Expression” at the start of the syntax is nothing but an expression against which this function can be used. Like Workbook is the expression against which SaveAs can be used.
Examples to Save Excel File using VBA Save As Function
Below are the different examples to save excel file using VBA Save As function.
Example #1 – How to Save a Copy of the Workbook with a Different Name?
Let’s see how we can save the current workbook with a different name.
Follow the below steps to use Save As Function in Excel VBA:
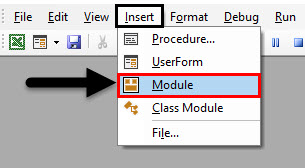
Step 1: Add a new module under Visual Basic Editor (VBE). Go to Insert and then select Module.
Step 2: Define a new sub-procedure which can store a macro.
Code:
Sub SaveAs_Ex1()

End Sub
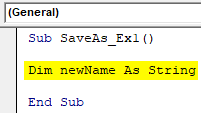
Step 3: Define a new variable which can hold the name by which the file to be saved as.
Code:
Sub SaveAs_Ex1()

Dim newName As String

End Sub
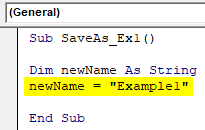
Step 4: Now use the assignment operator to assign a name to this variable using which current file can be saved as.
Code:
Sub SaveAs_Ex1()

Dim newName As String
newName = "Example1"

End Sub
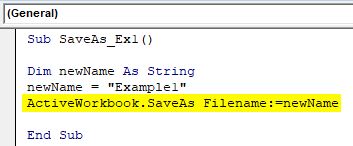
Step 5: Now, use SaveAs function with FileName argument in order to save the file as with name “Example1”.
Code:
Sub SaveAs_Ex1()

Dim newName As String
newName = "Example1"
ActiveWorkbook.SaveAs Filename:=newName

End Sub
Step 6: This is it, now run this code by hitting F5 or manually using the Run button and see the output.
You can see that a file with the name “Example1” is being saved on Documents.
If you could have noted down, the file is being saved as Macro-Enabled File, because the original file which I have used SaveAs function on is a file with Macro-Enabled. It means that this function in VBA automatically checks the file format of the previous file and saves it in the same format. Also, by default, the file will be saved in Documents under This PC. This default location can be provided explicitly at the time of defining sheet name.
Example #2 – Saving Workbook with User Provided Name
Instead of defining name initially, is it possible to write a code which allows a user to save the worksheet by the name of his choice same as Excel Save As function?
Follow the below steps to use Save As Function in Excel VBA.
Step 1: Define a new sub-procedure under newly inserted module which can store the macro.
Code:
Sub SaveAs_Ex2()

End Sub
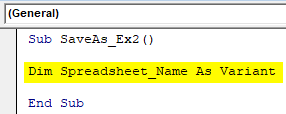
Step 2: Define a new variable which can hold the value of the user-defined name.
Code:
Sub SaveAs_Ex2()

Dim Spreadsheet_Name As Variant

End Sub
The reason for this variable being defined as Variant is, this data type makes Naming conventions versatile. For Example, a user may add some extra special character (which are allowed in naming conventions) or can add dates as well under the file name.
Step 3: Now, with the help of an assignment operator and function combination called application.GetSaveAsFilename, make a statement that allows the system to take a user-defined name. See how it has been achieved in the screenshot below.
Code:
Sub SaveAs_Ex2()

Dim Spreadsheet_Name As Variant
Spreadsheet_Name = Application.GetSaveAsFilename

End Sub
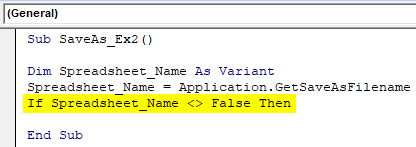
Step 4: Use conditional IF to make sure the name user enters is valid as per the naming conventions.
Code:
Sub SaveAs_Ex2()

Dim Spreadsheet_Name As Variant
Spreadsheet_Name = Application.GetSaveAsFilename
If Spreadsheet_Name <> False Then

End Sub
This condition checks if the name given by the user to save the worksheet is properly satisfying the naming conventions set for naming a file or not.
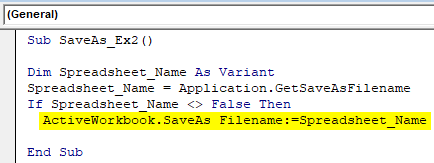
Step 5: Write down a statement which gets evaluated for the given IF condition.
Code:
Sub SaveAs_Ex2()

Dim Spreadsheet_Name As Variant
Spreadsheet_Name = Application.GetSaveAsFilename
If Spreadsheet_Name <> False Then
  ActiveWorkbook.SaveAs Filename:=Spreadsheet_Name

End Sub
This piece of code gets evaluated once the IF condition is true. If so, the active workbook will get saved under the name define in variable Spreadsheet_Name (Which will be user-defined)
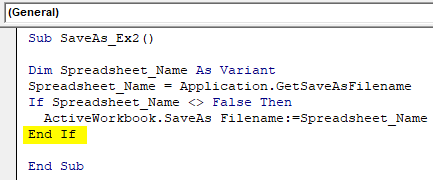
Step 6: End the IF-loop and run this code to see the output.
Code:
Sub SaveAs_Ex2()

Dim Spreadsheet_Name As Variant
Spreadsheet_Name = Application.GetSaveAsFilename
If Spreadsheet_Name <> False Then
  ActiveWorkbook.SaveAs Filename:=Spreadsheet_Name
End If

End Sub
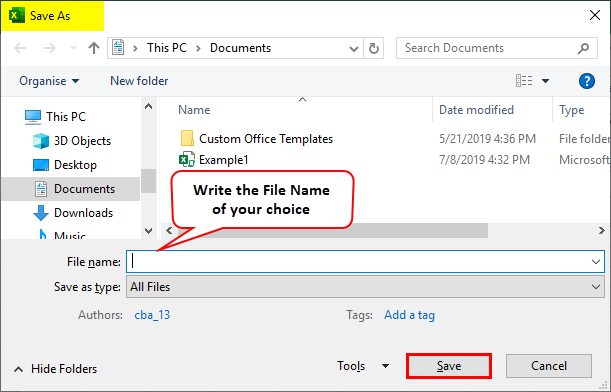
Step 7: As soon as you run this code, you’ll get Save As dialogue box which will allow you to type in the name of your choice and save the file.
Example #3 – How to Save as a File into PDF using Excel VBA SaveAs function?
Suppose you have a data as given below in your excel sheet and you need to convert it into PDF.
Follow the below steps to convert this file into a PDF Using VBA Save As function:
Step 1: Define a new sub-procedure to store a macro.
Code:
Sub SaveAs_PDF_Ex3()

End Sub
Step 2: Now, use the following code to save this file as a PDF file.
Code:
Sub SaveAs_PDF_Ex3()

ActiveSheet.SaveAs Filename:="Vba Save as.pdf"

End Sub
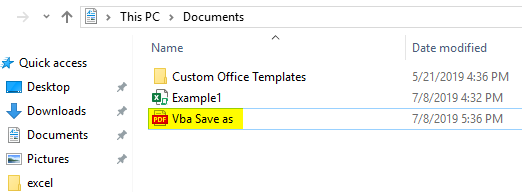
Step 3: Run this code and you’ll see a pdf file generated under This PC > Documents.
In this code, ActiveSheet.SaveAs allows the file to be saved with the same name. As we have added the extension as .pdf at the end of the file, it gets exported into PDF file. You can see the image above for your reference.
Things to Remember
- The by default save location for the file used under VBA SaveAs will be This PC > Documents. However, you can specify the directory manually at the time of defining file name.
- By default, the file saved using VBA SaveAs will be saved under the format same as that of the original file. However, it can also be defined as per user requirement at the time you define the variable.
Recommended Articles
This is a guide to VBA Save As. Here we discuss how to save the file using Excel VBA Save As function along with an example and downloadable excel template. Below are some useful excel articles related to VBA –

