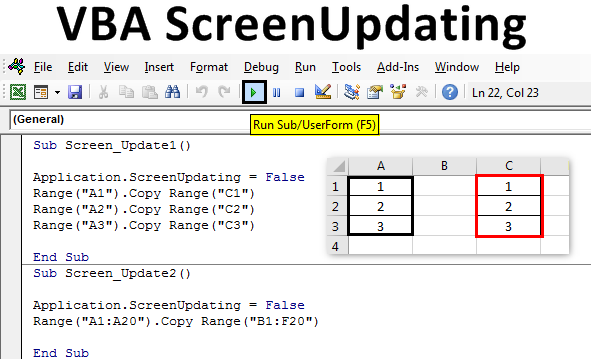
Excel VBA ScreenUpdating
When we run any VBA macro with a huge set of code, the code completes but in the background we get processing data in the form of running or waiting for the pointer. And once it is done, we can only see the output. The regular way is not the proper way to see how the values are updating by running code. For example, let’s say we have written the code to generate some numbers in 100 cells. Now that code could simply generate the output without showing how the numbers are getting printed. To resolve this, we have VBA ScreenUpdating. ScreenUpdating in VBA helps us the see how the code is generating the output. This could be numbers, text, alphabets or combination. Once we run the code loop, by VBA ScreenUpdating we could able to see the numbers getting generated.
How to Use ScreenUpdating Application in Excel VBA?
We will learn how to use the ScreenUpdating application in Excel by using the VBA Code.
VBA ScreenUpdating can be noticed while we run the code or macro. While the code is running, we will be able to see how our screen is getting updated by the values generated by written code in VBA. Instead of seeing the older waiting sign, by the help of VBA ScreenUpdating we can see how the screen is updating the values of output by VBA ScreenUpdating. Now by that, we can also see the name of the article itself defines it work, VBA ScreenUpdating.
VBA ScreenUpdating – Example #1
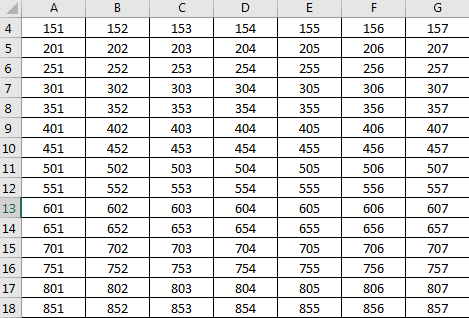
In this example, we will see a simple code for updating the screen. For this, we need some cells with numbers, as shown below. For this, follow the below steps:
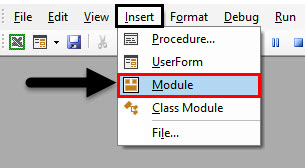
Step 1: Open a Module from the Insert menu tab as shown below.
Step 2: Now write the subprocedure in the name of VBA ScreenUpdating as shown below.
Code:
Sub Screen_Update1()

End Sub
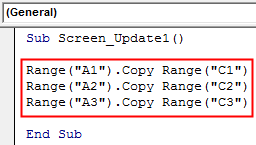
Step 3: We will now copy the numbers from cell A1: A3 to any other cells. Let’s say that cell be C1: C3 with the help of the below code.
Code:
Sub Screen_Update1()

Range("A1").Copy Range("C1")
Range("A2").Copy Range("C2")
Range("A3").Copy Range("C3")

End Sub
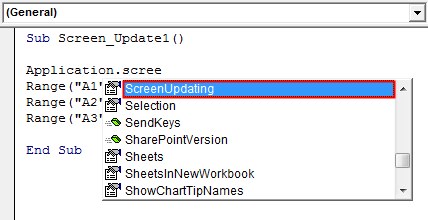
Step 4: Now if we run this code, we could only get the output which is copied values from column A to C. Now we will use ScreenUpdating application as shown below.
Code:
Sub Screen_Update1()

Application.ScreenUpdating
Range("A1").Copy Range("C1")
Range("A2").Copy Range("C2")
Range("A3").Copy Range("C3")

End Sub
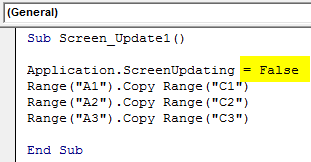
Step 5: We put an equal sign to select the Boolean values which are TRUE or FALSE. We will select FALSE to stop the screenupdating.
Code:
Sub Screen_Update1()

Application.ScreenUpdating = False
Range("A1").Copy Range("C1")
Range("A2").Copy Range("C2")
Range("A3").Copy Range("C3")

End Sub
Step 6: Run the code by pressing the F5 key or by clicking on the Play Button located below the menu ribbon. We will see the values are copied from column A to C.
This could be seen more clearly if we have a huge set of numbers.
VBA ScreenUpdating – Example #2
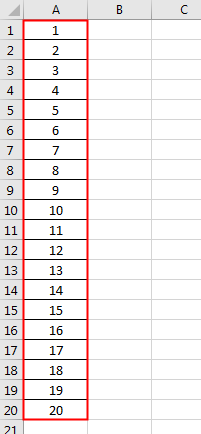
Let’s see another example for ScreenUpdating. This time let’s consider the number from 1 to 20 from cell A1 to A20 as shown below.
For using screenupdating application, follow the below steps:
Step 1: Write the subprocedure of VBA Screenupdating as shown below.
Code:
Sub Screen_Update2()

End Sub
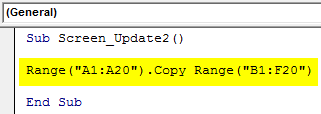
Step 2: Now write the code to select the range cell from A1 to A20 and copy them at B1 to F20 as shown below. In a similar fashion as we saw in example-1.
Code:
Sub Screen_Update2()

Range("A1:A20").Copy Range("B1:F20")

End Sub
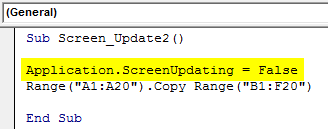
Step 3: To apply the screenupdating application, we will again use a similar line of code which we have seen in example-1.
Code:
Sub Screen_Update2()

Application.ScreenUpdating = False
Range("A1:A20").Copy Range("B1:F20")

End Sub
The above-used application ScreenUpdating as FALSE will allow us to see how the VBA code updates the screen. As we have more numbers so there are chances we can see screenupdating.
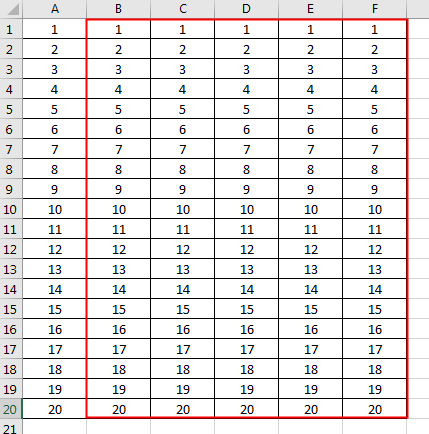
Step 4: Run the code by pressing the F5 key or by clicking on the Play Button. We could see the value getting updated.
VBA ScreenUpdating – Example #3
There is another way to see the screen getting updated. This could be done with the help of the For-Next Loop. In this example, we will print the numbers in a Row and Column combo matrix. For this, follow the below steps:
Step 1: Write the subprocedure of VBA ScreenUpdating.
Code:
Sub Screen_Updating3()

End Sub
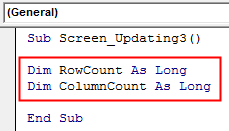
Step 2: Now declare the 2 variables for Row and Columns separately as data type Long.
Code:
Sub Screen_Updating3()

Dim RowCount As Long
Dim ColumnCount As Long

End Sub
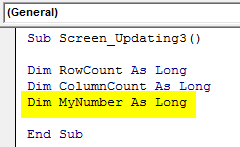
Step 3: Now declare another variable which we will use as a reference to start the numbers.
Code:
Sub Screen_Updating3()

Dim RowCount As Long
Dim ColumnCount As Long
Dim MyNumber As Long

End Sub
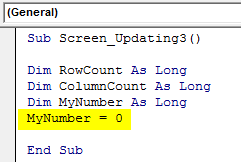
Step 4: Now give the reference number from which position we want to start the counting. Here we are giving it as 0.
Code:
Sub Screen_Updating3()

Dim RowCount As Long
Dim ColumnCount As Long
Dim MyNumber As Long
MyNumber = 0

End Sub
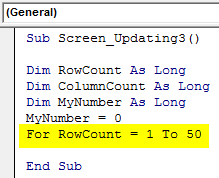
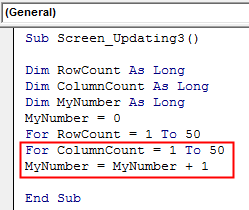
Step 5: Now open a For loop and give the count of the Columns and Rows which want to see updating. Let say from 1 to 50.
Code:
Sub Screen_Updating3()

Dim RowCount As Long
Dim ColumnCount As Long
Dim MyNumber As Long
MyNumber = 0
For RowCount = 1 To 50

End Sub
Step 6: To continue the loop give MyNumber variable +1.
Code:
Sub Screen_Updating3()

Dim RowCount As Long
Dim ColumnCount As Long
Dim MyNumber As Long
MyNumber = 0
For RowCount = 1 To 50
For ColumnCount = 1 To 50
MyNumber = MyNumber + 1

End Sub
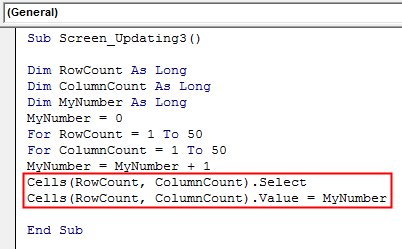
Step 7: Now select the Row and Column variables in Cell function. And then select the values stored in them and assign them to MyNumber variable.
Code:
Sub Screen_Updating3()

Dim RowCount As Long
Dim ColumnCount As Long
Dim MyNumber As Long
MyNumber = 0
For RowCount = 1 To 50
For ColumnCount = 1 To 50
MyNumber = MyNumber + 1
Cells(RowCount, ColumnCount).Select
Cells(RowCount, ColumnCount).Value = MyNumber

End Sub
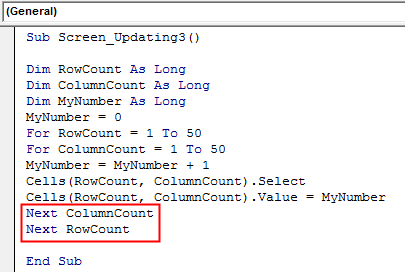
Step 8: Now close the Loop by Next. Include Row and Column variables which we defined and used in the For-Next loop.
Code:
Sub Screen_Updating3()

Dim RowCount As Long
Dim ColumnCount As Long
Dim MyNumber As Long
MyNumber = 0
For RowCount = 1 To 50
For ColumnCount = 1 To 50
MyNumber = MyNumber + 1
Cells(RowCount, ColumnCount).Select
Cells(RowCount, ColumnCount).Value = MyNumber
Next ColumnCount
Next RowCount

End Sub
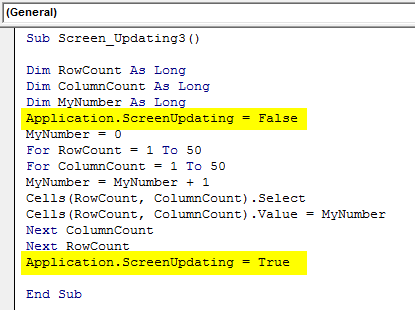
Step 9: Now we haven’t inserted the Screenupdating application yet. Now insert the Screenupdating application as FALSE before the start of the loop and as TRUE at the end of the loop as shown below.
Code:
Sub Screen_Updating3()

Dim RowCount As Long
Dim ColumnCount As Long
Dim MyNumber As Long
Application.ScreenUpdating = False
MyNumber = 0
For RowCount = 1 To 50
For ColumnCount = 1 To 50
MyNumber = MyNumber + 1
Cells(RowCount, ColumnCount).Select
Cells(RowCount, ColumnCount).Value = MyNumber
Next ColumnCount
Next RowCount
Application.ScreenUpdating = True

End Sub
Now compile the complete code step by step by pressing the F8 function key and then run it if no error is found. We will see, how each cell of selected rows and columns is getting updated with the values stored in it.
Pros of Excel VBA ScreenUpdating
- It is quite helpful in seeing how the screen is getting updated with the value stored in the loop.
- We can use Screenupdating if we want to switch between worksheets and workbooks.
- We can use any range of numbers.
Things to Remember
- We use the insert For-Next loop as the frame or first, we can satisfy the condition of For loop and then close it by Next.
- VBA ScreenUpdating is quite useful and visible if we are using a huge set of numbers.
- Once done, do save the excel file as Macro enables excel format.
- VBA ScreenUpdating can also be used for creating a macro through which we can send emails.
Recommended Articles
This is a guide to VBA ScreenUpdating. Here we discuss how to use ScreenUpdating application in Excel VBA along with practical examples and downloadable excel template. You can also go through our other suggested articles –

