Excel VBA UBound Function
How often do you come up with a situation where you need to mention the maximum length or upper bound of an array data working with Excel? Most of the times, right? And how do you find the same? Maybe manually most of the time. However, you can automate it and get the maximum length or upper bound of an array using a VBA function called UBound.
Moreover, it has the most beautiful way to looping through. Like, if you are using a For loop in your array, you definitely wanted to loop all the elements of the array. In that case, it would be a tedious job to find out upper bound manually and mention it in the loop. It will also reduce the generality of the code. Therefore, VBA UBound function comes handy in such scenarios.
UBound stands for upper bound and it gives upper bound or maximum length of the array in Excel VBA.
Formula For UBound Function in Excel VBA
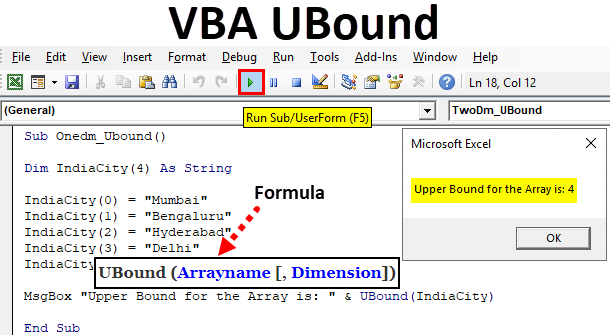
Excel VBA UBound function has the following syntax.
UBound (Arrayname [, Dimension])
Where,
- Arrayname: Name of the array you have defined. This argument is a mandatory/required argument.
- Dimension: Optional argument which specifies the dimension of an array. Whether it’s a one-dimensional, two-dimensional or multi-dimensional array. By default, it will assume the one-dimensional array if not specified.
As this function has only two arguments, it becomes much easier to remember the syntax of this function.
How to Use Excel VBA UBound Function?
We will learn how to use a VBA UBound function with few examples in Excel.
Example #1 – VBA UBound with One-Dimensional Array
Follow the below steps to use UBound function in VBA.
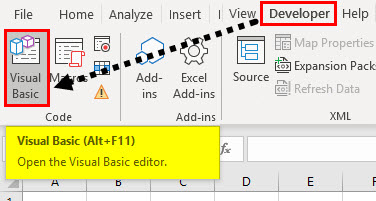
Step 1: In the Developer Tab click on Visual Basic to open the VB Editor.
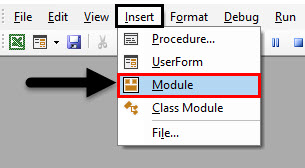
Step 2: Click on Insert and select the Module tab to add a new blank module to VBE.
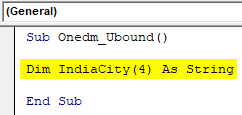
Step 3: In the VBE, start writing the macro and define the variable name.
Code:
Sub Onedm_Ubound()

Dim IndiaCity(4) As String

End Sub
Here variable IndiaCity is defined with 5 elements. The variable type is a string.
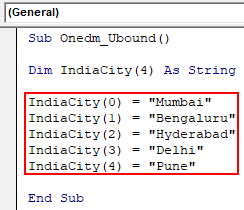
Step 4: Assign values to the array elements.
Code:
Sub Onedm_Ubound()

Dim IndiaCity(4) As String

IndiaCity(0) = "Mumbai"
IndiaCity(1) = "Bengaluru"
IndiaCity(2) = "Hyderabad"
IndiaCity(3) = "Delhi"
IndiaCity(4) = "Pune"

End Sub
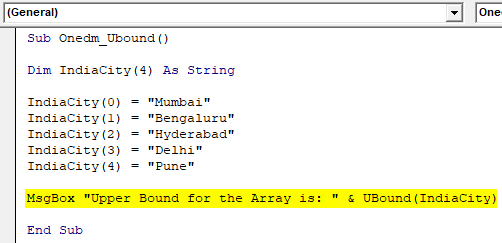
Here, the zeroth element has a value assigned as “Mumbai”, the First element has a value assigned as “Bengaluru” and so on.
Step 5: Use the UBound function along with MsgBox to get the upper bound for the array.
Code:
Sub Onedm_Ubound()

Dim IndiaCity(4) As String

IndiaCity(0) = "Mumbai"
IndiaCity(1) = "Bengaluru"
IndiaCity(2) = "Hyderabad"
IndiaCity(3) = "Delhi"
IndiaCity(4) = "Pune"

MsgBox "Upper Bound for the Array is: " & UBound(IndiaCity)

End Sub
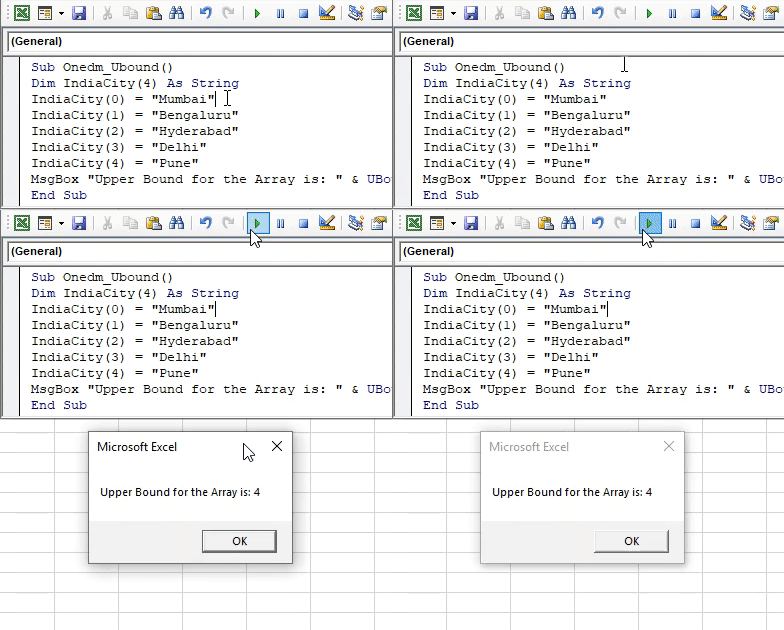
Step 6: Run this code by hitting F5 directly or manually hitting the Run button on the upper left panel. A message box will pop up with the message “Upper Bound for the Array is: 4”.
Please note that UBound function does not find out the upper limit from the elements of Array. It just finds out the maximum number of elements the array holds.
Example #2 – VBA UBound with Two-Dimensional Array
Follow the below steps to use UBound function in VBA.
Step 1: Define a variable which can hold two-dimensional data.
Code:
Sub TwoDm_UBound()

Dim Array_Test(0 To 6, 1 To 8) As String

End Sub
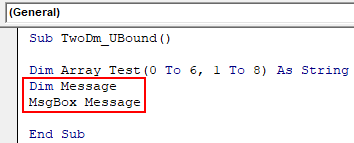
Step 2: Define a new variable Message and use it under MsgBox. This variable will help us printing the upper bounds of both dimensions simultaneously.
Code:
Sub TwoDm_UBound()

Dim Array_Test(0 To 6, 1 To 8) As String
Dim Message
MsgBox Message

End Sub
Step 3: Now, try the following statements which allow the system to print both dimensions of the array under the same message box.
Code:
Sub TwoDm_UBound()

Dim Array_Test(0 To 6, 1 To 8) As String
Dim Message
Message = "Upper bound for first dimension is: " & UBound(Array_Test, 1) & vbCrLf
Message = Message & "Upper bound for second dimension is: " & UBound(Array_Test, 2) & vbCrLf
MsgBox Message

End Sub
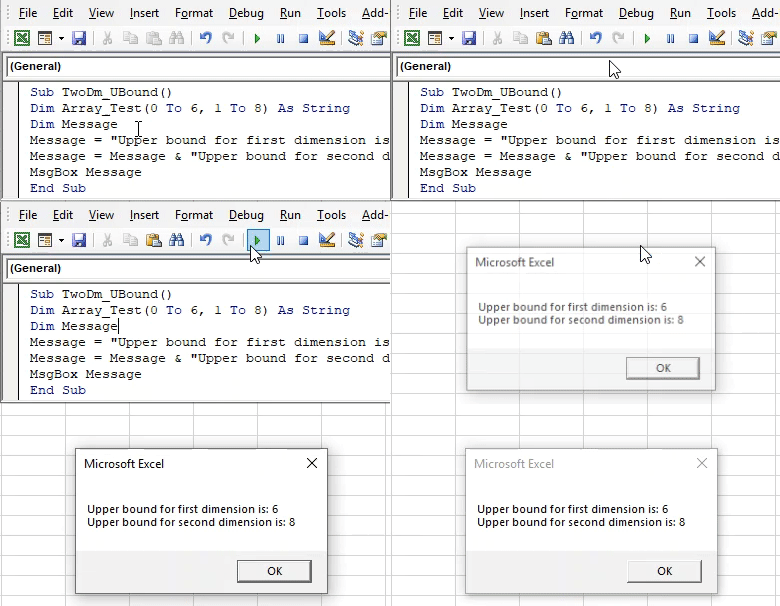
The two statements mentioned in the above code allow the system to print both dimensions in the same message box. The first statement stores the value of the upper bound for the first dimension in variable Message and ends the line (vbCrLf). The second statement adds the first value assigned to variable Message and combines it with the upper bound of second dimensions with a pop-up message.
As the vbCrLf is used in both statements, it works as newline/carriage return here in both statements.
Step 4: Run the code by hitting F5 or Run button and see the output.
On similar lines, we can go until multiple dimensions and see the upper bound for each of them.
Example #3 – UBound Function to Update the Data in Sheet Automatically
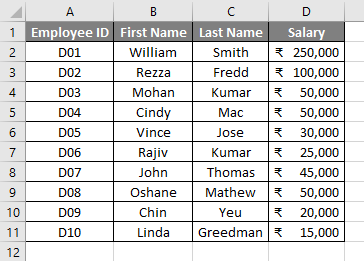
Suppose you have a data set as shown in below screenshot.
This data gets updated and you need to copy the updated data every now and then. Now, it’s really a tedious job to always check for the data updates and then copy it to the new sheet. It consumes a lot of time as well. Can we try automating it using UBound function in VBA? Let’s see.
Follow the below steps to update the data in sheet automatically using VBA UBound function:
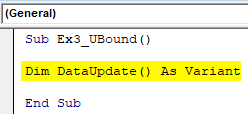
Step 1: Define a variable by creating a macro.
Code:
Sub Ex3_UBound()

Dim DataUpdate() As Variant

End Sub
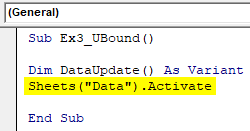
Step 2: Activate the worksheet which contains your data. In this case, the sheet name is “Data”.
Code:
Sub Ex3_UBound()

Dim DataUpdate() As Variant
Sheets("Data").Activate

End Sub
Step 3: Assign the range to the variable we just created. We will use activated sheets range for this purpose.
Code:
Sub Ex3_UBound()

Dim DataUpdate() As Variant
Sheets("Data").Activate
DataUpdate = Range("A2", Range("A1").End(xlDown).End(xlToRight))

End Sub
Step 4: Add a new worksheet to your Excel, where the updated data can be copied and pasted.
Code:
Sub Ex3_UBound()

Dim DataUpdate() As Variant
Sheets("Data").Activate
DataUpdate = Range("A2", Range("A1").End(xlDown).End(xlToRight))
Worksheets.Add

End Sub
Step 5: Now, use the below code line that allows the data from the “Data” sheet to be copied and pasted in a newly created excel sheet automatically.
Code:
Sub Ex3_UBound()

Dim DataUpdate() As Variant
Sheets("Data").Activate
DataUpdate = Range("A2", Range("A1").End(xlDown).End(xlToRight))
Worksheets.Add
Range(ActiveCell, ActiveCell.Offset(UBound(DataUpdate, 1) - 1, UBound(DataUpdate, 2) - 1)) = DataUpdate

End Sub
The above code will offset the cells from “Data” sheet up-to upper bound which can be obtained by UBound function used and assigns the range to the variable DataUpdate.
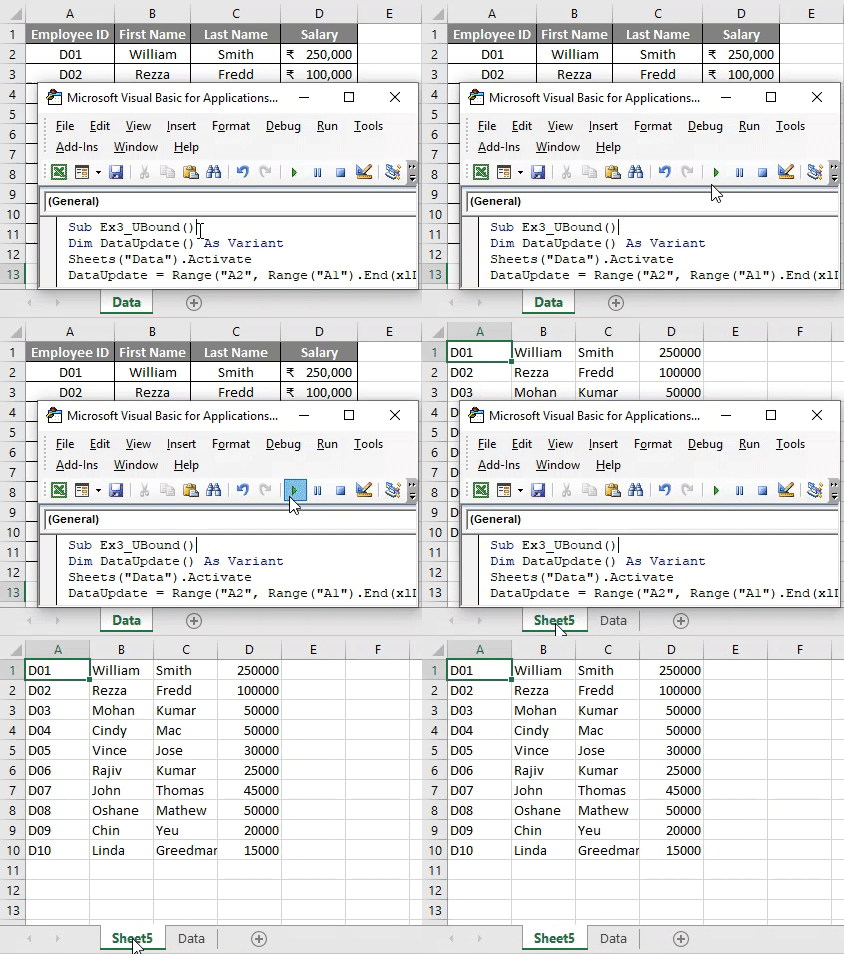
Step 6: Run the code by hitting F5 or Run button and see the output.
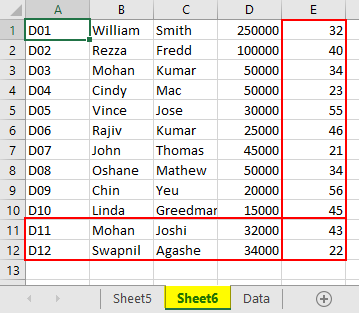
As you can see, there is a new sheet added in the Excel Workbook where all the data from the “Data” sheet gets copied automatically.
This is a dynamic code. What I mean saying it dynamic is, though I add column-wise and row-wise, it will automatically be copied to a new sheet.
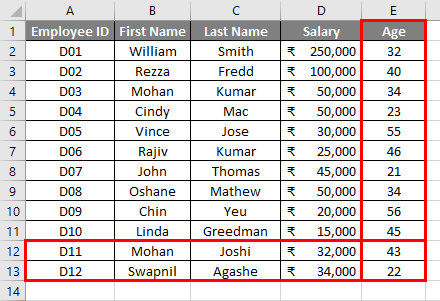
Step 7: Let’s add some rows and columns to the data and see if it actually works.
Step 8: Hit the Run button again after the data-sheet is updated and see the magic.
If you can see, a new sheet is added (colored) and a new column of Age along with two new rows is added as well in that sheet. It means, whatever we update in the master file (Data), this code will automatically copy everything from that and paste it in a new sheet.
Things to Remember
- UBound gives the upper bound/maximum length of an array and not the upper bound from the data points present in an array.
- The array always starts from the 0th position as parallel to most programming languages like C, C++, Python.
- If your array is multidimensional, you have to specify the dimension argument as well which takes numeric whole values like 1, 2, 3, etc. 1 stands for One-Dimension, 2 for Two-Dimensional and so on.
Recommended Articles
This is a guide to VBA UBound Function. Here we discuss how to use Excel VBA UBound Function along with some practical examples and downloadable excel template. You can also go through our other suggested articles –
