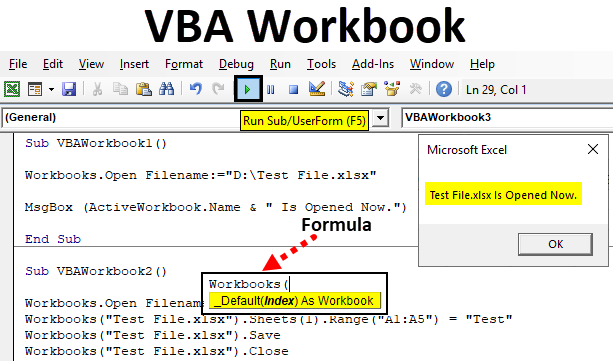
Excel VBA Workbook
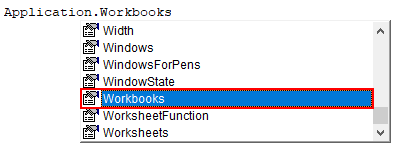
Excel file is called a Workbook, and every workbook has sheets or pages, which are called as Worksheets. Worksheets are the area where we write and create a data table. And Workbook contains N numbers of such Worksheets which can have different data. In VBA, we can use the Workbook function without even doing anything in the excel workbook. We can access these functions available in Excel into VBA with the command line “Application.Workbooks”.
Using equal sign (“=”) in excel activates all the insert functions in excel. And using “WorksheetFunction with a dot (.)” activates and allows the excel functions to use in as shown below.
How to Use Workbook Object in Excel VBA?
Below are the different examples to use workbook Object in Excel VBA.
VBA Workbook – Example #1
In this example, we will see how to open a workbook with the help of the VBA Workbook object.
For this, follow the below steps:
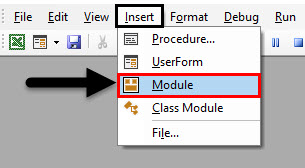
Step 1: Go to the VBA window and open a new module with the help of the list Insert Menu list as shown below.
By clicking on the Module option in the Insert menu, we will get a Module where we will write the code.
Step 2: Now start writing the Subcategory of function VBA Workbook in any name you want or, better keep the function name in the same name as it is being performed as shown below.
Code:
Sub VBAWorkbook1()

End Sub
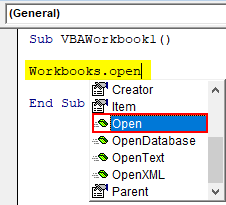
Step 3: Now, use the WorkBooks function in the code. This will allow any workbook to be used in. And to open it, use the Open command after putting a dot (.) as shown below.
The Open function itself has so many options and ways to open any workbook, as shown in the below syntax.
Now to open any workbook, we need the location of that file. Here we have already saved an excel workbook in the name of “Test File” somewhere in a local drive that is accessible.
Step 4: As per syntax, which is shown above, we need Filename as String which means Characters. So we have copied and pasted a location in below in inverted commas. This is where we can put any location or file address where we have kept it.
Code:
Sub VBAWorkbook1()

Workbooks.Open Filename:="D:\Test File.xlsx"

End Sub
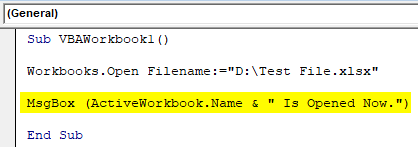
Step 5: Now, we want to show the name of the file which is opened with the help of Workbook.Open command. We will use MsgBox with ActiveWorkbook.Name. This we show the name of workbook name which is opened and active now.
Code:
Sub VBAWorkbook1()

Workbooks.Open Filename:="D:\Test File.xlsx"

MsgBox (ActiveWorkbook.Name & " Is Opened Now.")

End Sub
Step 6: Now compile the complete code step by step, then run it by clicking on the Play button.
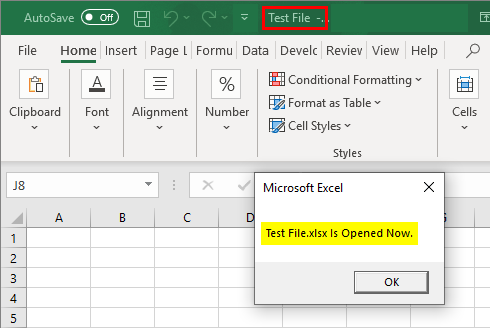
We will see the file named as “Test File” is now open, and we got a pop-up message saying that “Test File Is Opened Now”.
VBA Workbook – Example #2
This is another example where we will see how to use the VBA WorkBook object to use it for any excel workbook. For this, follow the below steps:
Step 1: Start writing Subcategory in any name or, for best practice, should in the name of the performed function.
Code:
Sub VBAWorkbook2()

End Sub
Step 2: Follow the procedure that we have seen in example-1 to open a saved “Test File” file in any location. It is always recommended to save the file which is accessible. In this command, we open the file from the mentioned address.
Code:
Sub VBAWorkbook2()

Workbooks.Open Filename:="D:\Test File.xlsx"

End Sub
Step 3: Now, we will use the file name along with the Workbook function and make or add some text to it. For this, we are selecting the sheet where we want to insert the text by using the Sheet(1) command. Number 1 inside the bracket is used for a sequence of the sheet, not for the name of the sheet and selecting the Range from cell A1 to A5 as shown below.
Code:
Sub VBAWorkbook2()

Workbooks.Open Filename:="D:\Test File.xlsx"
Workbooks("Test File.xlsx").Sheets(1).Range("A1:A5") = "Test"

End Sub
Step 4: Now, use the same format of selecting the workbook. We used “Test File”, so we are using it here followed by a dot(.) and save. This will save the file.
Code:
Sub VBAWorkbook2()

Workbooks.Open Filename:="D:\Test File.xlsx"
Workbooks("Test File.xlsx").Sheets(1).Range("A1:A5") = "Test"
Workbooks("Test File.xlsx").Save

End Sub
Step 5: Now, we use the Workbooks function with its name followed by a dot(.) and Close to close the selected workbook as shown below.
Code:
Sub VBAWorkbook2()

Workbooks.Open Filename:="D:\Test File.xlsx"
Workbooks("Test File.xlsx").Sheets(1).Range("A1:A5") = "Test"
Workbooks("Test File.xlsx").Save
Workbooks("Test File.xlsx").Close

End Sub
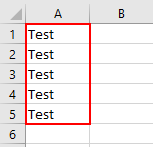
Step 6: Now, compile the code and run it. We see the text which we used in code “Test” is now copied in all the range cell A1 to A5.
And we will get a warning message, as shown below.
Click on the Ok button, which will save the file and close it.
VBA Workbook – Example #3
Let’s see another example where we will use the VBA Workbook object. In this example, we will see how to protect a Workbook with the help of a password. This is quite useful when we have important data in a sheet or workbook, and we need to protect it as well whenever we run the complete code. So, protecting the workbook after work becomes a needy job to avoid losing data.
For this, follow the below steps:
Step 1: In a module, start writing Subcategory in the name of the function being used, as shown below.
Code:
Sub VBAWorkbook3()

End Sub
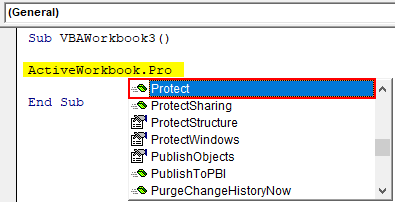
Step 2: Now, use the ActiveWorkbook command to select currently opened Workbook followed by a dot (.) and search and select Protect command from the list as shown below.
Step 3: After selecting Protect command, we will see the syntax to be used for allowing the protecting in the workbook, as shown below.
Code:
Sub VBAWorkbook3()

ActiveWorkbook.Protect

End Sub
Step 4: Now select the Password from syntax and choose a password, and for Structure and Window, allow it as TRUE.
Code:
Sub VBAWorkbook3()

ActiveWorkbook.Protect Password:="TestPassword", Structure:=True, Windows:=True

End Sub
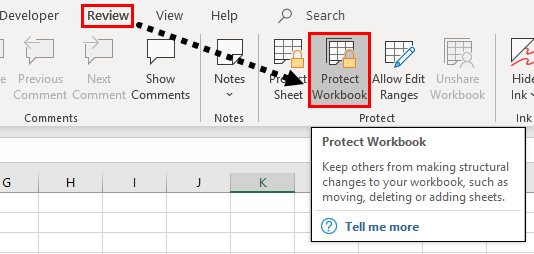
Step 5: Now compile it and run after it. We will see our current workbook will get locked, which can be seen in the Review menu in Protect Workbook option as shown below. To unlock it, click on Protect Workbook option.
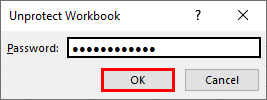
Step 6: And enter the password “TestPassword”, which we selected in our code and click on Ok.
Our current sheet again gets unlocked.
Pros of Excel VBA Workbook
- VBA Workbook allows us to work in the Workbook without doing anything in the sheet.
- We can perform any tasks with the help of the VBA Workbook object; for this, we just need to select or activate the sheet through code.
Things to Remember
- Always remember to compile the complete code or line by line to avoid an error.
- The file has huge data and multiple lines of code; always use Close VBA Workbook to avoid losing data.
- For people who are a beginner at VBA Coding, it is recommended not to use complex coding structures. Instead of trying with small sets of code and implementing its real-life work scenarios.
Recommended Articles
This is a guide to VBA Workbook. Here we discuss how to use the Workbook object in Excel VBA along with some practical examples and a downloadable excel template. You can also go through our other suggested articles –
