Introduction to Vue.js autocomplete
The vue.js autocomplete is defined as a vue.js component with CSS free, hence allowing for customization of any framework in the look or appearance of the Vue app through any framework, which also includes supporting of data binding, filtering, accessibility, grouping, and many more other features. This vue.js autocomplete is also defined as a textbox component with the entire above same feature along with the list of suggestions or advice to the user to select from user types. This component needs to be installed, and it can also be used as a directive v-autocomplete with various props included in it.
Working of vue.js autocomplete in Vue apps
In this article, we will see the autocomplete a vue.js component which provides flexible type-ahead functionalities in the v-autocomplete directive which is used in searching huge set of information or data from API and this component also provides support in various features like filtering, binding, grouping, etc. along with a variety of props like allow-overflow, append-icon, attach, auto-select-first, source, method, inputClass, name, etc. To install the autocomplete component in the vue.js app, we have to run the below command :
npm install vuejs-auto-complete –saveIn this article, we will see autocomplete component is mainly a CSS free and is mainly used for allowing the users to make ease in selecting from the lengthy lists by making the input autocomplete is recommended instead of just a dropdown, which in simple words the autocomplete component would help the user select what they are typing instead of searching in the given list by providing various features for doing so like binding, grouping, filtering, etc.
So generally, by the above section, we can say the autocomplete feature of the vue.js app is used as an advanced input element with search suggestions that the users type in the input box.
In vue.js apps autocomplete component it supports search advice features like data binding in which it helps the user to use the data manager to manage huge amount of data with customized options for handling the requested data and also proper data processing; filtering which has a built-in filtering options with again customized options like filter with type, filter with text casting, filter with minimum characters, etc; grouping is also another feature supported by autocomplete component which is mainly used for arranging or grouping the logics for searching the particular data; this component also supports one of the custom property allow custom which must be enabled for helping the users to specify the input with any custom values which means these values need not be present in the defined set of values or the specified given list ad this property is enabled by default and these custom values will be sent to the handlers when the form is about to be submitted and there are other properties like popup height and popup width which are also customized and by default it will adjust to the autocomplete input box. Hence, this autocomplete component supports many different features for designing the vue.js apps with an advanced input text box with searching data in the lengthy given list of data.
Now we will see how to define the autocomplete component in the html file. In html file we know that we use <div> tags for designing any templates so in this we can also use <auto-complete> </auto-complete> tags for defining the autocomplete components and it is written as
<div id = "autoapp"
<auto-complete> …..</auto-complete>
</div>
So to define this component in the javascript we can write the code as below:
Vue.component('auto-complete', {
new Vue ({
….
autocompleteValue:….
)}
}
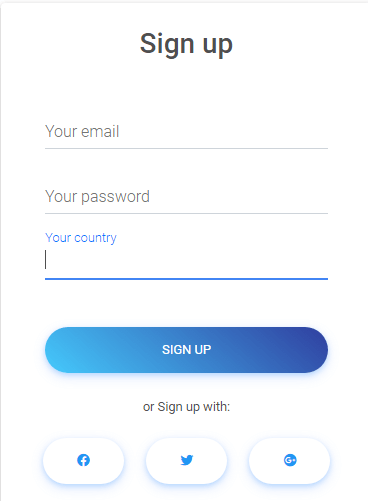
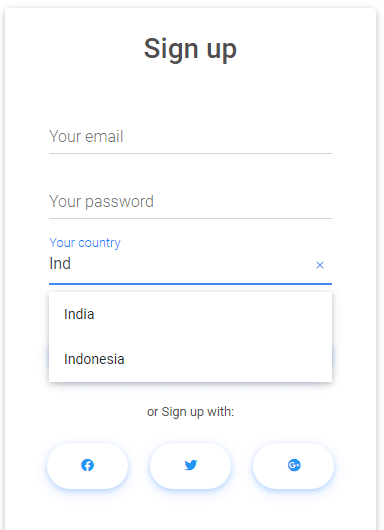
Let us consider an example where the vue.js app is designed to enter user details along with their country name so as an how the user enters the name of the country it will search by itself and gives you the direct country name instead of you searching it in the given dropdown list. But, first, let us see a sample snapshot of such a form.
So in the above screenshots, we can see the form with nothing entered in the country name field “your country” So when we type the country name, it automatically searches for such similar name ad display the list to select for the user, and this we saw in the second screenshot when we are typing the country name “Ind” it will give a list with country names starting with same alphabets, and the list has “India” and “Indonesia” so we can select “India” easily. This is how we use the autocomplete component in designing the vue.js app helps the user search suggestion easily.
So this is one of the sample examples to show how we can create a vue.js app with an autocomplete component in the below code.
So we have to create a HTML file where using a script tag, we have to import vue.js libraries such as vue.js and Axios library, and this can be written as
<script src="https://cdn.jsdelivr.net/npm/vue/dist/vue.js"></script>
<script src="https://cdnjs.cloudflare.com/ajax/libs/axios/0.18.0/axios.min.js"></script>
Then in the same html file, we have to also create a front end with an autocomplete component in a div tag with autocomplete tag, and this can be written as
<div id="app">
<autocomplete>
…..
</autocomplete>
</div>
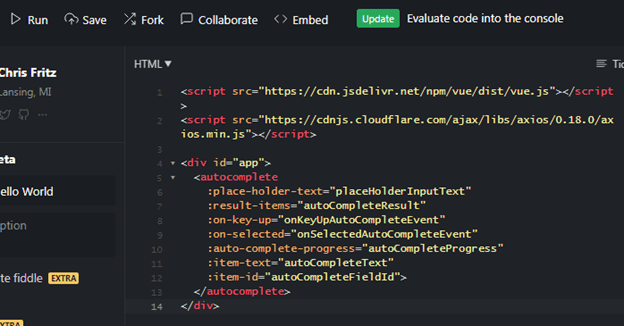
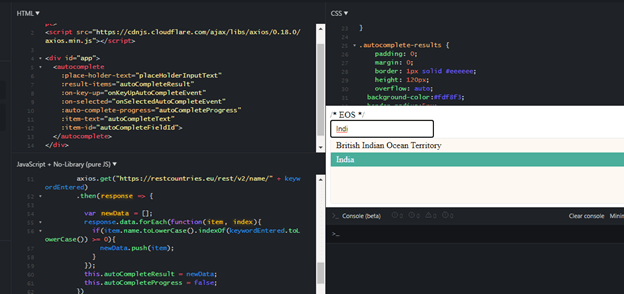
Therefore the html file looks like as in the below screenshot
Then we have to create a vue.js file to write the vue.js autocomplete component, and it can be written as below
var autocompleteComponent = Vue.component('autocomplete', {
……
});
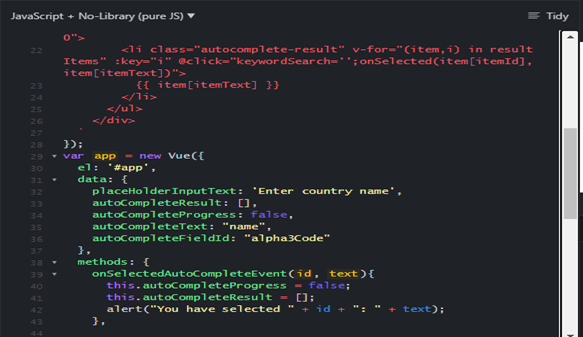
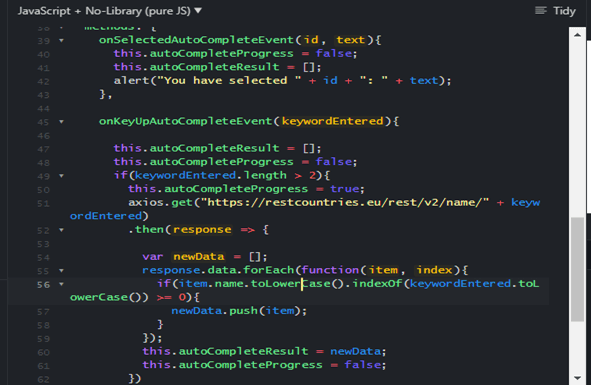
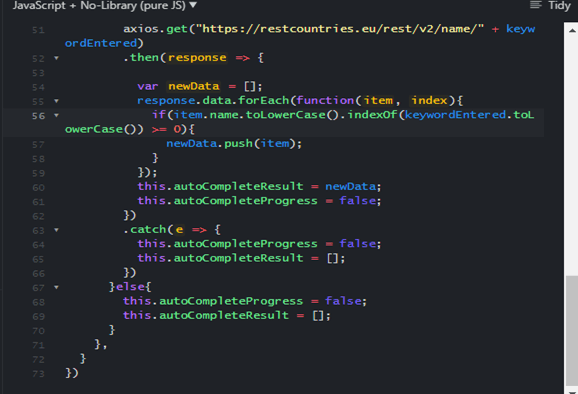
And then, we also have to declare methods and few data variables in the vue.js file which are used in the autocomplete component, and to write that; we have to write the code as below:
var app = new Vue({
…..
})
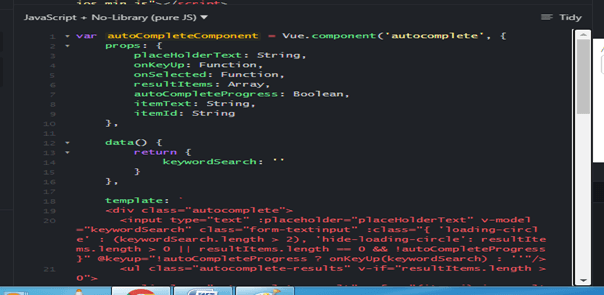
So the vue.js file looks like as in the below screenshot.
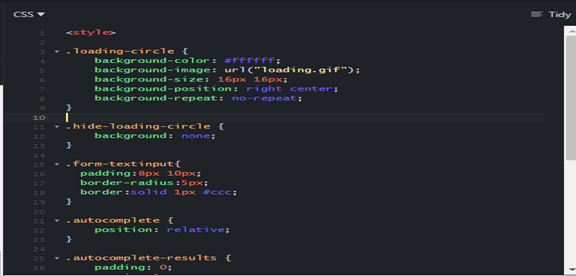
Then for styling, we are using CSS, so we know to write css code, we have to use style tag and then write the style properties along with the requirement inside this style tag.
<style>
……
</style>
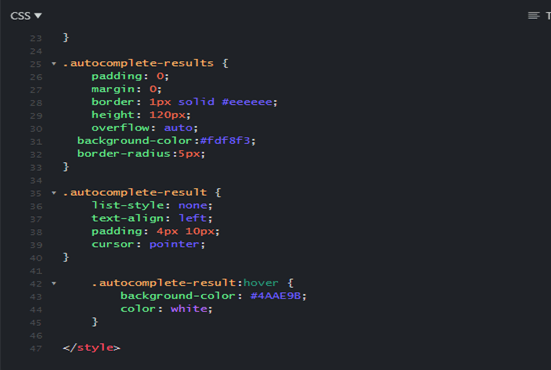
So the css file looks like as in the below screenshot:
The complete code would look like as below
HTML file
<script src="https://cdn.jsdelivr.net/npm/vue/dist/vue.js"></script>
<script src="https://cdnjs.cloudflare.com/ajax/libs/axios/0.18.0/axios.min.js"></script>
<div id="autocompleteapp">
<autocomplete
:place-holder-text="placeHolderInputText"
:result-items="autoCompleteResult"
:on-key-up="onKeyUpAutoCompleteEvent"
:on-selected="onSelectedAutoCompleteEvent"
:auto-complete-progress="autoCompleteProgress"
:item-text="autoCompleteText"
:item-id="autoCompleteFieldId">
</autocomplete>
</div>
Vue.js File
var autoCompleteComponent = Vue.component('autocomplete', {
props: {
placeHolderText: String,
onKeyUp: Function,
onSelected: Function,
resultItems: Array,
autoCompleteProgress: Boolean,
itemText: String,
itemId: String
},
data() {
return {
keywordSearch: ''
}
},
template: `
<div class="autocomplete">
<input type="text" :placeholder="placeHolderText" v-model="keywordSearch" class="form-textinput" :class="{ 'loading-circle' : (keywordSearch.length > 2), 'hide-loading-circle': resultItems.length > 0 || resultItems.length == 0 && !autoCompleteProgress }" @keyup="!autoCompleteProgress ? onKeyUp(keywordSearch) : ''"/>
<ul class="autocomplete-results" v-if="resultItems.length > 0">
<li class="autocomplete-result" v-for="(item,i) in resultItems" :key="i" @click="keywordSearch='';onSelected(item[itemId], item[itemText])">
{{ item[itemText] }}
</li>
</ul>
</div>
`
});
var app = new Vue({
el: '# autocompleteapp,
data: {
placeHolderInputText: 'Enter country name',
autoCompleteResult: [],
autoCompleteProgress: false,
autoCompleteText: "name",
autoCompleteFieldId: "alpha3Code"
},
methods: {
onSelectedAutoCompleteEvent(id, text){
this.autoCompleteProgress = false;
this.autoCompleteResult = [];
alert("You have selected " + id + ": " + text);
},
onKeyUpAutoCompleteEvent(keywordEntered){
this.autoCompleteResult = [];
this.autoCompleteProgress = false;
if(keywordEntered.length > 2){
this.autoCompleteProgress = true;
axios.get("https://restcountries.eu/rest/v2/name/" + keywordEntered)
.then(response => {
var newData = [];
response.data.forEach(function(item, index){
if(item.name.toLowerCase().indexOf(keywordEntered.toLowerCase()) >= 0){
newData.push(item);
}
});
this.autoCompleteResult = newData;
this.autoCompleteProgress = false;
})
.catch(e => {
this.autoCompleteProgress = false;
this.autoCompleteResult = [];
})
}else{
this.autoCompleteProgress = false;
this.autoCompleteResult = [];
}
},
}
})
CSS File
<style>
.loading-circle {
background-color: #ffffff;
background-image: url("loading.gif");
background-size: 16px 16px;
background-position: right center;
background-repeat: no-repeat;
}
.hide-loading-circle {
background: none;
}
.form-textinput{
padding:8px 10px;
border-radius:5px;
border:solid 1px #ccc;
}
.autocomplete {
position: relative;
}
.autocomplete-results {
padding: 0;
margin: 0;
border: 1px solid #eeeeee;
height: 120px;
overflow: auto;
background-color:#fdf8f3;
border-radius:5px;
}
.autocomplete-result {
list-style: none;
text-align: left;
padding: 4px 10px;
cursor: pointer;
}
.autocomplete-result:hover {
background-color: #4AAE9B;
color: white;
}
</style>
So the output would be as follows:
So in this way, you can create your vue.js apps with autocomplete components. The above code is just a sample code to understand where to write which tags and how the to autocomplete component and its tags can be used to get the autocomplete textbox. After that, we can create on our own to have other features accordingly.
Conclusion
In this article, we conclude that the vue.js autocomplete component is defined as the component with free CSS for handling search suggestions in the app to make it the user easy to search the data in the given lengthy list. In this article, we saw how the app looks like when searching the data, which yields direct search results instead of the user searching the entire list. This article also saw the features supported by the autocomplete component like data binding, grouping, filtering, etc.
Recommended Articles
This is a guide to Vue.js autocomplete. Here we discuss the Working of vue.js autocomplete in Vue apps and the features supported by the autocomplete component. You may also have a look at the following articles to learn more –
