Introduction to Vue.js Watch
The following article provides an outline for Vue.js Watch. Vue.js is an easy-to-use web application framework that can be used to develop great interactive front-end applications. Whenever there is any change in a particular property, a Vue watcher helps one to understand the component data. Vue.js has a special feature, i.e. Watcher, which helps one to keep track of a property of the component state and a function is run when the value of property changes. Watcher makes a code very simple and fast as it takes care of any change in data.
Syntax:
export default {
watch: {
name: function() {
console.log(this.name)
}
}
}
Working of Watch Property in Vue.js
- Watchers are used to seeing the changes in the data occurring in the reactive properties.
- It also supports different asynchronous options with the changing value.
- The syntax written above is used for using Vue.js watch in our application.
- There are many hooks provided to observe the properties in Vue.js.
- For adding some functionalities with the change, we can add a watch and apply different logics with the changing value.
Examples
Different examples are mentioned below:
Example #1
Vue.js Watch with Button to change the text.
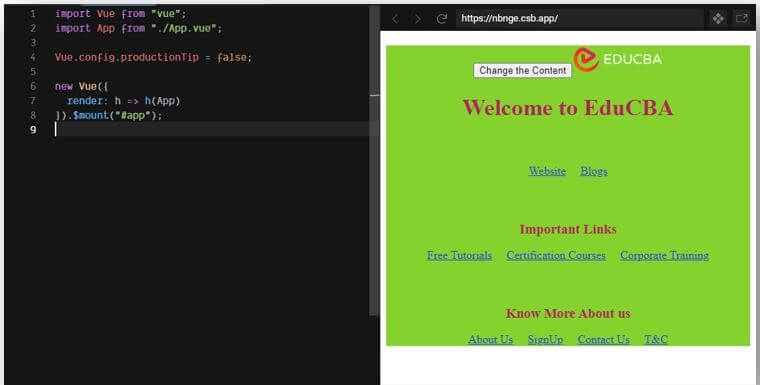
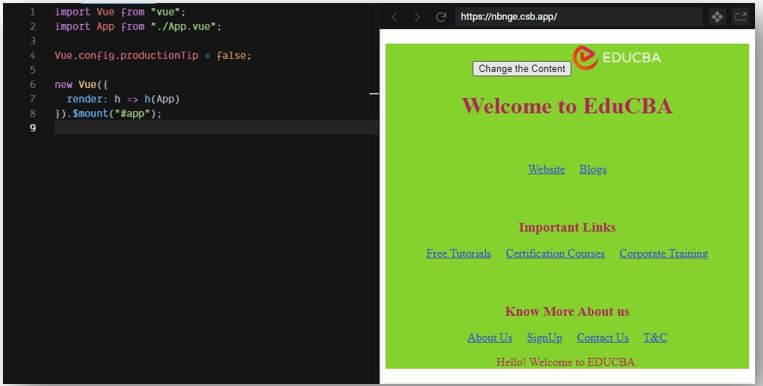
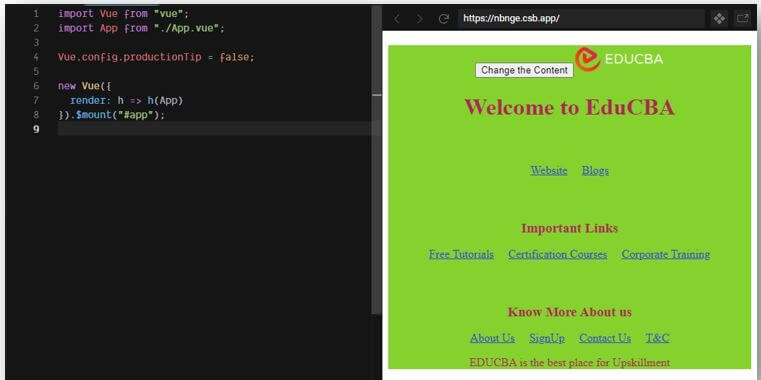
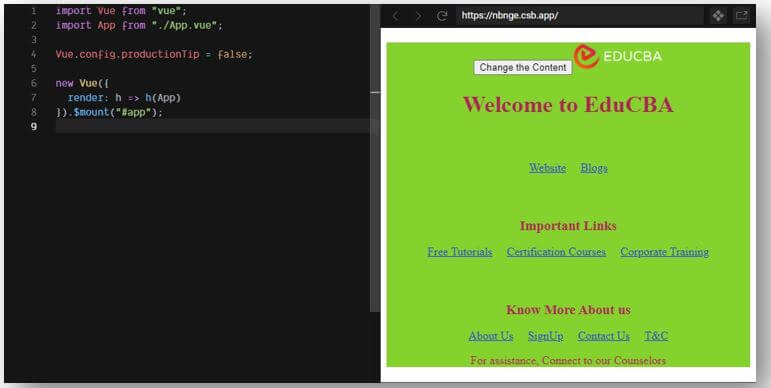
In the example below, the “Change the Content” button is used to change the content displayed at the bottom of the output screen. The text that appears at the bottom of the output screen changes randomly by pressing the “Change the Content” button.
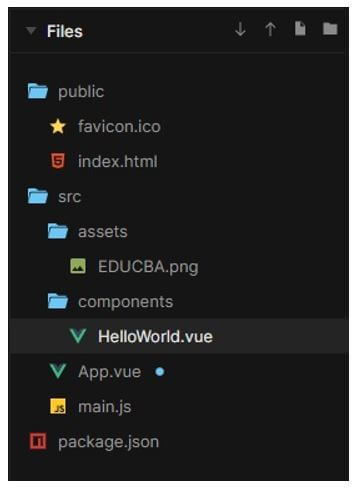
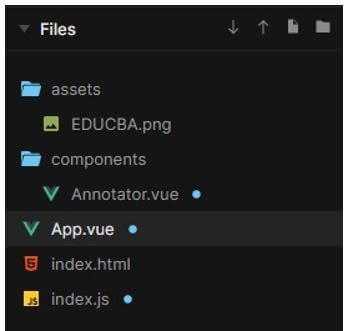
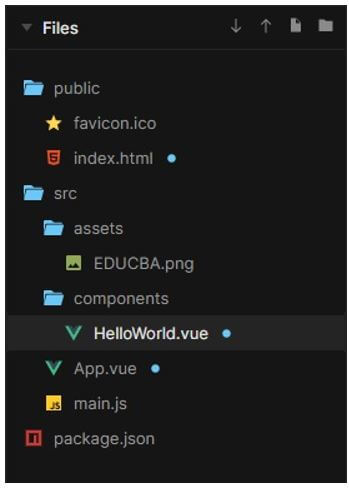
The files used to implement the code below are:
a. favicon.ico
b. index.html
<!DOCTYPE html>
<html lang="en">
<head>
<meta charset="utf-8">
<meta http-equiv="X-UA-Compatible" content="IE=edge">
<meta name="viewport" content="width=device-width,initial-scale=1.0">
<link rel="icon" href="<%= BASE_URL %>favicon.ico">
<title>Application</title>
</head>
<body>
<noscript>
<strong>Application doesn't work, kindly enable Codesandbox</strong>
</noscript>
<div id="app"></div>
</body>
</html>
c. EDUCBA.png
The image’s link is stated below:
https://cdn.educba.com/images/website_logo_transparent_background_white.png
d. HelloWorld.vue
<template>
<div class="hello">
<h1>{{ msg }}</h1>
<h3></h3>
<ul>
<li>
<a
href="https://www.educba.com/"
target="_blank"
rel="noopener"
>Website</a>
</li>
<li>
<a
href="https://www.educba.com/blog/?source=menu"
target="_blank"
rel="noopener"
>Blogs</a>
</li>
</ul>
<h3>Important Links</h3>
<ul>
<li>
<a href="https://www.educba.com/tutorials/?source=menu" target="_blank" rel="noopener">Free Tutorials</a>
</li>
<li>
<a href="https://www.educba.com/courses/?source=menu" target="_blank" rel="noopener">Certification Courses</a>
</li>
<li>
<a href="https://www.educba.com/corporate/?source=footer" target="_blank" rel="noopener">Corporate Training</a>
</li>
</ul>
<h3>Know More About us</h3>
<ul>
<li>
<a href="https://www.educba.com/about-us/?source=footer" target="_blank" rel="noopener">About Us</a>
</li>
<li>
<a href="https://www.educba.com/signup/?source=footer" target="_blank" rel="noopener">SignUp</a>
</li>
<li>
<a
href="https://www.educba.com/contact-us/?source=footer"
target="_blank"
rel="noopener"
>Contact Us</a>
</li>
<li>
<a href="https://www.educba.com/terms-and-conditions/?source=footer" target="_blank" rel="noopener">T&C</a>
</li>
</ul>
</div>
</template>
<script>
export default {
name: "HelloWorld",
props: {
msg: String
}
};
</script>
<style scoped>
h3 {
margin: 60px 0 0;
}
ul {
list-style-type: none;
padding: 0;
}
li {
display: inline-block;
margin: 0 10px;
}
a {
color: #2d43e3;
}
</style>
e. App.vue
<template>
<div id="app">
<input type="button" v-on:click="changeQuote" value="Change the Content">
<img width="25%" src="./assets/EDUCBA.png">
<HelloWorld msg="Welcome to EduCBA" />
<p>{{quote}}</p>
</div>
</template>
<script>
import HelloWorld from "./components/HelloWorld";
export default {
name: "App",
components: {
HelloWorld
},
data: function() {
return {
quotes: [
"Hello! Welcome to EDUCBA.",
"EDUCBA is the best place for Upskillment",
"For assistance, Connect to our Counselors"
],
quote: ""
};
},
methods: {
changeQuote() {
this.quote = this.quotes[Math.floor(Math.random() * this.quotes.length)];
}
},
watch: {
quote(oldValue, newValue) {
console.log("Change  "
+ oldValue
+ " vers "
+ newValue);
}
}
};
</script>
<style>
#app {
font-family: 'Times New Roman'
, Times
, serif;
-webkit-font-smoothing: antialiased;
-moz-osx-font-smoothing: grayscale;
text-align: center;
color: #b02558;
margin-top: 20px;
background-color: #85d12e;
}
</style>
f. main.js
import Vue from "vue";
import App from "./App.vue";
Vue.config.productionTip = false;
new Vue({
render: h => h(App)
}).$mount("#app");
Output:
Example #2
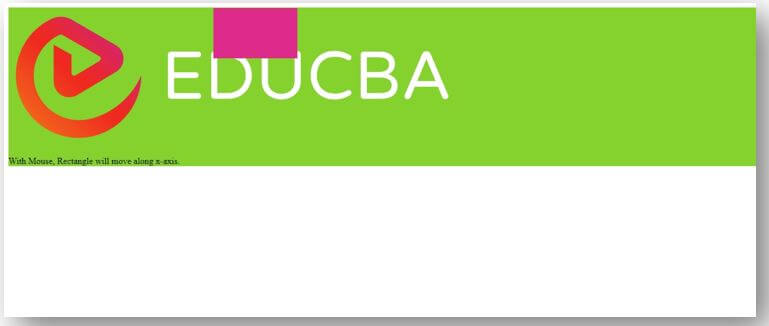
Drag the mouse and Change the value of the box.
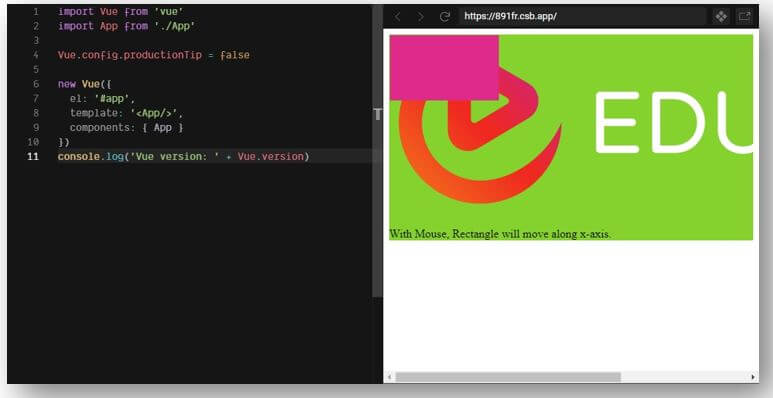
In the example below, the rectangle location changes along the x-axis with the movement of the mouse.
The files used to implement the code below are:
a. EDUCBA.png
The image’s link is stated below:
https://cdn.educba.com/images/website_logo_transparent_background_white.png
b. Annotator.vue
<template>
<svg :width="w" :height="h">
<foreignObject x="0" y="0" :width="w" :height="h">
<slot></slot>
</foreignObject>
<slot name="annotation"></slot>
</svg>
</template>
<script>
export default {
props: {
width: Number,
height: Number
},
data () {
return {
w: this.width,
h: this.height
}
},
mounted () {
this.w = this.$slots.default[0].elm.width || this.width
this.h = this.$slots.default[0].elm.height || this.height
let currentX = this.$slots.annotation[0].data.attrs.x
this.$el.addEventListener("mousemove", evt => {
this.$slots.annotation[0].elm.setAttribute('x', evt.clientX)
})
}
}
</script>
<style >
</style>
c. App.vue
<template>
<div id= 'app'>
<annotations>
<rect :x="x" class="box" slot="annotation" y="1" width="150" height="90" ></rect>
<img src="./assets/EDUCBA.png" />
</annotations>
<p>With Mouse, Rectangle will move along x-axis.</p>
</div>
</template>
<script>
import Annotator from './components/Annotator'
export default {
components: {
'annotations': Annotator
},
data () {
return {
x: 1
}
},
watch: {
x (val) {
console.log(val)
}
}
}
</script>
<style scoped>
.box {
fill: #de2a8a;
}
.box:hover {
fill: #f7f72a;
}
#app{
background-color: #85d12e;
}
</style>
d. index.html
<div id="app"></div>e. index.js
import Vue from 'vue'
import App from './App'
Vue.config.productionTip = false
new Vue({
el: '#app',
template: '<App/>',
components: { App }
})
console.log('Vue version: ' + Vue.version)
Output:
On full screen, the output will seem as the below image.
Example #3
Usage with Counter.
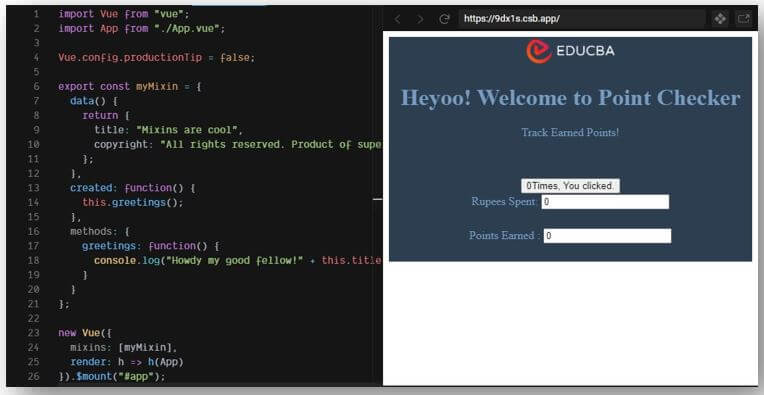
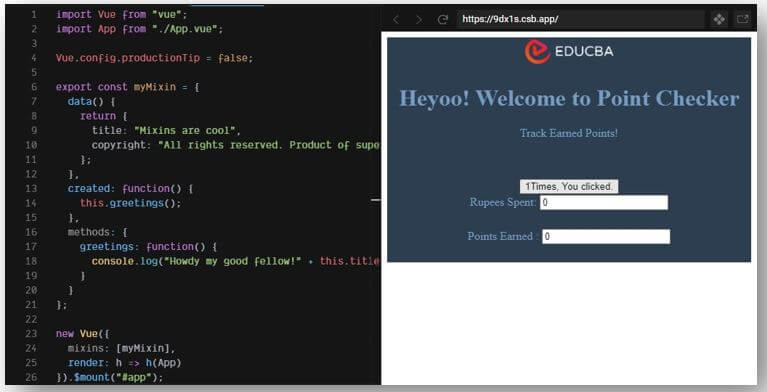
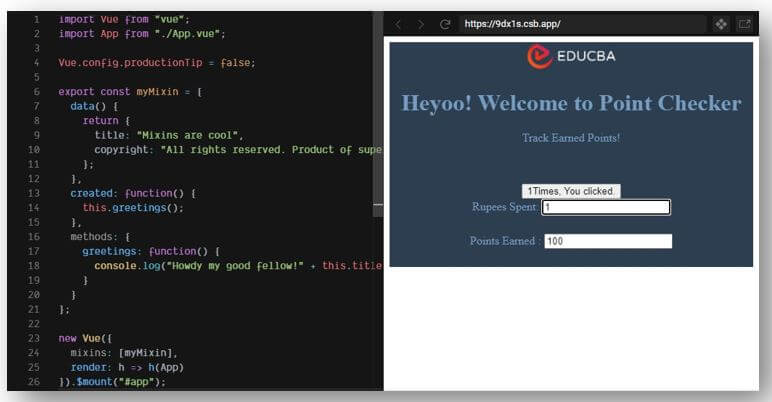
In the example below, the value of the counter changes when the “You clicked here _ times” button is clicked, and also one can see the change in value when the “Rupees Spent” or “Points Earned” value is entered.
The files used to implement the code below are:
a. EDUCBA.png
The image’s link is stated below:
https://cdn.educba.com/images/website_logo_transparent_background_white.png
b. HelloWorld.vue
<template>
<div class="hello">
<h1>{{ msg }}</h1>
<div>{{ text }}</div>
<br>
<div>{{ message }}</div>
<br>
<div>{{ reversedMessage }}</div>
<br>
<button-counter></button-counter>
<div id="computed_props" class="input-container">
Rupees Spent:
<input type="text" v-model="kilometers">
</div>
<div id="computed_props" class="input-container">
Points Earned :
<input type="text" v-model="meters">
</div>
</div>
</template>
<script>
import Vue from "vue";
export default {
name: "HelloWorld",
props: {
msg: String
},
data() {
return {
text: "Mixins are cool",
message: "",
kilometers: 0,
meters: 0
};
},
mounted() {
this.text = "Two";
this.$nextTick(() => {
this.text = "Track Earned Points!";
});
},
computed: {
reversedMessage: function() {
return this.message
.split("")
.reverse()
.join("");
}
},
watch: {
kilometers: function(val) {
this.kilometers = val;
this.meters = val * 100;
},
meters: function(val) {
this.kilometers = val / 100;
this.meters = val;
}
}
};
Vue.component("button-counter", {
data: function() {
return {
count: 0
};
},
template:
'<button v-on:click="count++"> {{ count }} Times, You Clicked.</button>'
});
</script>
<style scoped>
h3 {
margin: 35px 0 0;
}
ul {
list-style-type: none;
padding: 0;
}
li {
display: inline-block;
margin: 0 11px;
}
a {
color:#e03a69;
}
.input-container {
display: inline-block;
width: 100%;
margin-bottom: 25px;
margin-top: 1px;
}
</style>
c. App.vue
<template>
<div id="app">
<img width="25%" src="./assets/EDUCBA.png">
<HelloWorld msg="Heyoo! Welcome to Point Checker"/>
</div>
</template>
<script>
import HelloWorld from "./components/HelloWorld";
export default {
name: "App",
components: {
HelloWorld
}
};
</script>
<style>
#app {
font-family: 'Times New Roman'
, Times
, serif;
-webkit-font-smoothing: antialiased;
-moz-osx-font-smoothing: grayscale;
text-align: center;
color: #769cc2;
margin-top: 1px;
background-color: #2c3e50;
}
</style>
d. main.js
import Vue from "vue";
import App from "./App.vue";
Vue.config.productionTip = false;
export const myMixin = {
data() {
return {
title: "Mixins are cool",
copyright: "All rights reserved. Product of super awesome people"
};
},
created: function() {
this.greetings();
},
methods: {
greetings: function() {
console.log("Howdy my good fellow!" + this.title);
}
}
};
new Vue({
mixins: [myMixin],
render: h => h(App)
}).$mount("#app");
Output:
Conclusion
On the basis of the above article, we saw the concept of the watch in Vue.js. We saw when and why we should use the watch in Vue.js. The examples will help us in understanding the application of watch in Vue.js and how it can be used in different situations and logics.
Recommended Articles
This is a guide to Vue.js Watch. Here we discuss the introduction, working of watch property in Vue.js and examples, respectively. You may also have a look at the following articles to learn more –
