Updated April 13, 2023

Introduction to Vue.js data()
The Node.js provides a Vue.js data() method to the user. Basically in vue.js data() we defined collection of logic and stored in component using vue.js we can access data Node.jsassociated with a vue instance. Components are reusable as many times as per requirement. But each time it uses a separate component and also creates a new instance. When we use a data function at that time each instance maintains a separate copy of the return data object. Most of vue.js uses API to fetch and post data. It is safe because it does not affect the changes outside the scope.
Syntax
Vue.component('new component name', {
data: function () {
return {
count: 0
}
},
template: '<button v-on:click="count++">hit clicked {{ count }} times.</button>'
})
Explanation: The above syntax component is reusable with instance name and notice that when we use data does not provide objects directly. Instead a component data option is function so each instance is maintaining a separate copy of return data by using the following syntax.
Syntax:
data: function () {
return {
count: 0
}
}
How does data() work in Vue.js?
- We must install Node.js 10.x and above on your system and you can verify by using node –v command in your terminal.
- We must install the latest version of Vue on your system.
- We must install the Vue CLI 3.0 version on your system.
- We required basic knowledge about Node.js
- We required basic knowledge about Vue.js and components.
Examples of Vue.js data()
Let’s see how we can implement Vue.js data() with different examples as follows.
Example #1
A basic example of data method
App.vue:
<template>
<div id="app">
<h2>{{title}} </h2>
</div>
</template>
<script>
export default {
name: 'App',
data(){
return{
title: 'welcome in vue data function'
}
}
}
</script>
<style>
#app {
font-family: Avenir, Helvetica, Arial, sans-serif;
-webkit-font-smoothing: antialiased;
-moz-osx-font-smoothing: grayscale;
text-align: center;
color: #2c3e50;
margin-top: 60px;
}
</style>
In this example, we only made changes in the App.vue file in which we added a data method to access the title. Illustrate the end result of the above declaration by using the use of the following snapshot.
Example #2
For Data with Method
App.vue:
<template>
<div>
<h1> Hi welcome in vue Data{{title}}</h1>
<h2>{{Msg()}}</h2>
</div>
</template>
<script>
export default {
data: function() {
return {
title: "function with method "
};
},
methods:{
Msg:function(){
return '$' + this.title
}
}
}
</script>
<style>
#app {
font-family: Avenir, Helvetica, Arial, sans-serif;
-webkit-font-smoothing: antialiased;
-moz-osx-font-smoothing: grayscale;
text-align: center;
color: #2c3e50;
margin-top: 60px;
}
</style>
Explanation: In the above example first we created a data function that returns an object. Every property of vue is added to the vue reactivity system so that if we make some changes in the program that is updated. So that we add title property in our template by using {{}} double curly braces. Vue js must require {{}} double curly to pass javaScript Expression.
In the second part of the program we have created a method and the method also has an object. Here we create a Msgmethod which returns a string. Inside the method, we access data object property by using this and finally we added in the template tag. Illustrate the end result of the above declaration by using the use of the following snapshot.
Example #3
App.vue
<template>
<div>
<h1>Programming Language: {{name1}}</h1>
<h1>Scripting language: {{name2}}</h1>
<h1>{{Msg()}}</h1>
</div>
</template>
<script>
export default {
data: function() {
return {
name1: "Node.js ",
name2: "Java Script"
};
},
methods:{
Msg:function(){
return 'Coding done by' +this.name1 +''+ this.name2
}
}
}
</script>
<style>
#app {
font-family: Avenir, Helvetica, Arial, sans-serif;
-webkit-font-smoothing: antialiased;
-moz-osx-font-smoothing: grayscale;
text-align: center;
color: #2c3e50;
margin-top: 60px;
}
</style>
Explanation: This is another simple example of data function with methods. Illustrate the end result of the above declaration by using the use of the following snapshot.
Example #4
Emit data in vue.js with event
HelloWorld.vue
<template>
<div class="hello">
<h1 class="is-size-3">{{ msg }}</h1>
<br>
<div class="container" style="width: 35%;">
<input class="input" type="text" v-model="StartMsg"><br/><br/>
<button class="button is-primary is-medium" @click="changeMsg">Click to change message</button>
</div>
</div>
</template>
<script>
export default {
name: "HelloWorld",
data() {
return {
StartMsg: ""
}
},
props: {
msg: String
},
methods: {
changeMsg() {
this.$emit("changeMsg", this.StartMsg);
console.log('message emit from child component')
}
}
};
</script>
<style scoped>
h3 {
margin: 40px 0 0;
}
ul {
list-style-type: none;
padding: 0;
}
li {
display: inline-block;
margin: 0 10px;
}
a {
color: #42b983;
}
</style>
Explanation: In the above component, we sent messages from the child component to the parent component. In the above template, we use a button to send the message to the parent component. See in this template we use the changes function whenever we submit a message to the parent component.
Then we added the following code in the App.vue file
App.vue
<template>
<div id="app">
<img alt="Vue logo" src="./assets/logo.png">
<HelloWorld @changeMsg="setMessage" :msg="StartMsg"/>
</div>
</template>
<script>
import HelloWorld from "./components/HelloWorld.vue";
export default {
name: "app",
data() {
return {
StartMsg: "Welcome in Data function World"
};
},
methods: {
setMessage(msg) {
this.StartMsg = msg;
}
},
components: {
HelloWorld
}
};
</script>
<style>
#app {
font-family: "Avenir", Helvetica, Arial, sans-serif;
-webkit-font-smoothing: antialiased;
-moz-osx-font-smoothing: grayscale;
text-align: center;
color: #2c3e50;
margin-top: 60px;
left: 20px;
}
</style>
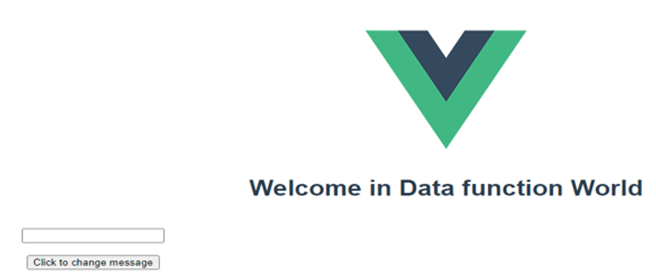
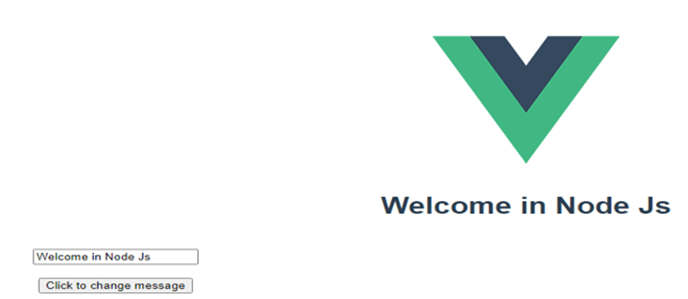
Explanation: In this file actually we are listing our event. In the first component, we just send messages from the child component to the parent component but in this we actually manipulate them. In this file, we import the HelloWorld.vue component for listening to custom events by using changeMsg function. We also define a setMessage function to handle custom events. The remaining part is the css part this necessary for design purpose. In this example we by default content of vue. Illustrate the end result of the above declaration by using the use of the following snapshot.
Before Click on Button:
After Submit Message:
Conclusion
We hope from this article you have understood about the vue.js data. From the above article, we have learned the basic syntax of the vue.js data function. We have also learned how we can implement them in Node.js with examples. From this article, we have learned how we can handle vue.js data as well as components in Node.js.
Recommended Articles
This is a guide to Vue.js data() Here we also discuss the introduction, syntax, and working of data() in vue.js along with different examples and code implementation. You may also have a look at the following articles to learn more –


