Updated April 14, 2023

Introduction to js drag and drop
The Node.js provides a Vue.js function with different options to the user like drag and drop facility in which we transfer data from one location to another location that means drag and drop. It provides an interactive way for the user to manipulate their data. When we add drag and drop functionality to your project, it is a great way to make the application natural and user friendly. It provides different types of API to users to implement drag and drop functionality such as drag, dragstart, dragend, dragenter, dragleave, dragover, and drop, etc. To implement drag and drop we required a dataTransfer object.
Syntax
1. Drag
startDrag: (event , product)
{
event.dataTransfer.dropEffect = 'move'
event.dataTransfer.effectAllowed = 'move'
event.dataTransfer.setData('productID', product.id)
}
Explanation
In the above drag syntax, we need to store id of the product and we are dragging using the dataTransfer functionality and we also mention here drag event will be moved.
2. Drop
onDrop (event, product)
{
Const product_ID = event.dataTransfer.getData('productID')
Const product = this.product.find(product = product.id == productID)
product.list = list
}
Explanation
In the above syntax, we retrieve the stored product id so we can access it properly.
How does drag and drop work in Vue.js?
- We must install Node.js 10.x and above on your system and you can verify by using the node –v command in your terminal.
- We must install the latest version of Vue on your system by using the npm i -g @vue/cli command.
- Then create the project by using vue to create a project name.
- We must install the draggable packages in your project by using npm i -S vuedraggable.
- We required basic knowledge about Node.js.
- We required basic knowledge about Vue.js and its components.
- With the help of Vue.js drag and drop, we perform different operations.
Before going to explain we must know the Drag and Drop Event as follows.
Vue.js provides a total of eight types of drag and drop events in the API and we can implement them in our application.
- Drag: The drag event is used to drag the item.
- dragstart: The dragstart event is used to start dragging a draggable item.
- dragend: The dragend event is used to show the drag ends.
- dragenter: The dragenter event is used when a dragged item is entered in a droppable zone.
- dragleave: The dragleave event is used when we leave a dragged item.
- dragover: The dragover event we use when a dragged item is moved.
- drop: The drop event is used when we dropped the dragged item.
- dataTransfer Object: The dataTransfer object is the most useful object in the drag and drops API. This object gives permission to start dragging an item and access them when we drop in the drop
Properties of dataTransfer Object
- dropEffect: This dropEffect is used to show ongoing drag and drop operation.
- effectAllowed: This also shows the drag and drop operation.
- setData: This is used to add values to dataTransfer objects.
- getData: It is used to retrieve stored values.
Example of Vue.js Drag and Drop
Let’s see examples of how drag and drop work for a better understanding. First, we create a new project with a name as dnd in which we created two different components as follows.
First component name as Table.vue the code of Table component as follows.
Code:
<template>
<div
:id="id"
class="table"
@dragover.prevent
@drop.prevent="drop"
>
<slot />
</div>
</template>
<script>
export default {
props: ['id'],
methods: {
drop: a => {
const site_id = a.dataTransfer.getData('site_id');
const site = document.getElementById(site_id);
site.style.display = "block";
a.target.appendChild(site);
}
}
}
</script>
Explanation
In the above component, we coded for table or box for drag and drop the site using a template and script tag in which we also use a method to get site id.
After that, we created a second component name as Site.vue the code of the Site component as follows.
Code:
<template>
<div
:id="id"
class="site"
:draggable="draggable"
@dragstart="dragStart"
@dragover.stop
>
<slot />
</div>
</template>
<script>
export default {
props: ['id', 'draggable'],
methods: {
dragStart: a => {
const target = a.target;
a.dataTransfer.setData('site_id', target.id);
setTimeout(() => {
target.style.display = "none";
},0);
}
}
}
</script>
Explanation
In the above component, we coded to display the site by using the dataTransfer method. Here we draggable to move the content on the table.
In the next part, we will code in App.vue and this is by default of the dnd project. The code of the App.vue as follows.
Code:
<template>
<div id="app">
<main class="flexbox">
<Table id="table-1">
<Site id="site-1" draggable="true">
<p>Home Page</p>
</Site>
</Table>
<Table id="table-2">
<Site id="site-2" draggable="true">
<p>Home Page 2</p>
</Site>
</Table>
</main>
</div>
</template>
<script>
import Table from './components/Table';
import Site from './components/Site';
export default {
name: 'App',
components: {
Site,
Table
}
}
</script>
<style>
* {
margin: 0;
padding: 0;
box-sizing: border-box;
}
body {
background-color:whitesmoke ;
}
.flexbox {
display: flex;
justify-content: space-between;
width: 100%;
max-width: 700px;
height: 60vh;
overflow: hidden;
margin: 0 auto;
padding: 15px;
}
.flexbox .table{
display: flex;
flex-direction: column;
width: 100%;
max-width: 300px;
background-color: blue;
padding: 15px;
}
.flexbox .table .site {
padding: 15px 25px;
background-color: brown;
cursor: pointer;
margin-bottom: 15px;
}
</style>
Explanation
In the above vue file, we coded for table and site design using different functions of designing. In this file, we also write the site name as the home page. After that we import components.
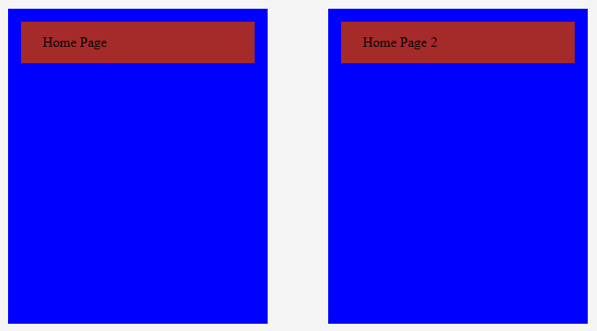
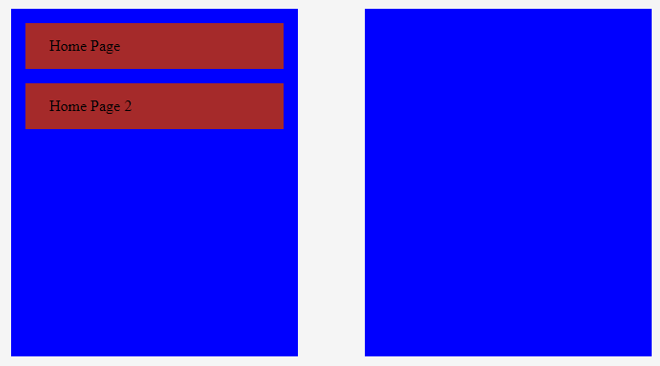
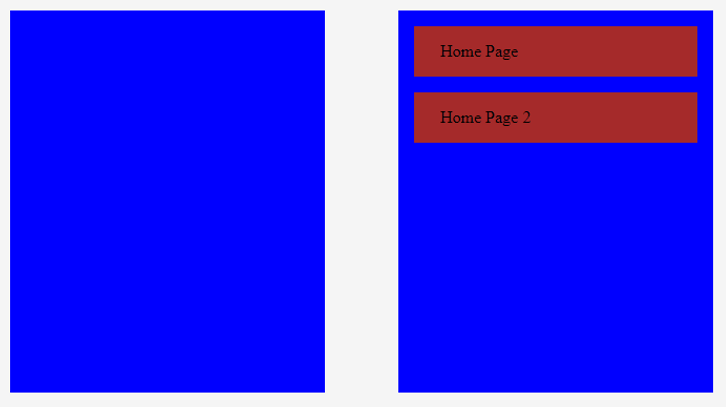
In the above example, we have implemented drag and drop vue. Illustrate the end result of the above declaration by using the use of the following snapshot.
- The first screenshot for before drag and drop as follows.
- In the second screenshot, the site name dragged is Home Page 2 on the first table as shown in the below screenshot.
- In the next screenshot, we drag both sites that are Home Page and Home Page2 on the second table as shown in the below screenshot.
Conclusion
We hope from this article you have understood about the vue.js Drag and Drop. From the above article, we have learned the basic syntax of vue.js Drag and Drop function. We have also learned how we can implement them in Node.js with examples. From this article, we have learned how we can handle vue.js Drag and Drop as well as components in Node.js.
Recommended Articles
This is a guide to Vue.js Drag and Drop. Here we discuss How does drag and drop work in Vue.js and Example along with the codes and explanation. You may also have a look at the following articles to learn more –


