Introduction
With the powerful method of dual-booting, you may install two different operating systems (OS) on a single machine and select which one to boot into. It is comparable to having two distinct computers, each with special capabilities, all in one. Users who want the freedom and open-source nature of Ubuntu 24.04 combined with the dependability and large software library of Windows 11 will find this solution advantageous. You may take use of the advantages of both platforms by dual-booting, whether you want to use them for testing or software development or just to run a wider selection of apps and games. It also acts as a safety net, providing you piece of mind as you can still boot into the other system in the event that one fails.
Table of Contents
Preparation
Check system requirements
The following conditions must be met by your system in order to guarantee a seamless installation:
- RAM: At least 4 GB
- Processor: 2 GHz dual-core or better
- Storage: At least 128 GB of hard drive space
- USB Drive: A USB drive with at least 8 GB of storage
Back up your data
Disk partition manipulation is required for dual-booting, and data loss is always a possibility. That’s why backing up your data is essential before starting the installation. One way to accomplish it is by:
- Copying files to external hard drive or cloud storage.
- Creating a system image for a full backup.
- Ensure you have a recovery option in case of any issues during installation.
Download the Ubuntu 24.04 ISO file.
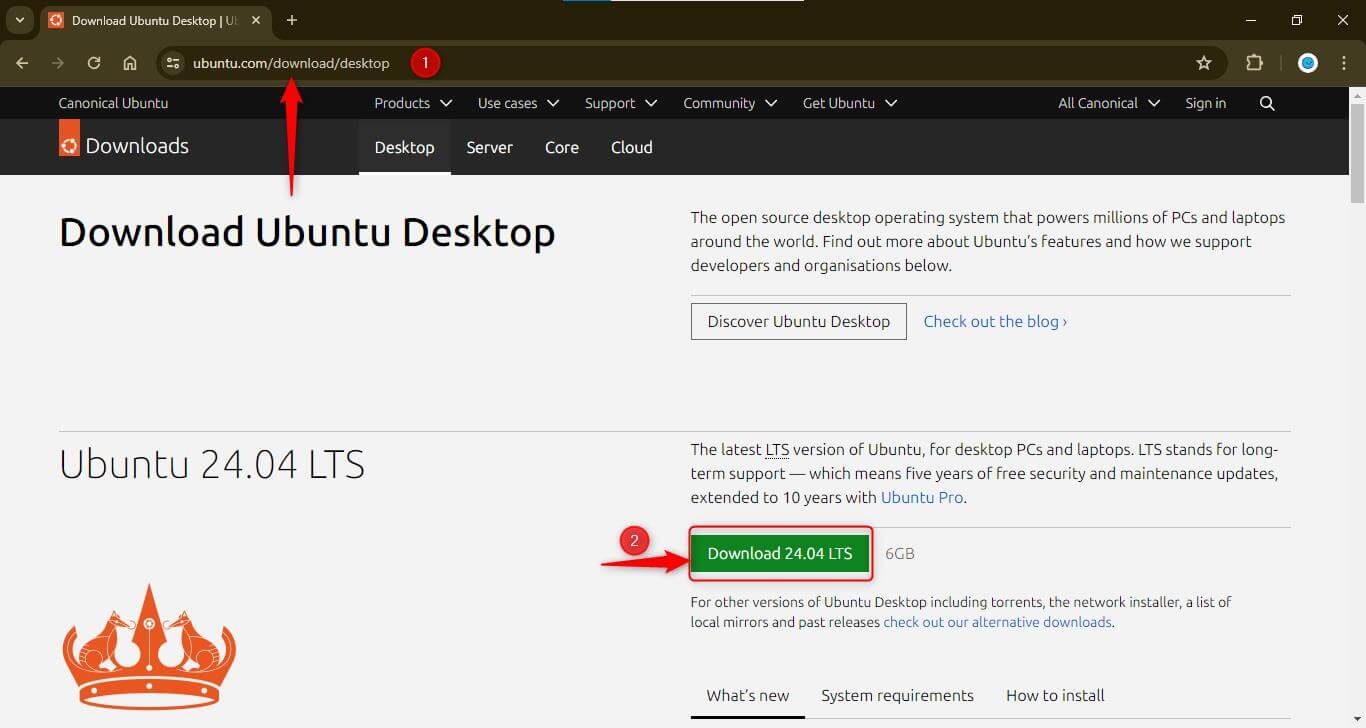
Go to ubuntu-download-desktop, the official Ubuntu website, to obtain the most recent Ubuntu 24.04 ISO file.
Create a bootable USB drive.
You may use specialized programs like Etcher (for macOS and Linux) or Rufus (for Windows) to generate a bootable USB drive for Ubuntu 24.04. These tools are intended to make things easier and guarantee that the bootable disk is created successfully.
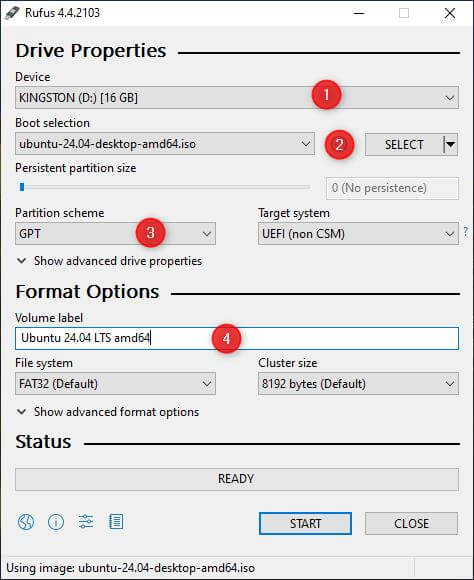
We’ll be using Rufus to create a bootable USB drive.
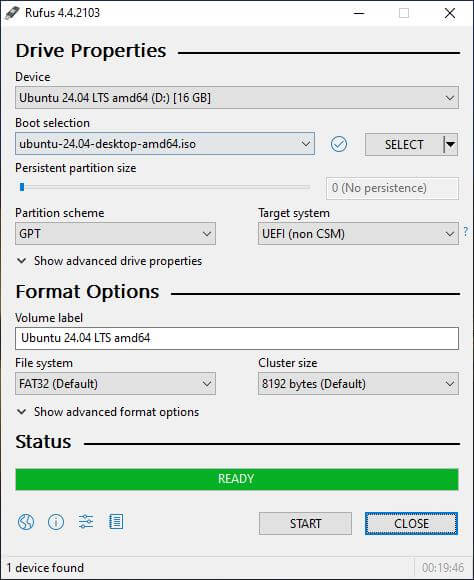
- Plug in your USB and open Rufus.
- It is your bootable USB drive.
- Click on Select and provide the downloaded Ubuntu ISO file here.
- Set the Partition scheme as GPT (GUID Partition Table.)
- Volume label is optional, but you can give it whatever name you want.
- Click on START to start the process of creating a bootable USB drive.
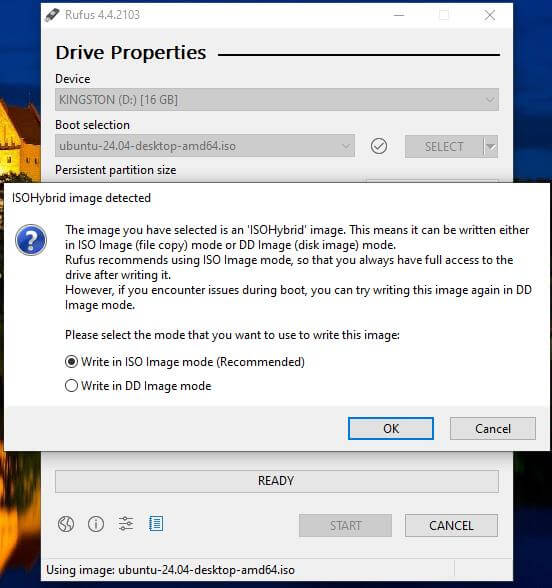
- Select “Write in ISO Image mode” and click OK.
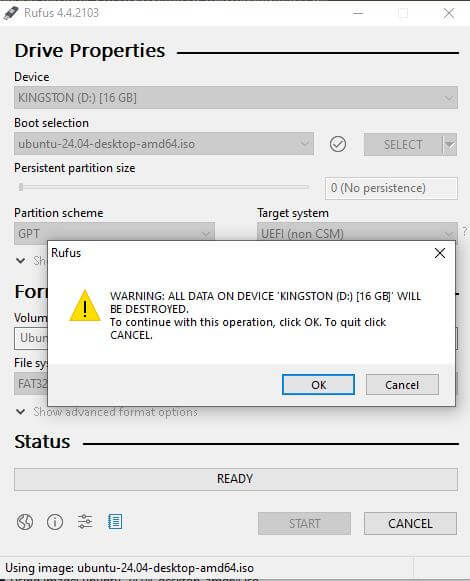
- You’ll receive a warning saying it will erase all data on the USB drive. Click OK
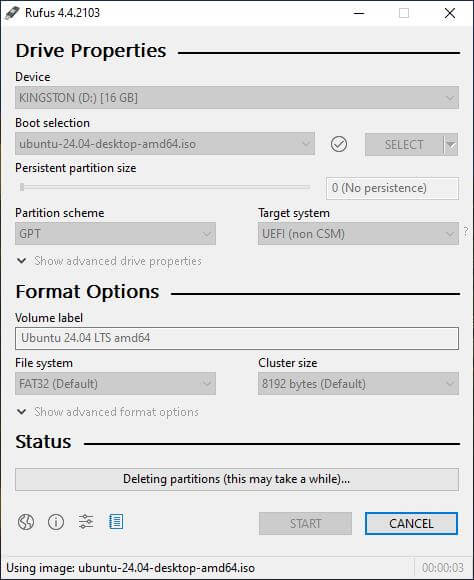
- The process will start, and it will take some time to complete (Depending on the speed of your USB drive.)
- Rufus will show READY if creating a USB bootable drive was successful.
Ensuring UEFI is enabled
In order to use UEFI dual-boot, you must:
- You can access your system’s UEFI/BIOS settings during startup by pressing a key like F2, Del, or Esc.
- Disable ‘Legacy Boot’ and enable ‘UEFI Mode.’
- Ensure ‘Secure Boot’ is disabled if you encounter issues during the Linux installation, as it may prevent unauthorized operating systems from booting.
Partitioning
Understand disk partitioning
Disk partitioning involves dividing your hard drive into separate sections, known as partitions, each of which can be formatted and used independently. To dual-boot Windows 11 and Ubuntu 24.04, you will need to set aside disk space on your computer for each operating system. Comprehending disk partitioning guarantees effective storage management and prevents data loss during installation.
Shrink Windows partition
You must reduce the size of the current Windows partition in order to make room for Ubuntu before installing it. It is preferable to use the Windows Disk Management tool to steer clear of any problems.
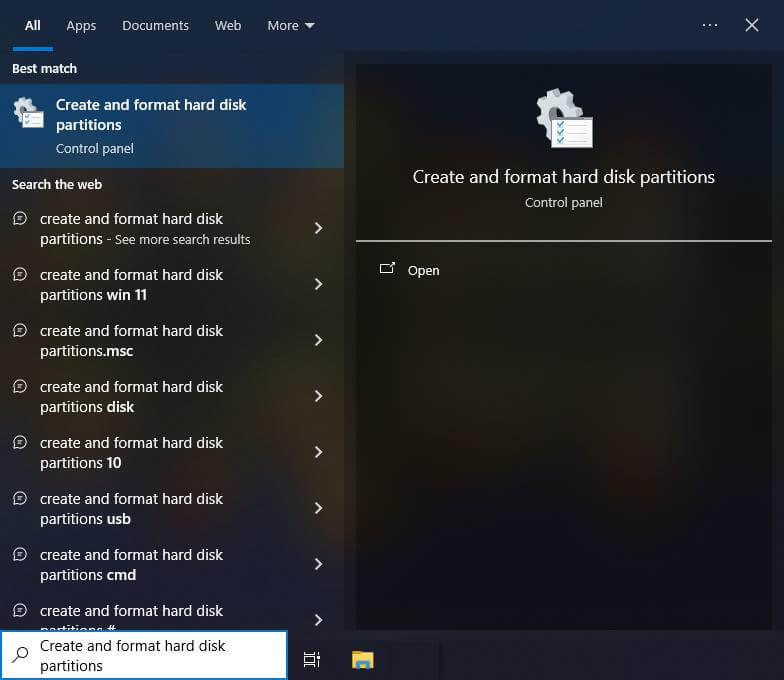
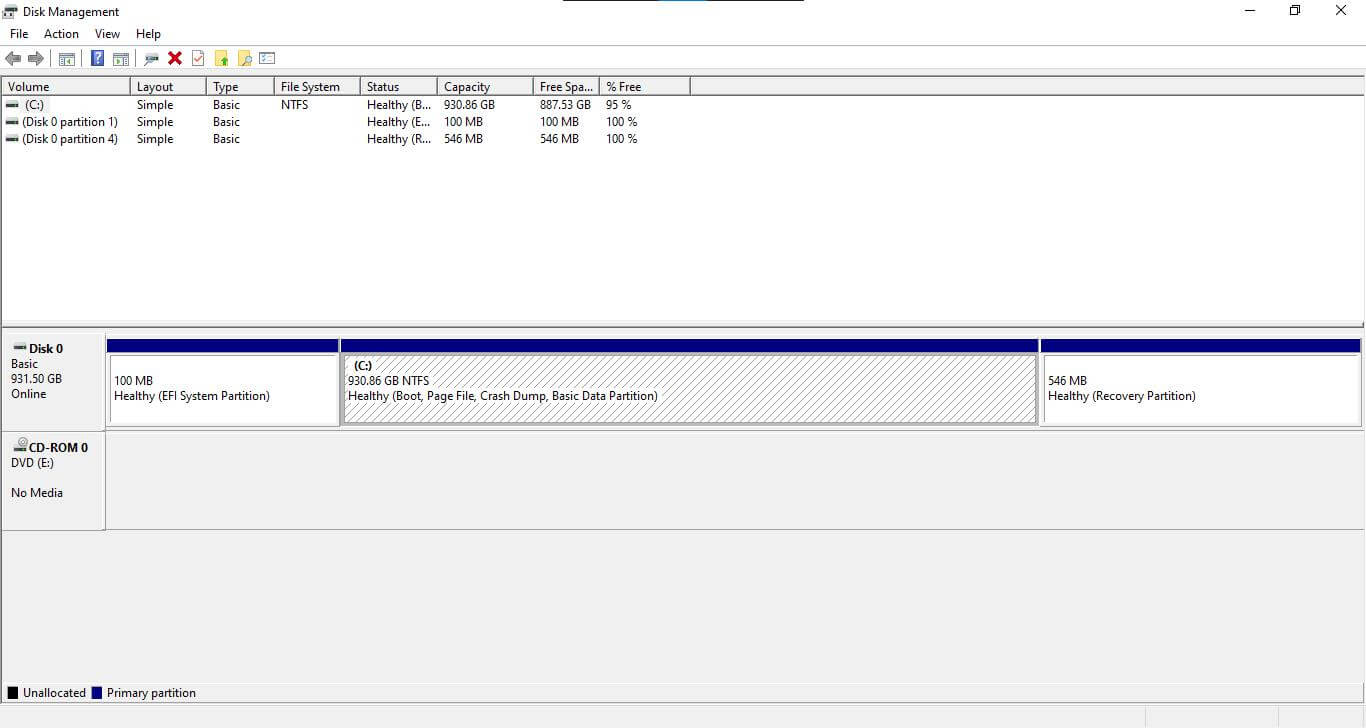
- To open Disk Management in Windows, search for “create and format hard disk partitions.”
- It will open the Disk Management window.
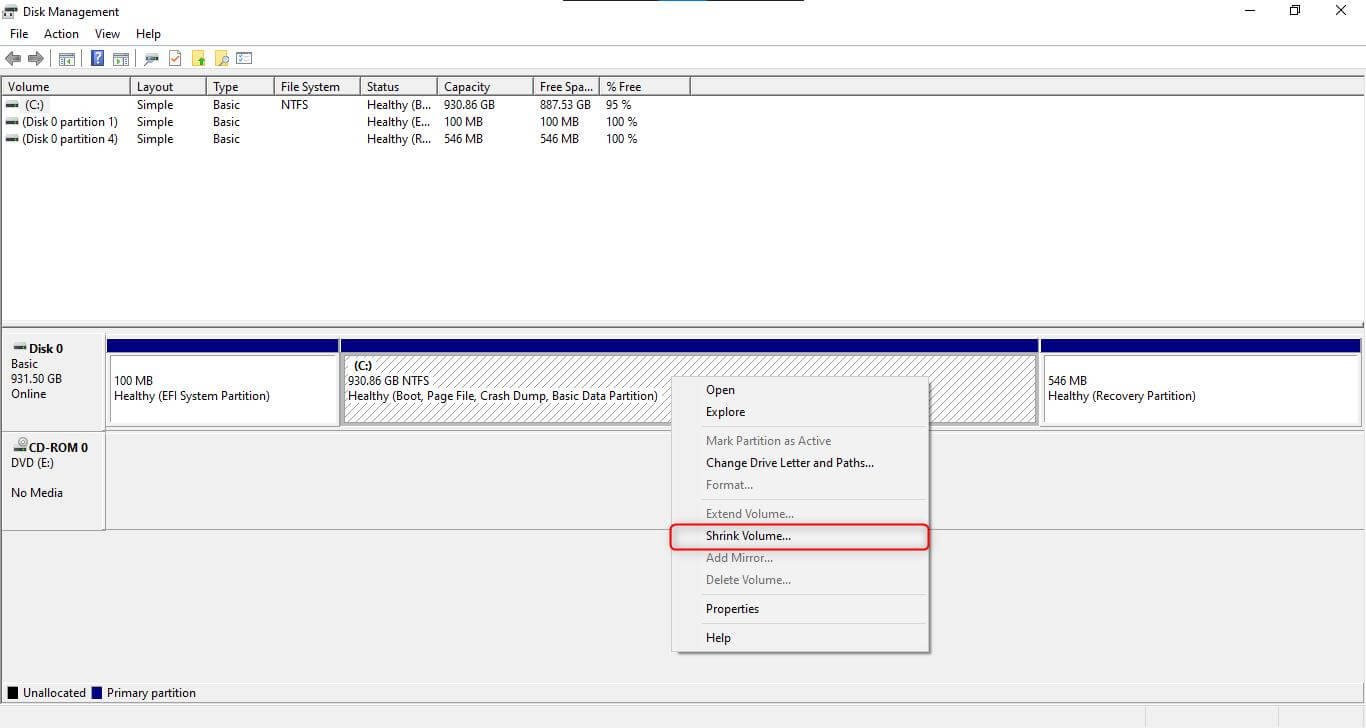
- Right-click on the Windows partition (usually C:) and select ‘Shrink Volume’. This action will initiate the process of creating unallocated space for Ubuntu. Remember, the goal is to create enough unallocated space to accommodate Ubuntu without affecting the performance of your Windows system.
- You can shrink any volume. The goal is to create unallocated space for Ubuntu.
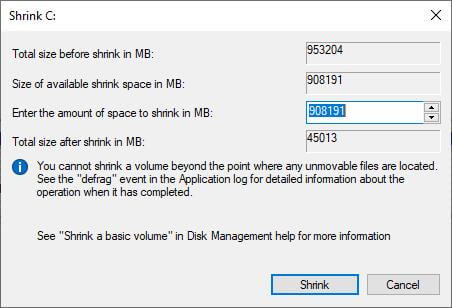
- When you click “Shrink Volume,” a new popup window will appear
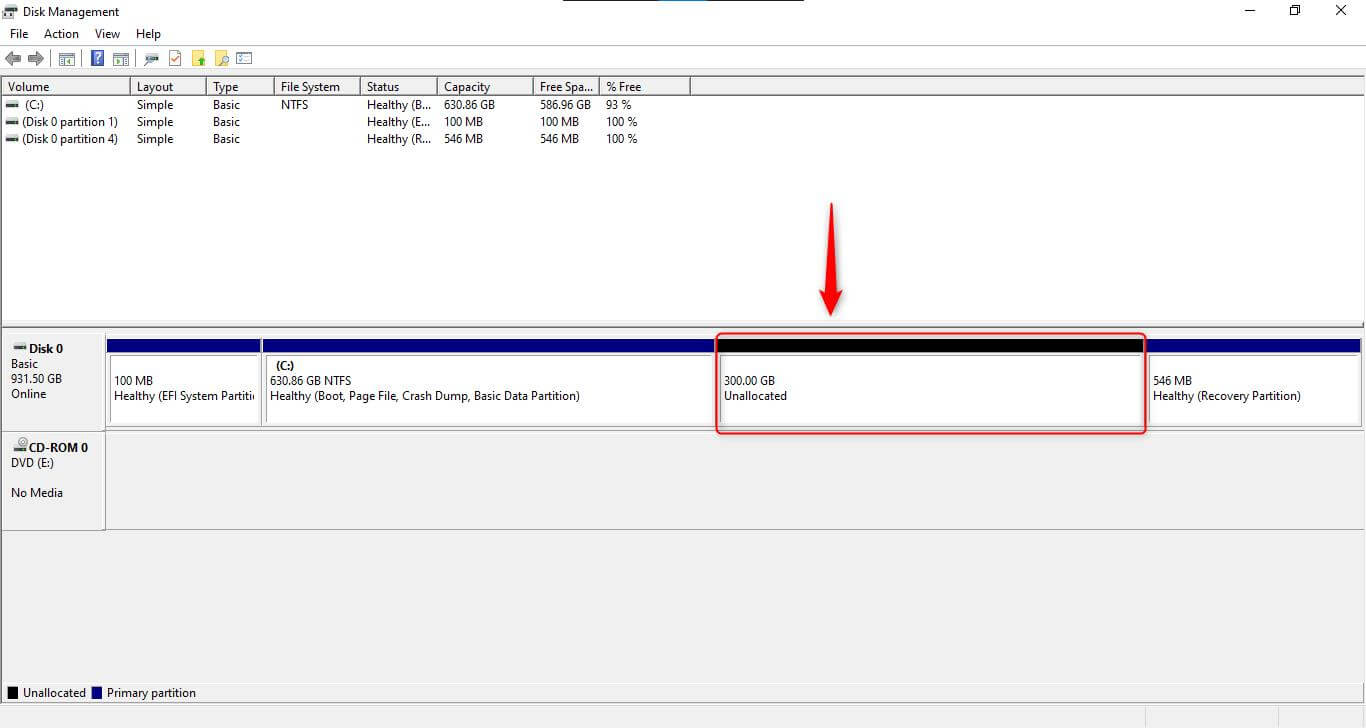
- Decide the amount of space to shrink (the free space will become ‘Unallocated’).
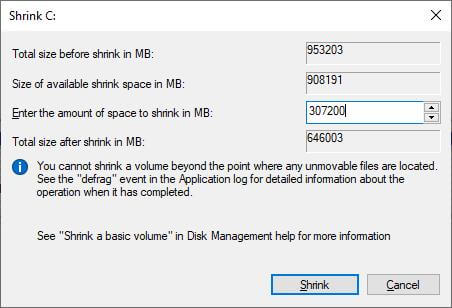
- We are going to allot 300GB for Ubuntu, so to shrink 300GB from the whole partition, we first convert MB to GB, i.e., 1 GB = 1024 MB, so 300 GB = 307200 MB, now we subtract 307200 MB from 953204
- Shrink the volume to proceed.
- Because Ubuntu utilizes EXT4 (the fourth extended file system) while Windows uses NTFS (the New Technology File System), we have to leave the space unallocated. Ubuntu will automatically format the unallocated drive into the EXT4 file system during installation.
BIOS/UEFI Settings
Access BIOS/UEFI settings
Using Windows Settings:
- Go to Settings > Update & Security > Recovery.
- Under “Advanced startup,” click the Restart Now button.
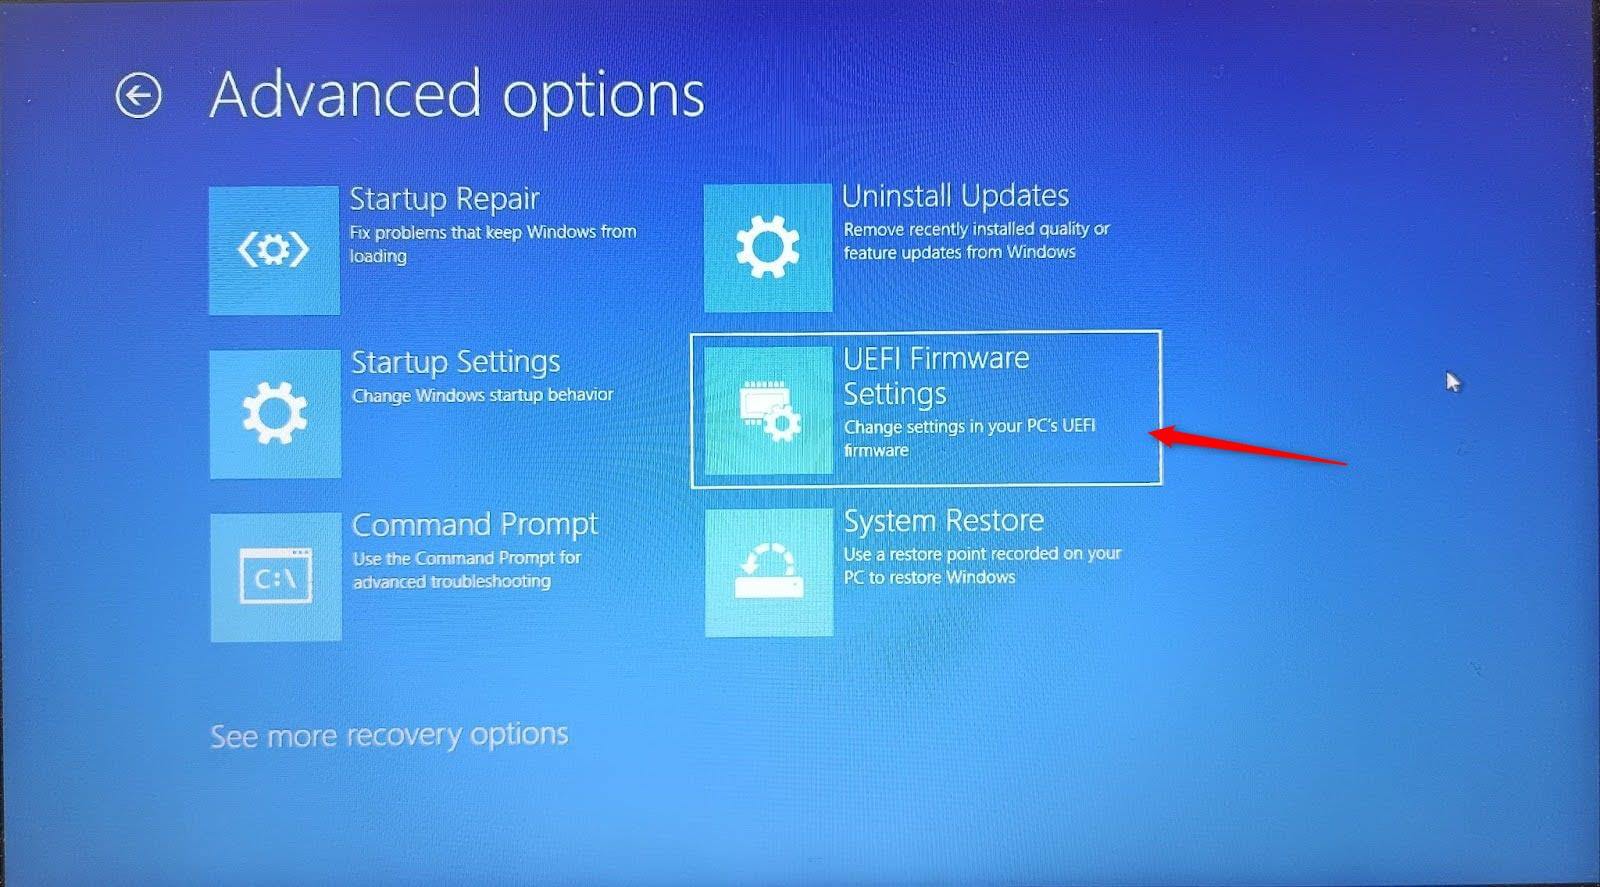
- After the system restarts, go to Troubleshoot > Advanced Options> UEFI Firmware Settings.
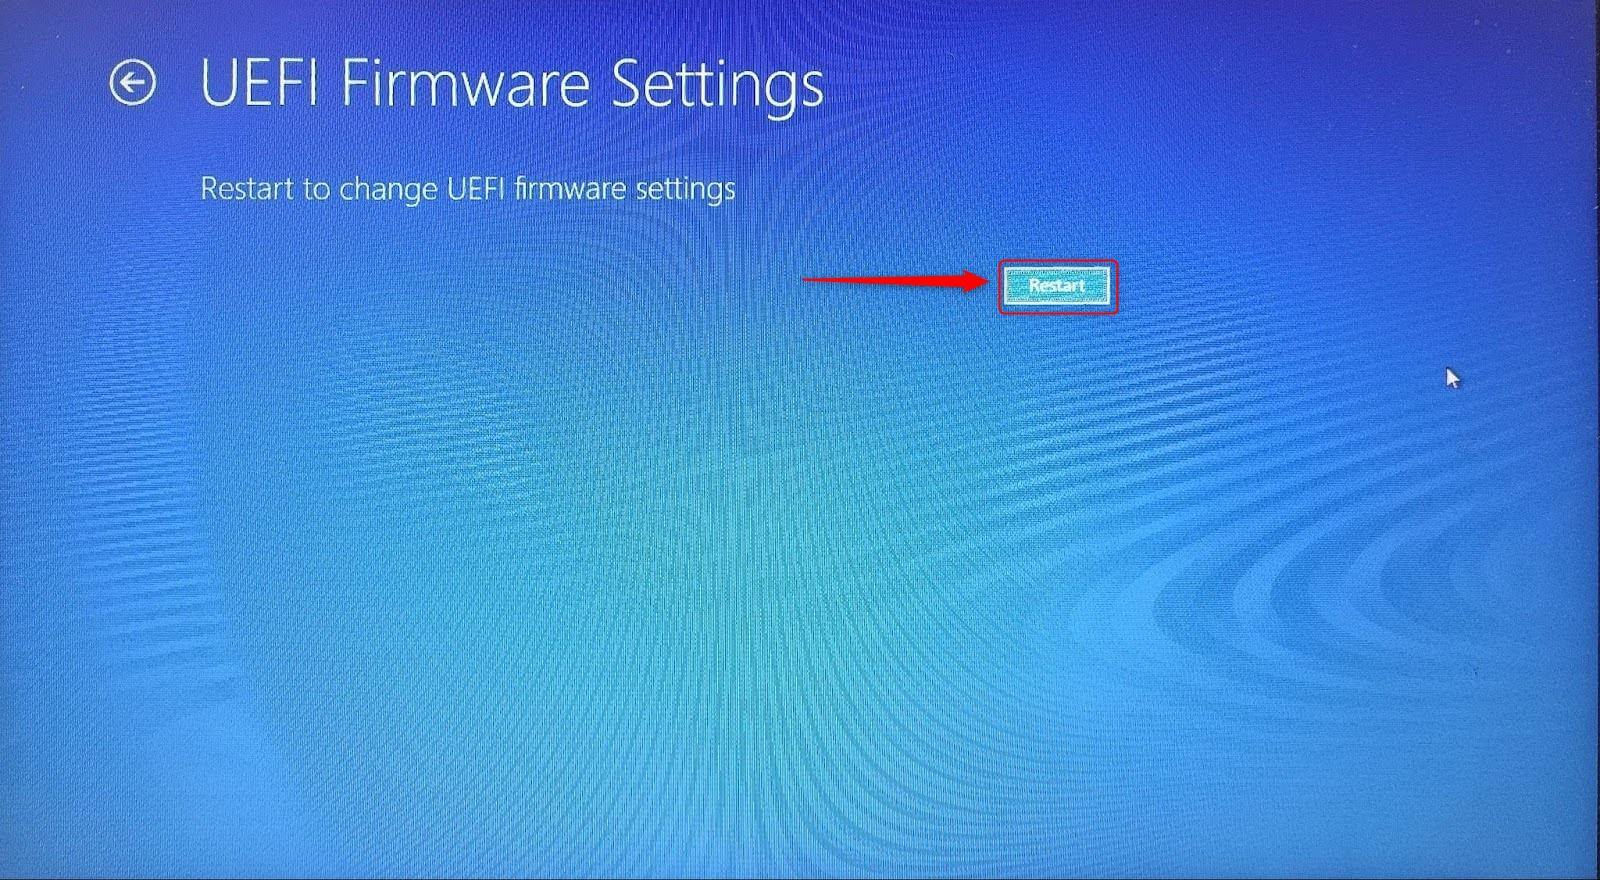
- Click Restart to enter the BIOS/UEFI settings.
Using Boot Key:
Restart your computer and repeatedly press the “Del” key to enter the BIOS/UEFI. This key is often displayed during the boot process and can be Esc, Delete, or one of the Function keys (F1, F2, F10.)
Change boot order
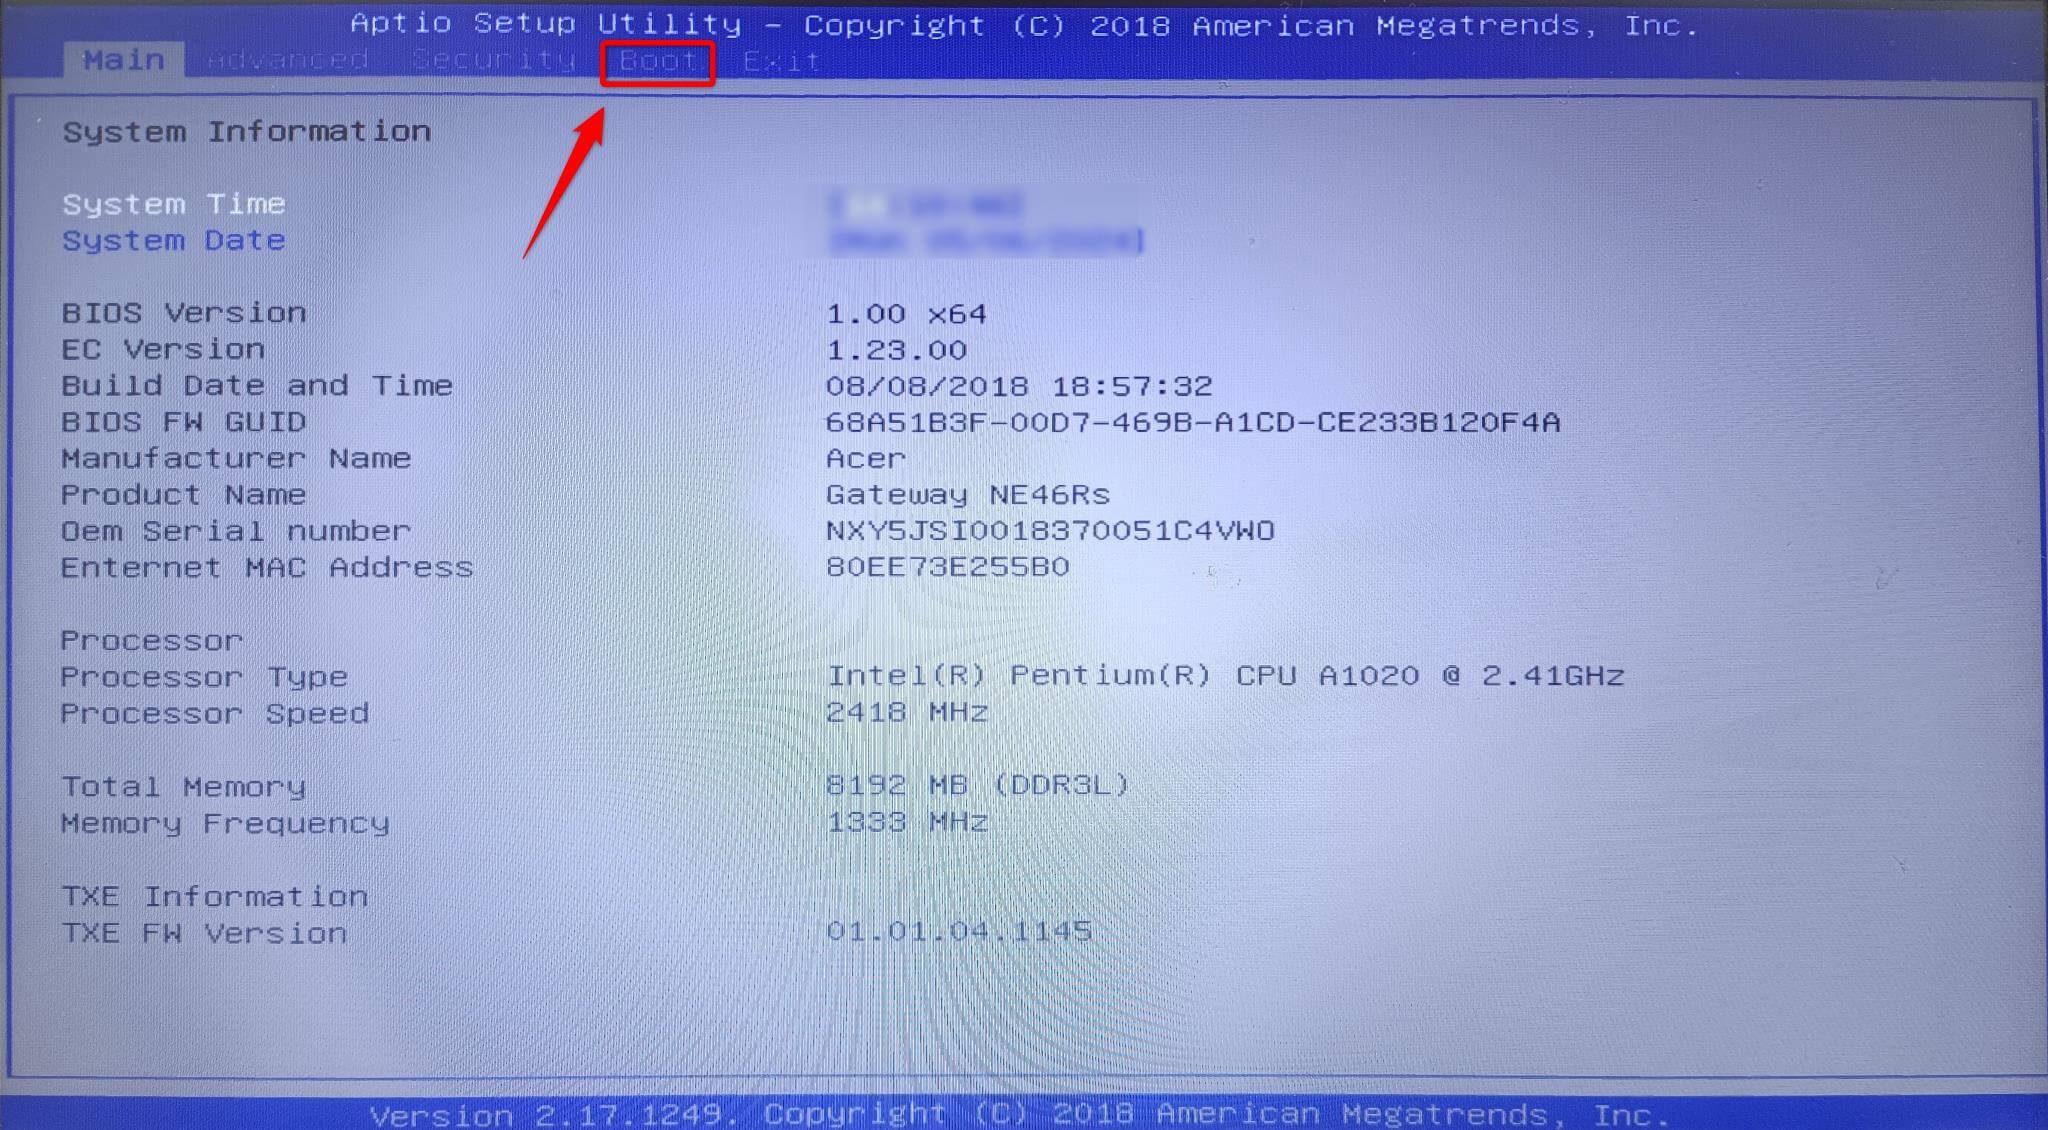
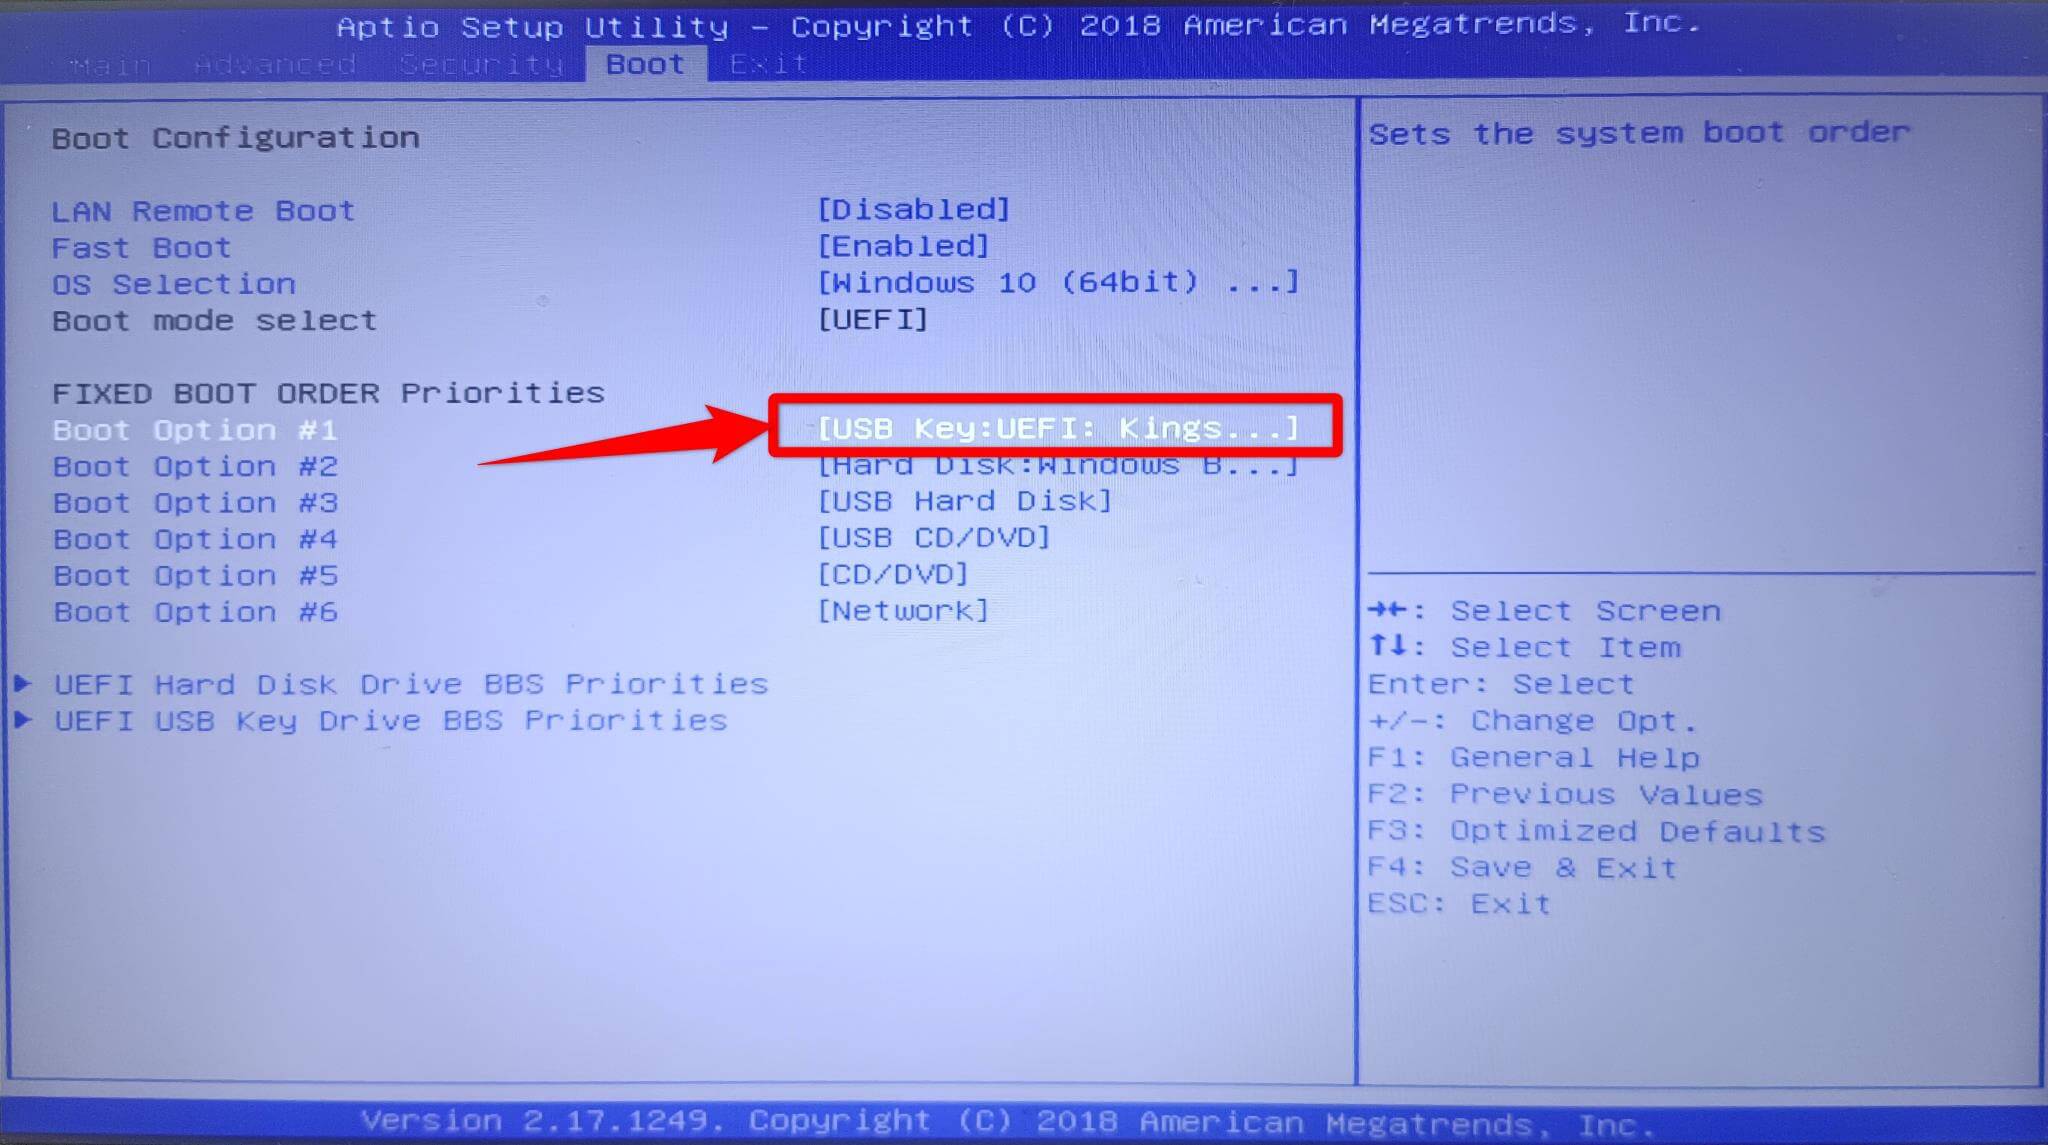
Look for the Boot tab or menu once you’re in the BIOS/UEFI settings.
- Navigate to the Boot section using the arrow keys.
- You will now see a list of bootable devices. Use the + or – keys or follow on-screen instructions to change the order of the devices.
- Place the USB drive or DVD (with Ubuntu 24.04) at the top of the list to boot from it.
- Save changes and exit the BIOS/UEFI. It is usually done by pressing the F10 key and selecting Yes to confirm.
Installing Ubuntu
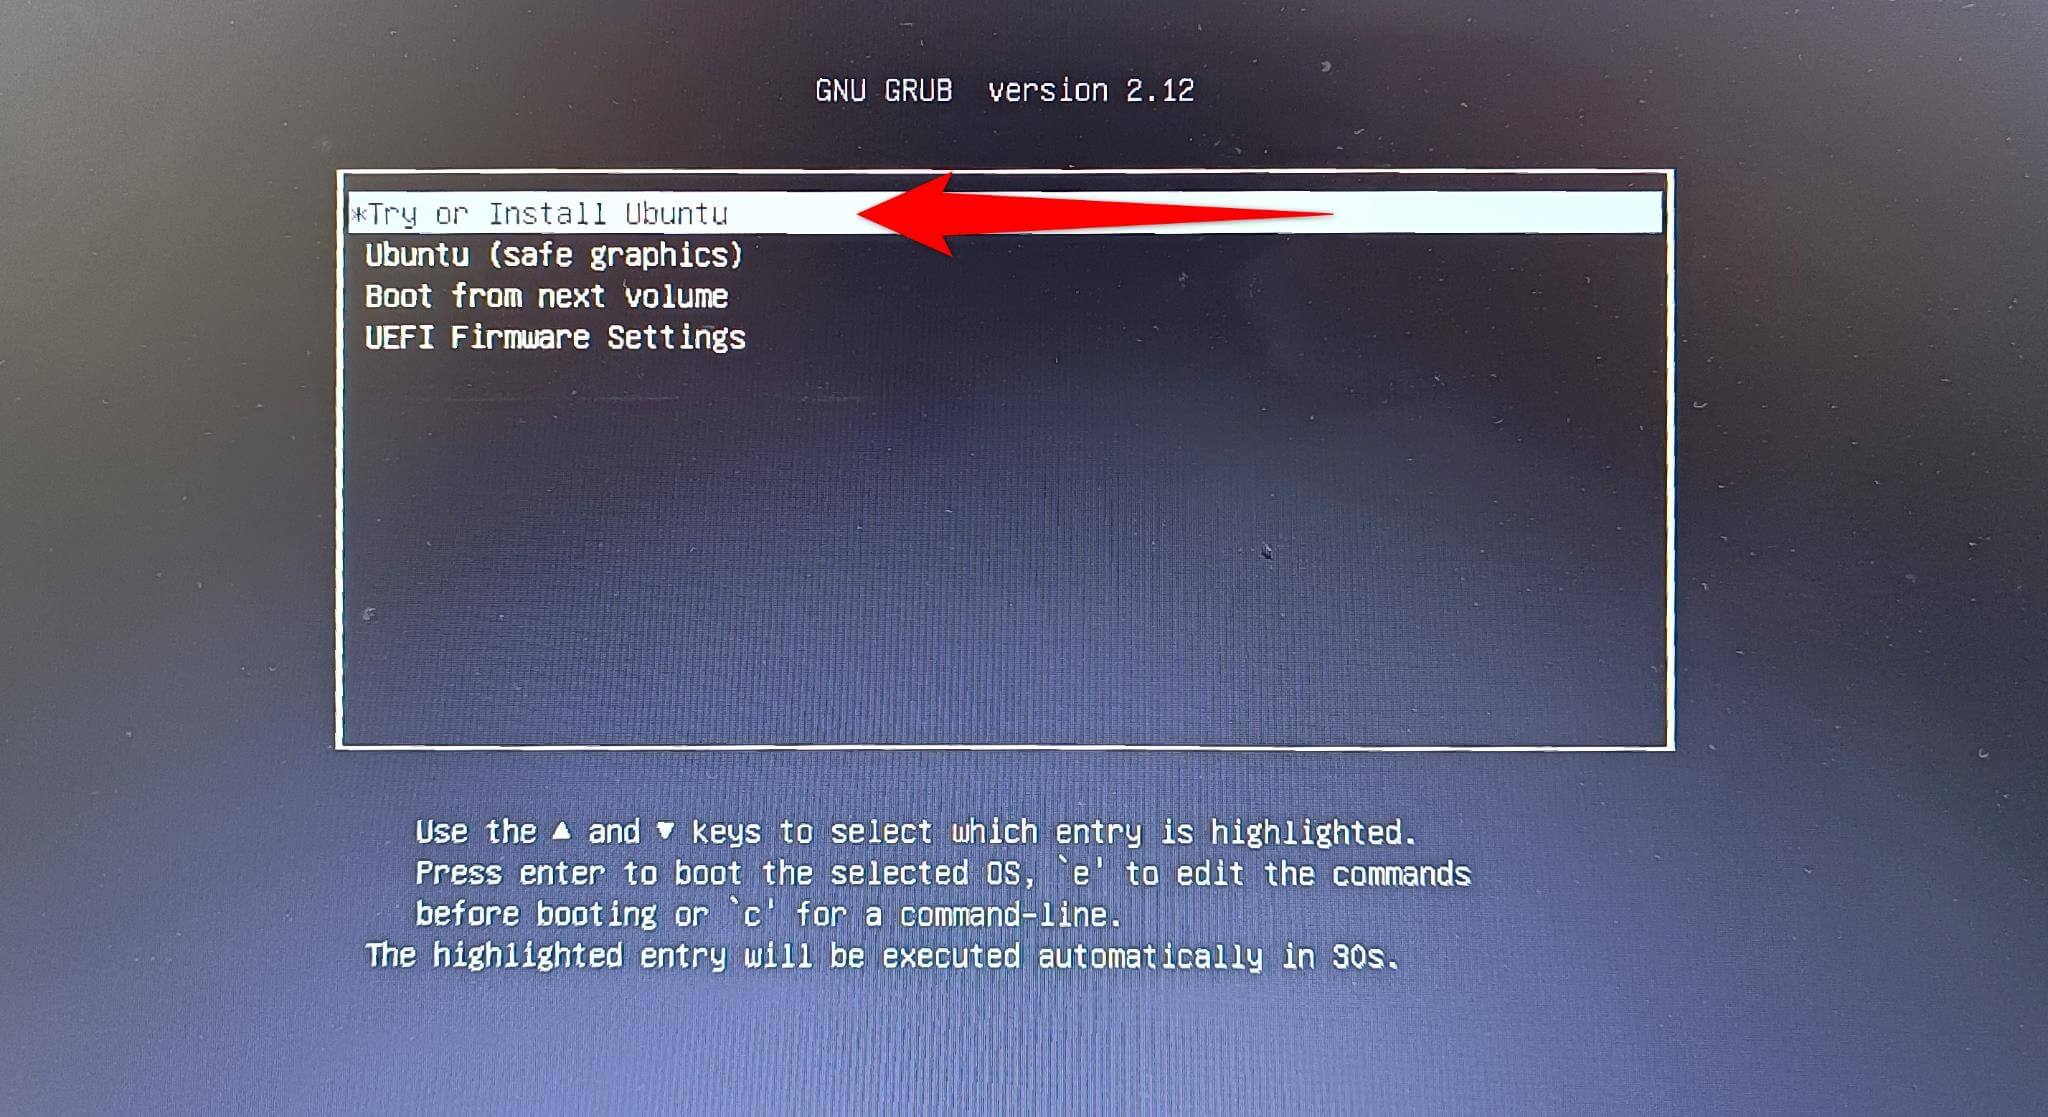
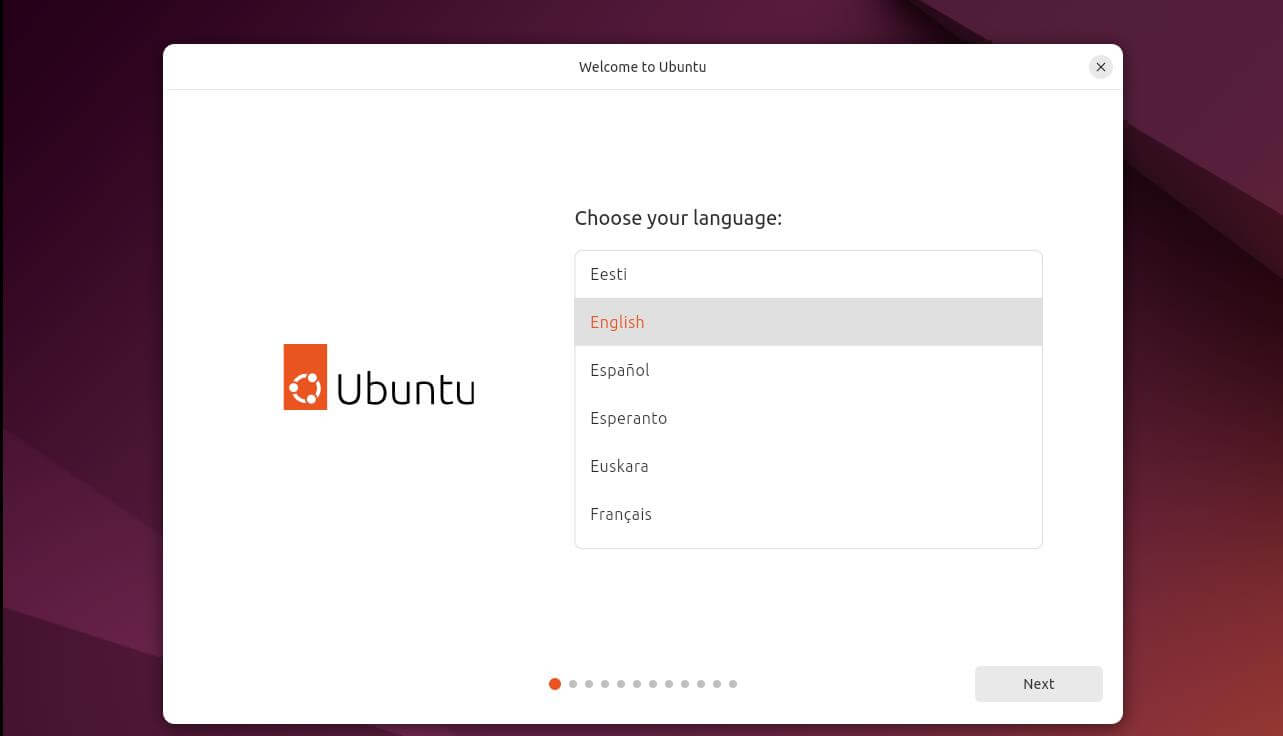
- Once booted from the USB, the Ubuntu installation wizard will greet you.
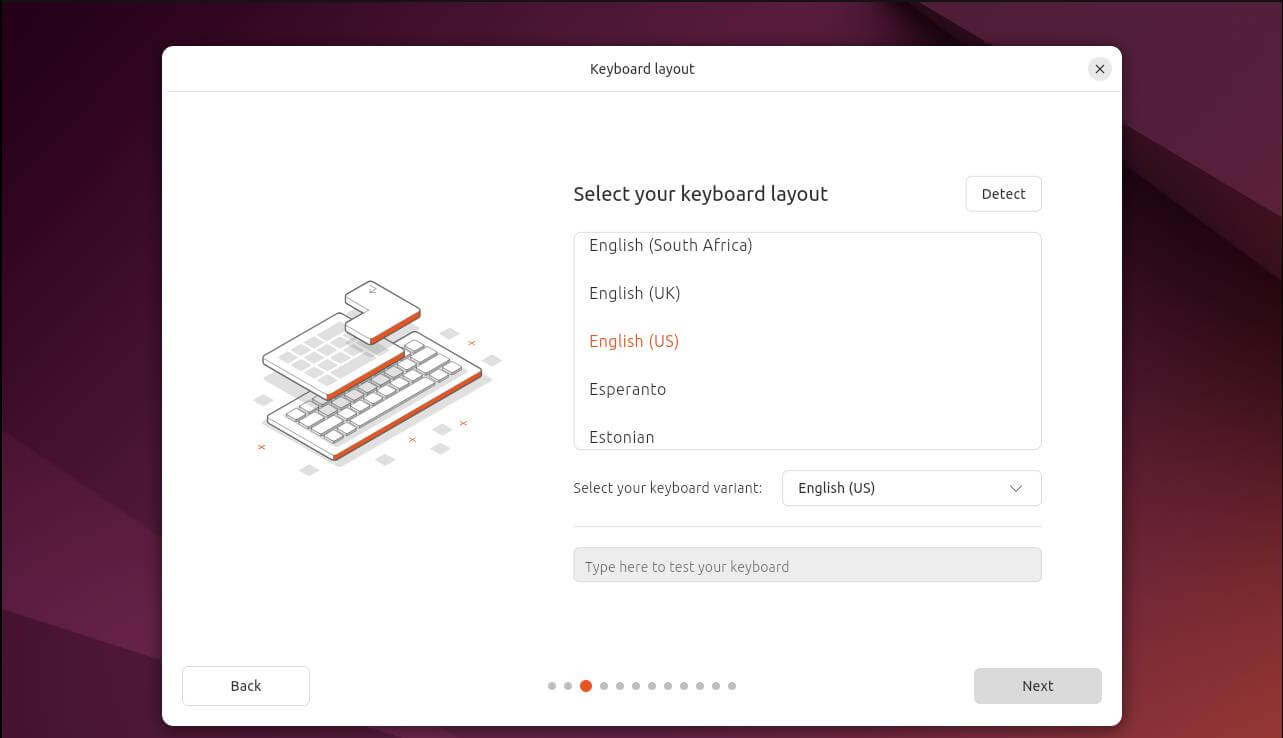
- Selecting the installation language and keyboard layout
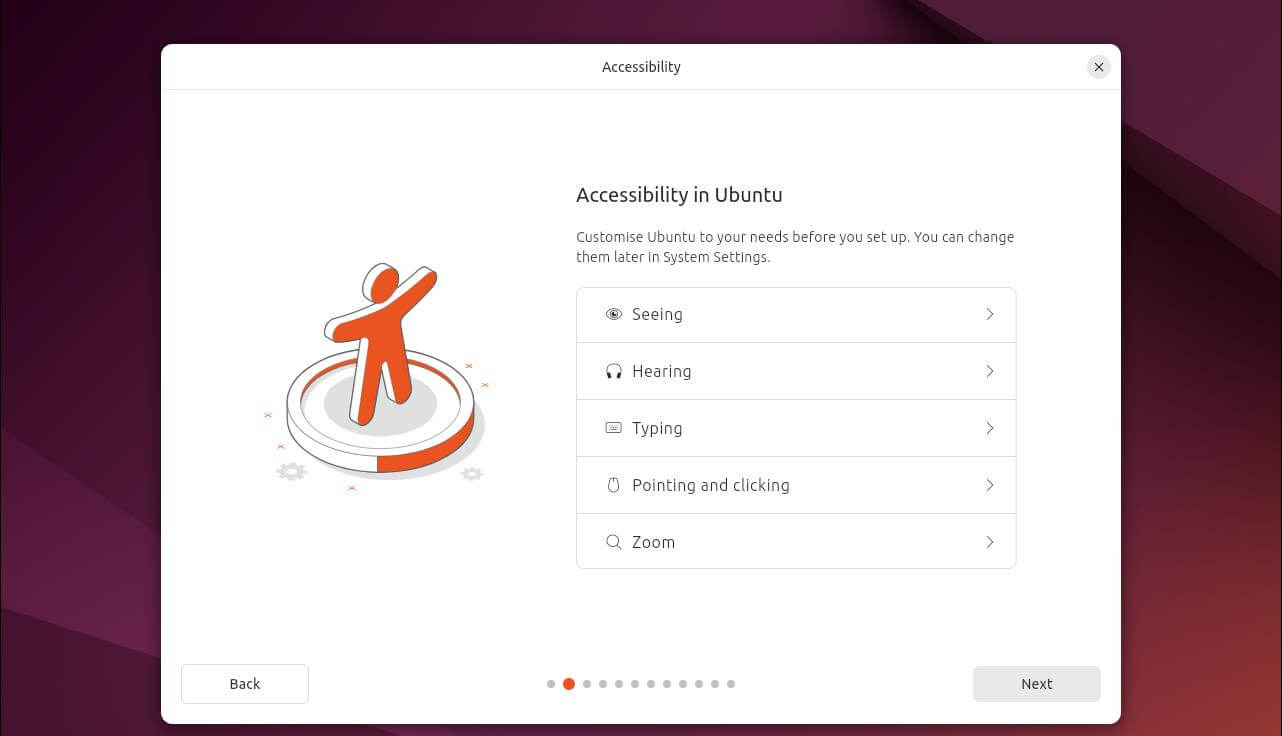
- Select the keyboard layout.
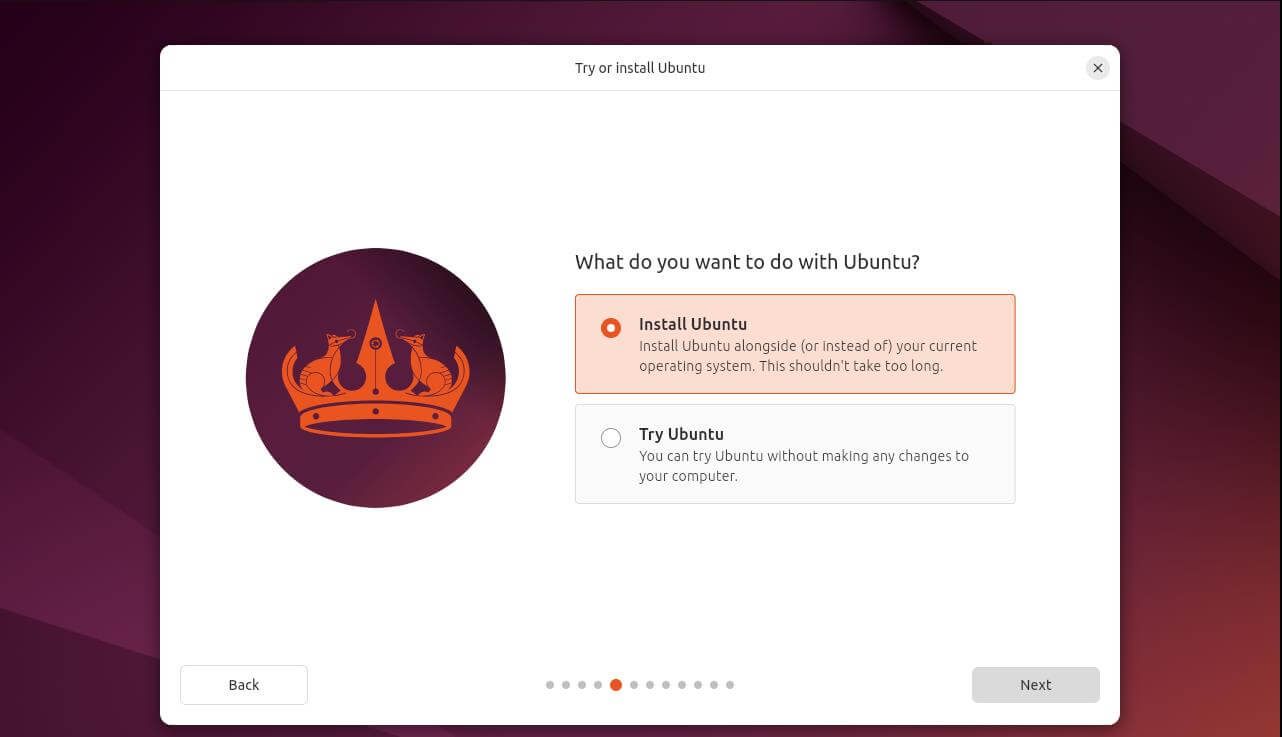
- Welcome screen options.
- Try Ubuntu: This option allows you to run Ubuntu from the USB drive without installing it. It helps test Ubuntu or access files on your computer before installing.
- Install Ubuntu: Select this option to begin the installation process. This option will guide you through installing Ubuntu 24.04 on your computer’s hard drive.
Click on Install Ubuntu
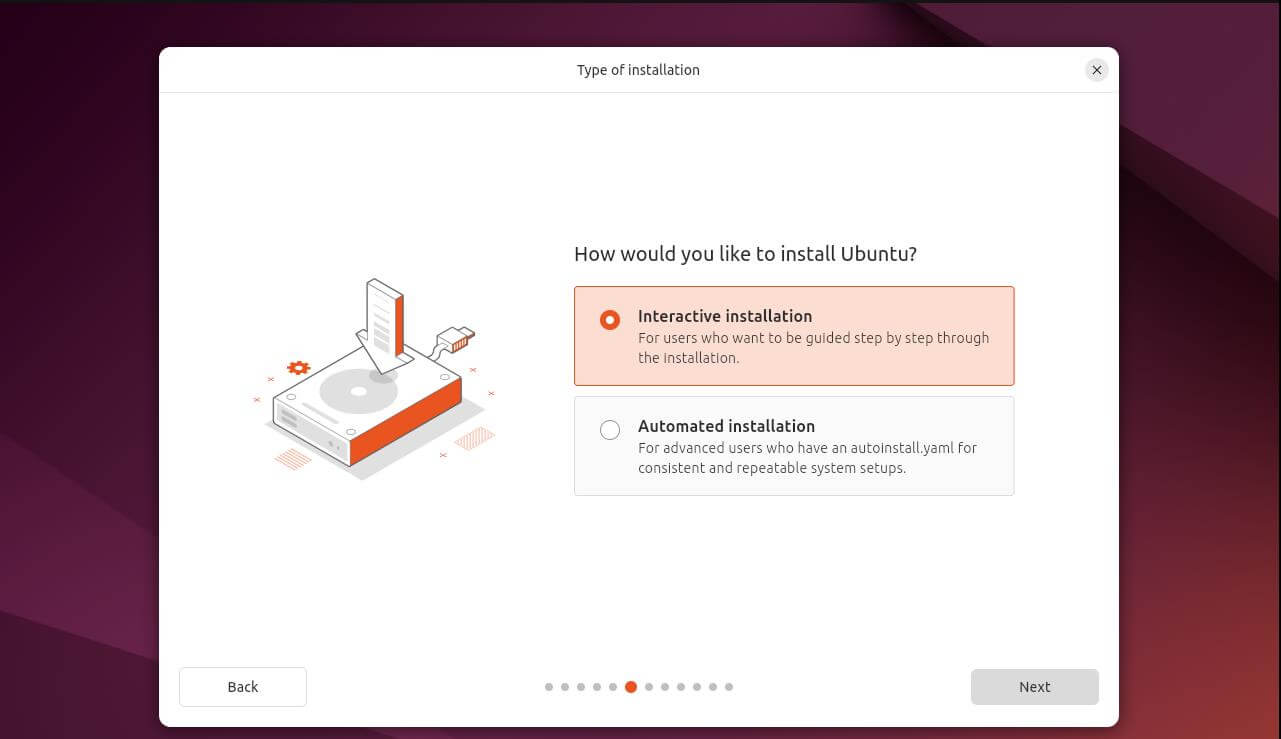
- Type of installation
- Interactive Installation: This is the traditional method in which the installer guides you through each step, making it easy to set up Ubuntu.
- Automated Installation: This method uses a pre-configured file (YAML) to automate the installation without user interaction. They are used to deploy Ubuntu on multiple machines with the same configuration Quickly.
Select Interactive Installation
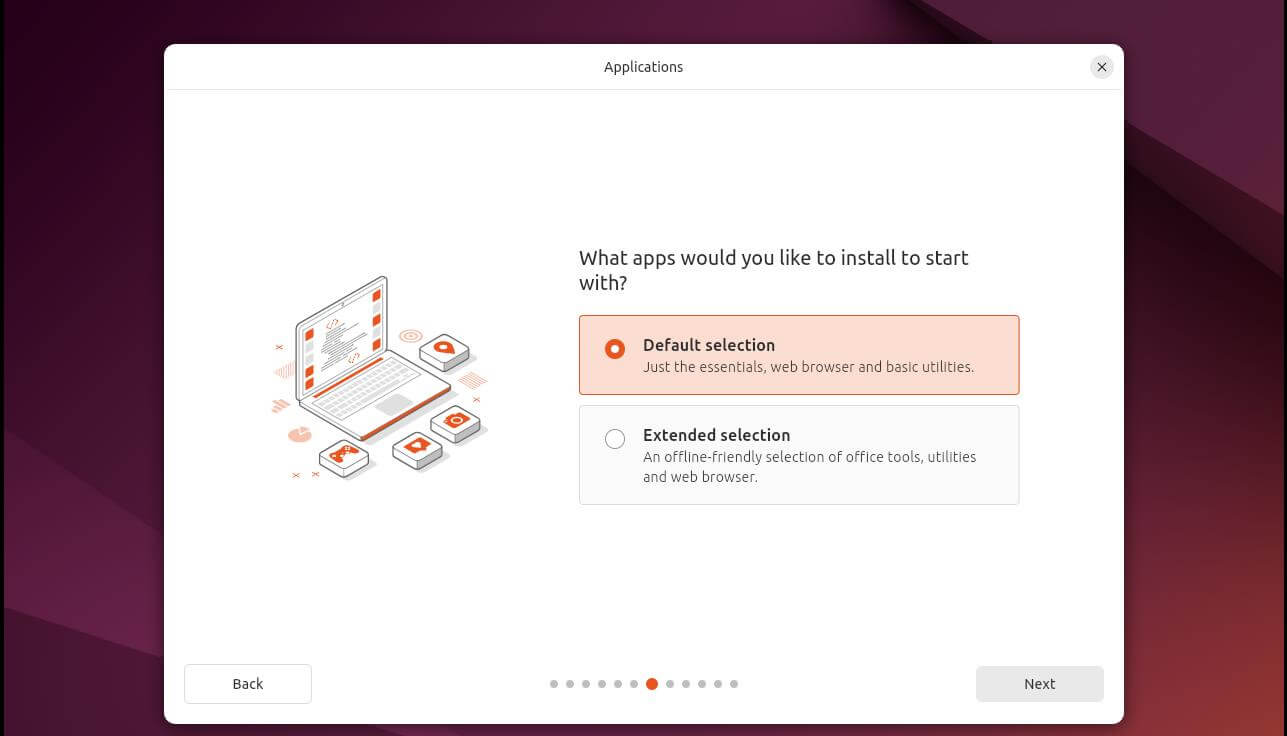
- Applications
- Default selection (previously Minimal): This option offers a leaner installation, ideal for those who prefer a base system with minimal overhead.
- Extended selection (previously Normal): This option provides a more comprehensive installation suitable for everyday use. It includes commonly used applications like LibreOffice (office suite), Thunderbird (email client), and essential utilities.
Click Extended Selection
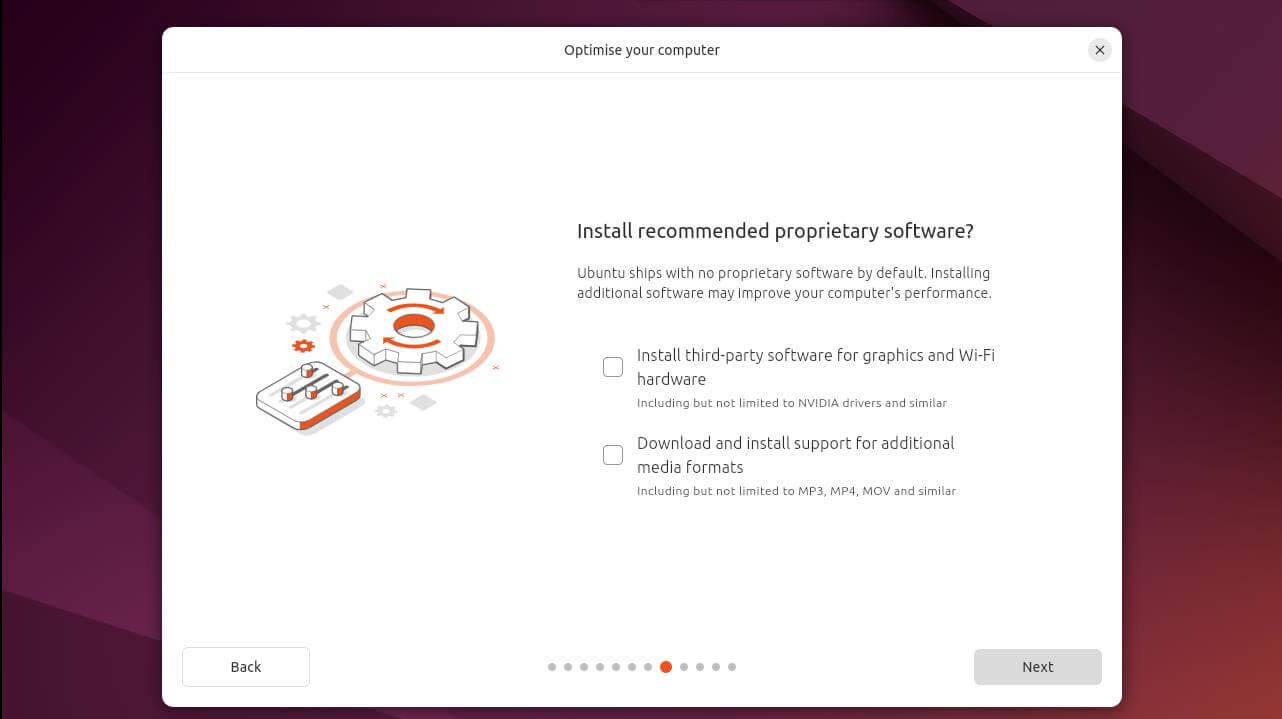
- Tick both and click next.
- Choose Installation Type
- You’ll be presented with several installation options. Select Install alongside Windows Boot Manager. This option will automatically use the unallocated partition on your hard drive to install Ubuntu 24.04 alongside Windows.
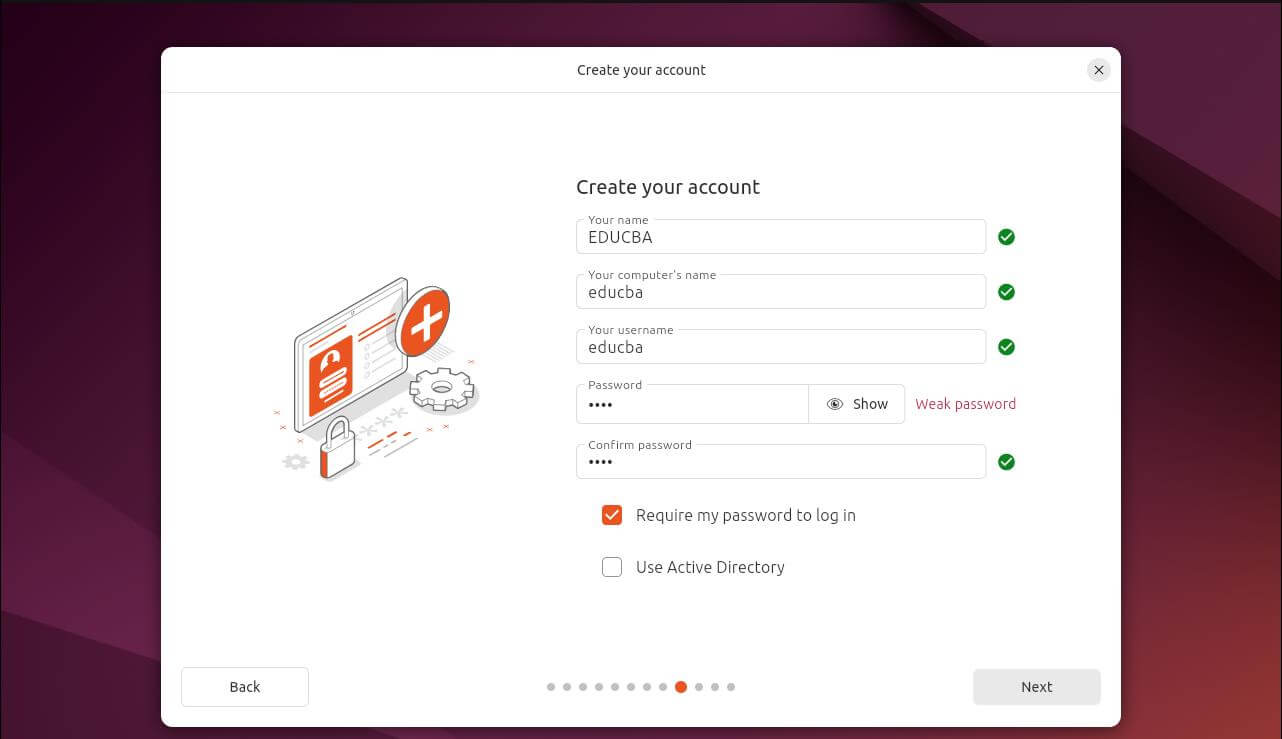
- Creating a user account (username and password).
- You have to create a user account in this step. You will use this account to log in to your Ubuntu system.
- Your Name: Enter your full name or a desired username for your account.
- Choose a computer name: This is your computer’s name on the network.
- Pick a password: Create a strong password for your account.
- Click Next
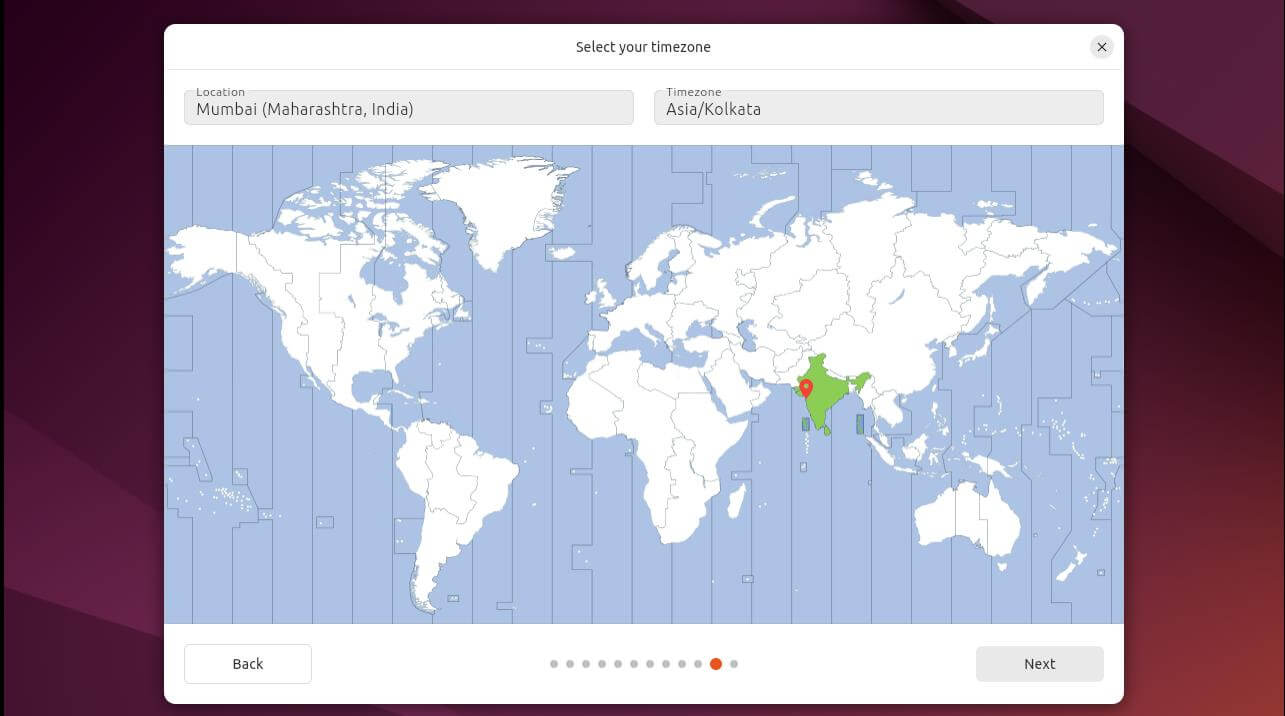
- Lastly, select the timezone.
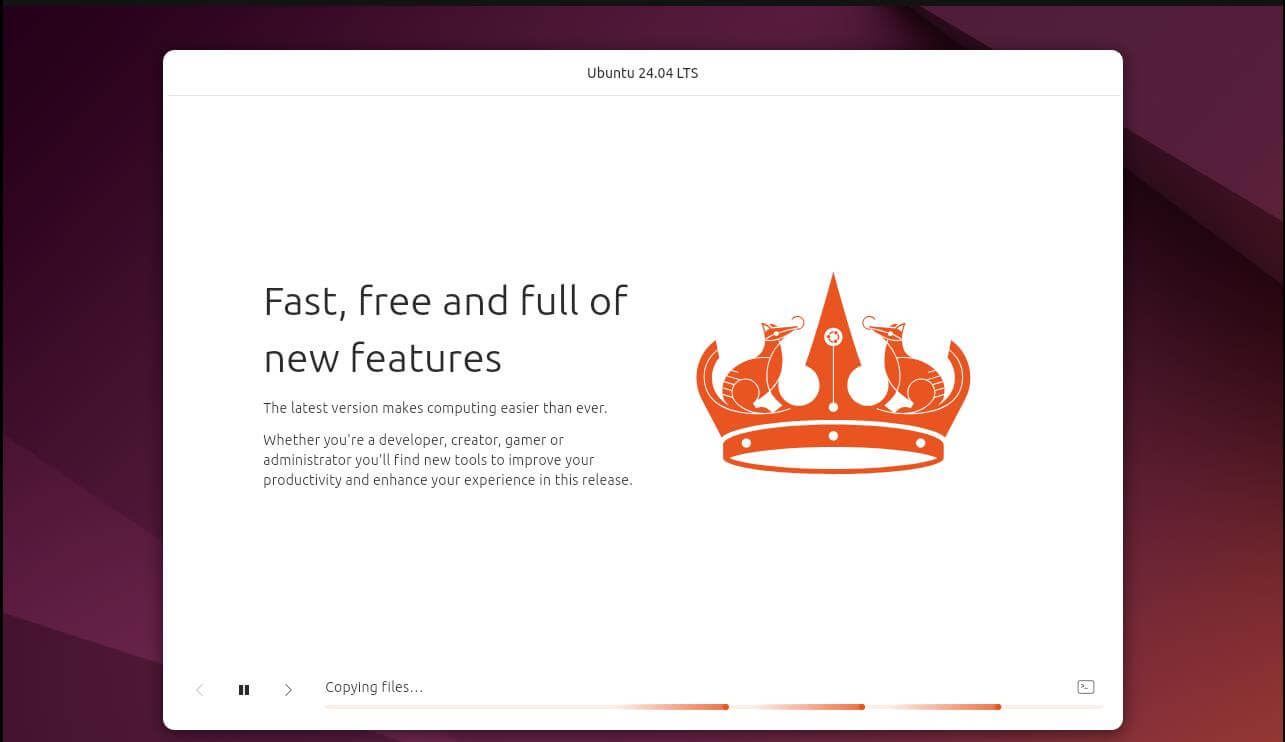
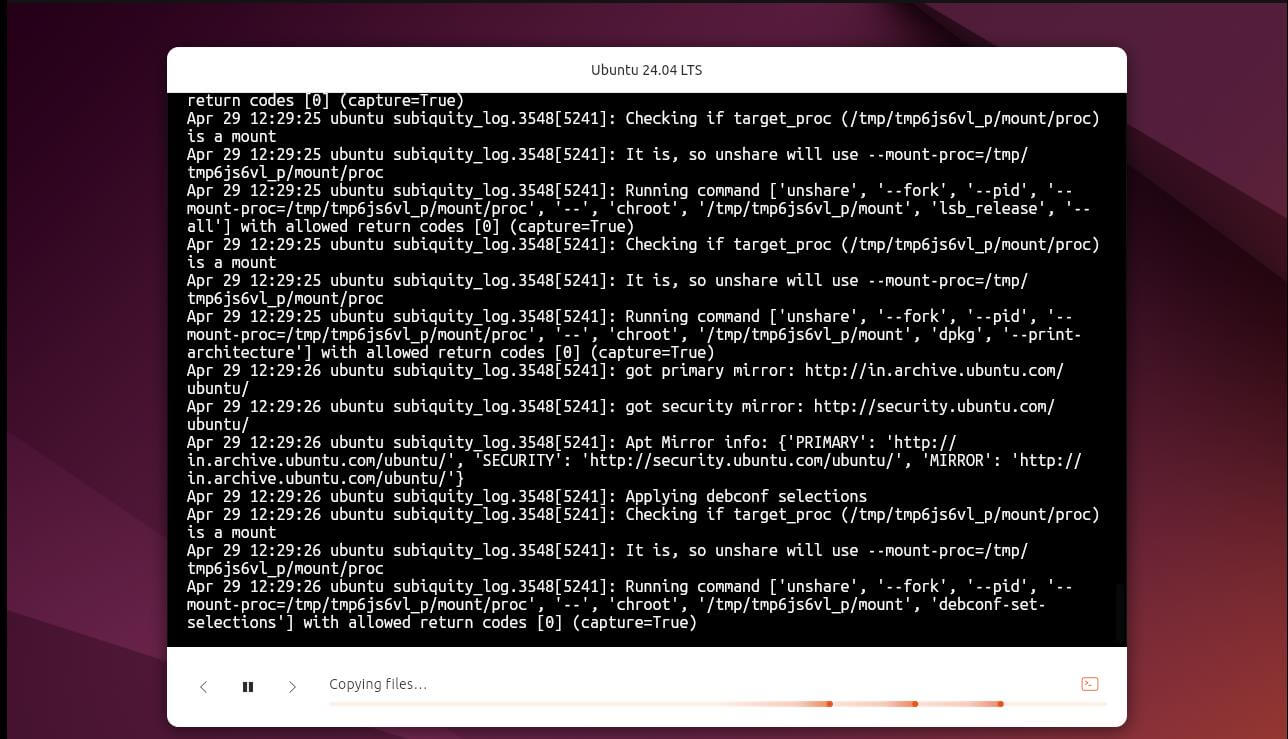
- Click next to start the installation process.
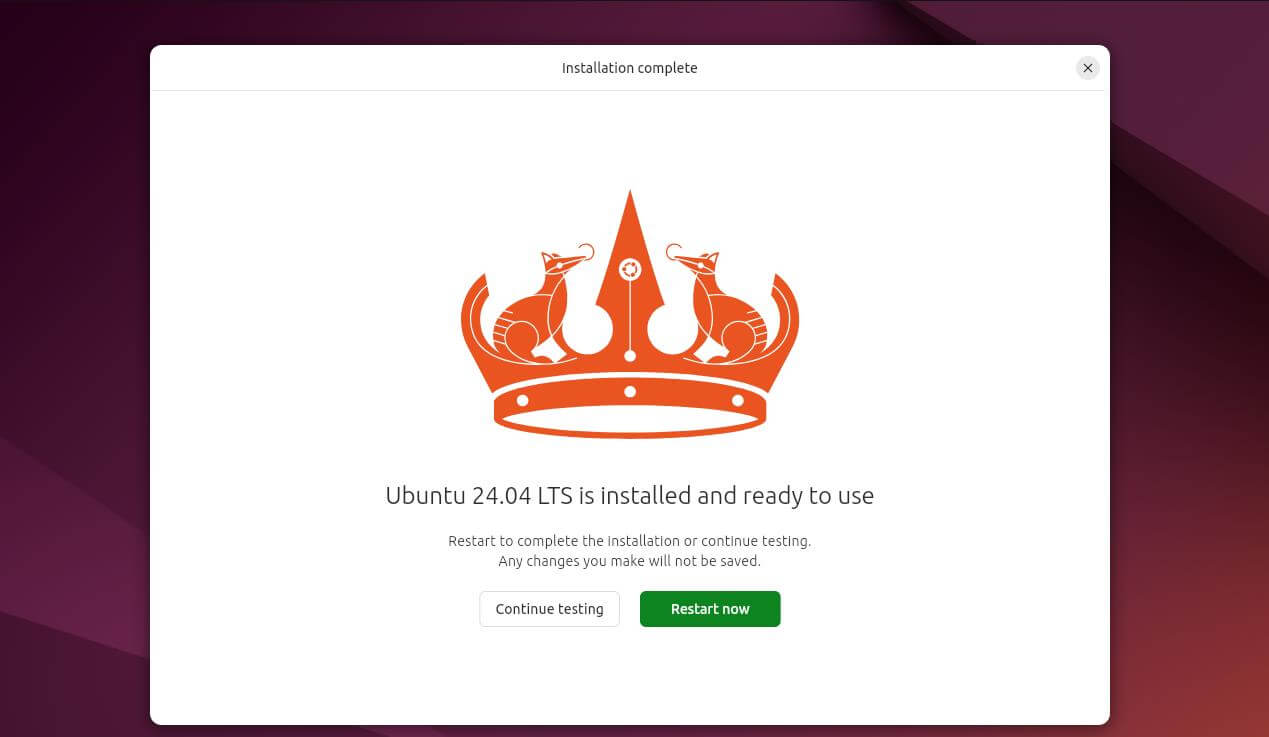
- Once the installation is complete, you must restart the system.
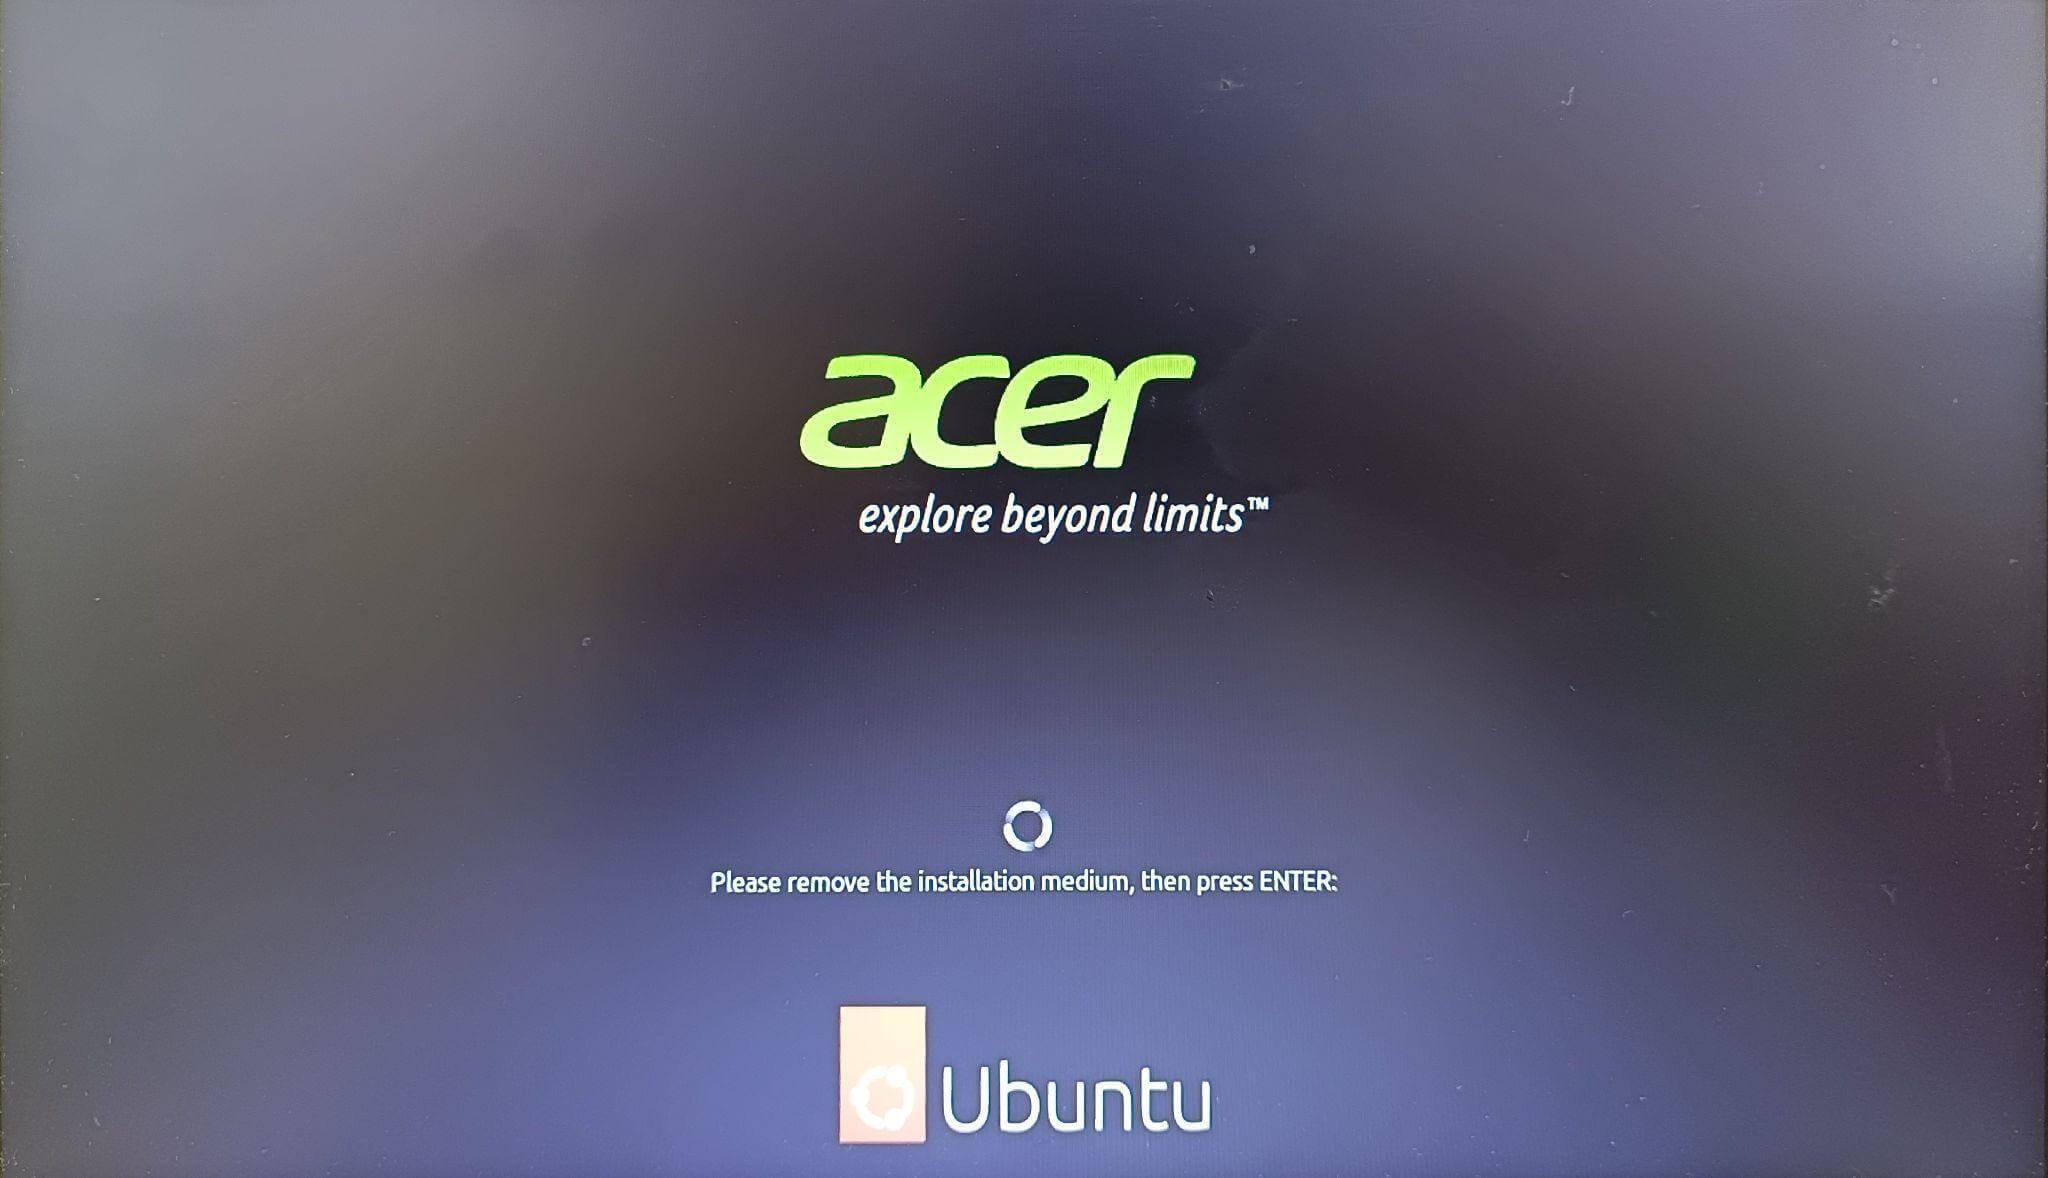
- Remove the installation media (USB drive) and press Enter when instructed.
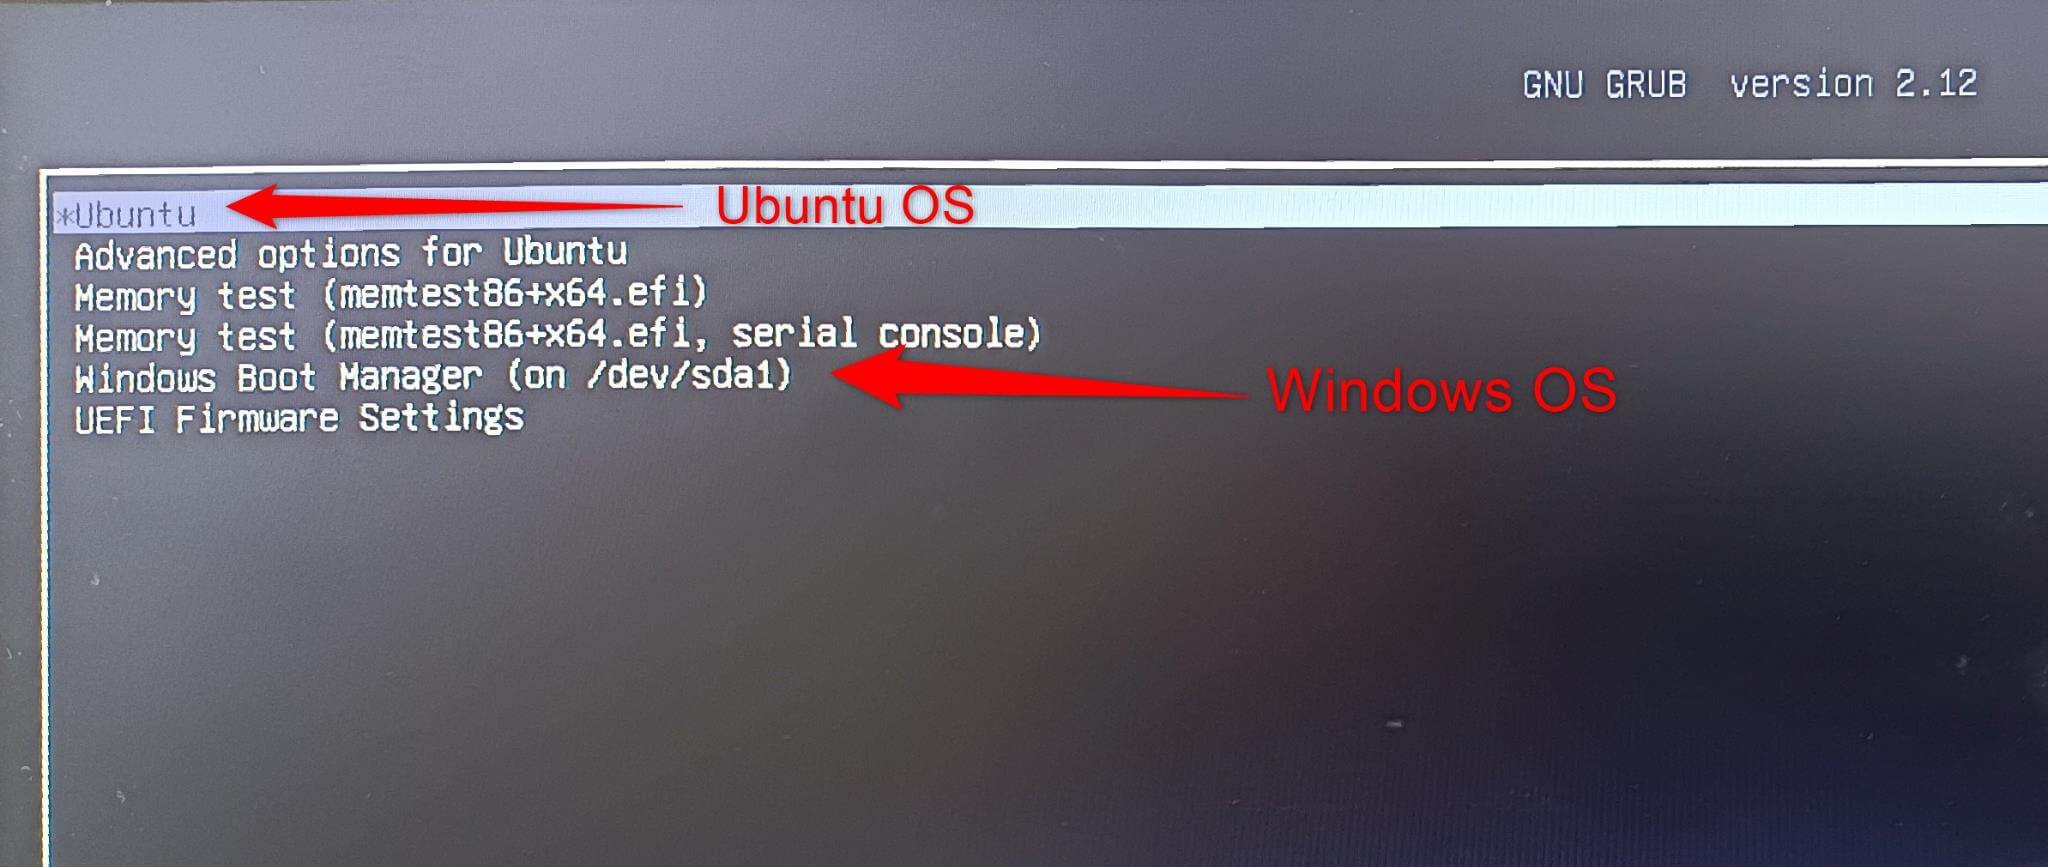
- Your system will reboot, and you should see the GRUB menu, which allows you to choose between Ubuntu and Windows.
- Boot into Ubuntu
- In the GRUB menu, select Ubuntu and press Enter to boot into your new Ubuntu installation.
- The system takes longer to set up during the first boot.
Post-Installation
- Update and Install Drivers (if necessary)
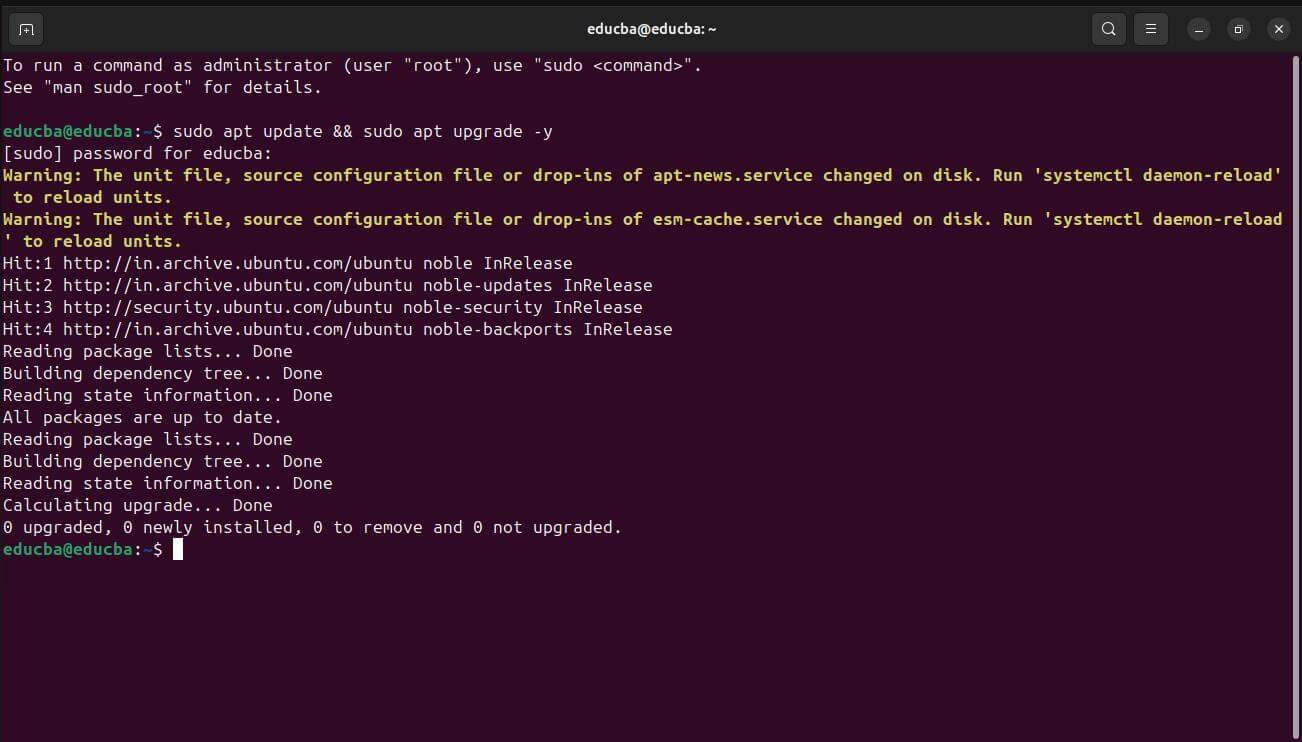
- After logging in, it’s a good practice to check for updates. Open the Terminal in Ubuntu and enter the following command:
- sudo apt update && sudo apt upgrade -y
Grub Boot Loader
In a dual-boot system, the GRUB (GRand Unified Bootloader) is an essential part.
- GRUB: What is it? Ubuntu utilizes the GRUB bootloader to control the dual-boot setup. It allows you to select the operating system to boot into and is the first screen you see following the BIOS/UEFI handoff.
- Why GRUB? It is perfect for dual-boot configurations because it supports multiple operating systems and is very configurable.
Configuring Grub Settings
- Accessing GRUB: In Ubuntu, GRUB settings can normally be accessed and modified through the /etc/default/grub file.
- Editing GRUB: To edit this file, you should use text editors like nano or vi with root permissions, for example:
- sudo nano /etc/default/grub
Customizing Grub
- Customizing GRUB: You can set the default OS, change the menu timeout, and add custom boot parameters.
- Updating GRUB: After making changes, you need to update GRUB for them to take effect:
- sudo update-grub
Testing Boot Options for Windows and Ubuntu
- Reboot: To test the changes, reboot your system.
- GRUB Menu: You should see the GRUB menu with the list of available operating systems.
- Select OS: Use the arrow keys to select Windows or Ubuntu and press Enter to boot into the selected OS.
- Verify Boot: Ensure that both operating systems boot correctly without any errors.
Tips for Switching Between Operating Systems Smoothly
- Fast Startup: Turn off Windows’ Fast Startup function since it may make it difficult for Ubuntu to mount Windows volumes.
- Time Sync: Make sure that the two operating systems are in the same time zone, and if Windows is not configured to UTC, set Ubuntu to use local time.
- Update both systems to maintain compatibility and prevent security vulnerabilities.
- Shared Data: If you wish to access data from both operating systems, use a different NTFS partition.
Conclusion
Dual-booting both Ubuntu 24.04 and Windows 11 provide a flexible computing environment that can be tailored to a variety of requirements. With this configuration, users can take advantage of the advantages of both operating systems for development, security, or instructional purposes. We’ve gone over how to prepare, partition, and install operating systems as well as troubleshoot common problems step-by-step. If users adhere to these guidelines and best practices, they can customize a flexible and effective computing environment to meet their needs.
Frequently Asked Questions (FAQs)
Q1. Will my computer’s performance suffer if I dual-boot?
Answer: Dual-booting usually has little effect on system performance when set up correctly. To guarantee peak performance, though, you must give each operating system enough resources and disk space.
Q2. Can I resize a partition after Windows and Ubuntu have been dual-booted?
Answer: Yes, you can create new partitions for data storage or resize existing ones to give the operating system more space after dual-booting.
Q3. After dual-booting, is it possible to remove one of the operating systems?
Answer: In a dual-boot configuration, you can indeed remove one of the operating systems by erasing its partition and changing the bootloader settings appropriately. But, since there’s a chance that this process will erase your data, make a backup of it first.
Q4. What if I run out of space on my hard drive?
Answer: If you underestimated the disk space needed for Ubuntu, you can try expanding the Ubuntu partition using a partition editor (Gparted), but only if there’s unallocated space available on your drive. Shrinking existing partitions to make space is riskier and should be done with caution and backups in place.
