Updated September 14, 2023
Introduction to ZBrush Alpha Skin
ZBrush Alpha Skin can understand as detailing applied to the model to make it similar to a real-world look. Alpha allows us to paint on the model to create a surface on it that embossed all the required details of the surface. Alpha structure varies from part to part of the model or which type of detailing you want to add in your model such as for creature we can use alpha that helps us for enhancing the detailing of its skin, same as we can go with the structure of human skin which include the texture of the skin, veins of body and wrinkles and so on.
How to Use Alpha Skin in ZBrush?
Here we will see how to use Zbrush Alpha skin and where you can navigate for having Alpha skin texture. For browsing, it goes to any browser and searches for Alpha Skin for Zbrush, and we will have our result after searching.
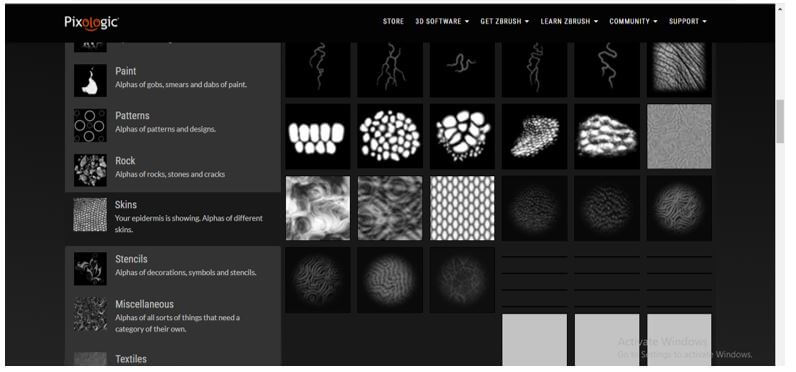
You can go with the official website of Zbrush, which is Pixologic or have it from other websites also. We will go with Pixologic first. Once you open the link, you will have a tab of Alpha in a different tab section of the page, and under this tab, we have a number of Alpha files for different purposes.
Here we will see about skin alpha so that we will navigate for skins on this page. You can find it by scrolling down on the same page.
Once we click on it, it will show us all the skins alpha, which has different details according to creatures and humans. There are skin alpha for aliens also. So you can download any one as per your requirement. For example, we have Dragon skin alpha.
Alpha for nails and so on.
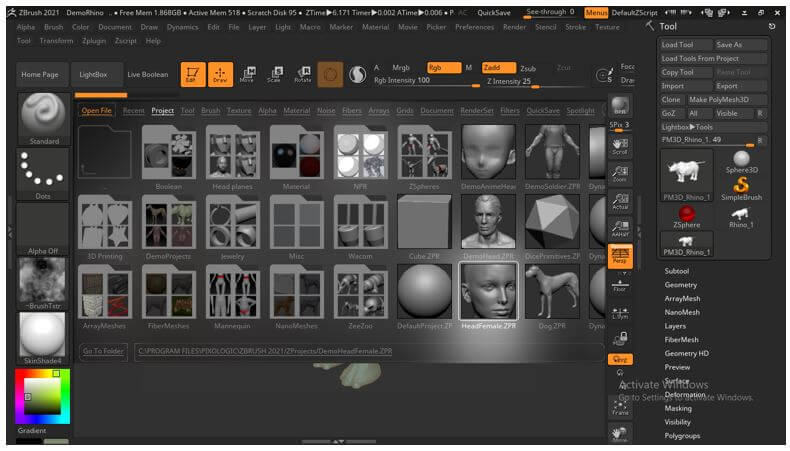
Now let us jump into Zbrush software to understand how we can apply alpha skin to our model. Here in Zbrush, we will take a model from Light Box, which has presets of models, and use that model.
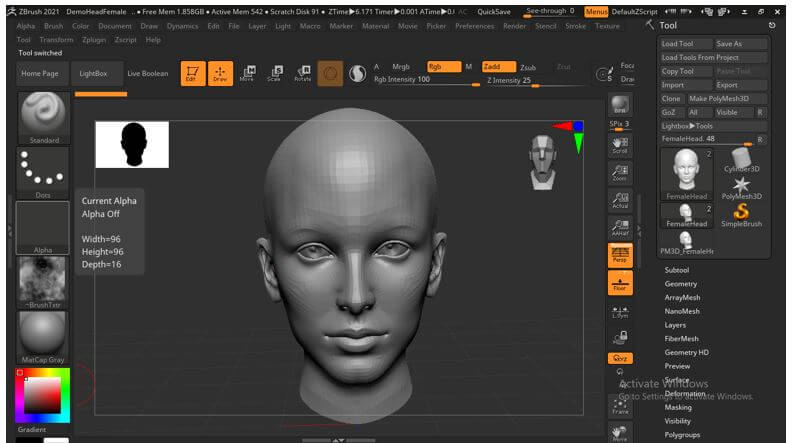
So we will click on the Light Box button and choose this Female head model. Then, we will make double-click on it to have it on my working space of this software.
Now at the left side of the working space, we have some tabs, and in this tab’s bar, we have the Alpha tab also. There is nothing in this tab, or it is blank because currently, there is no alpha applied on this model, and you can understand it as Alpha is off.
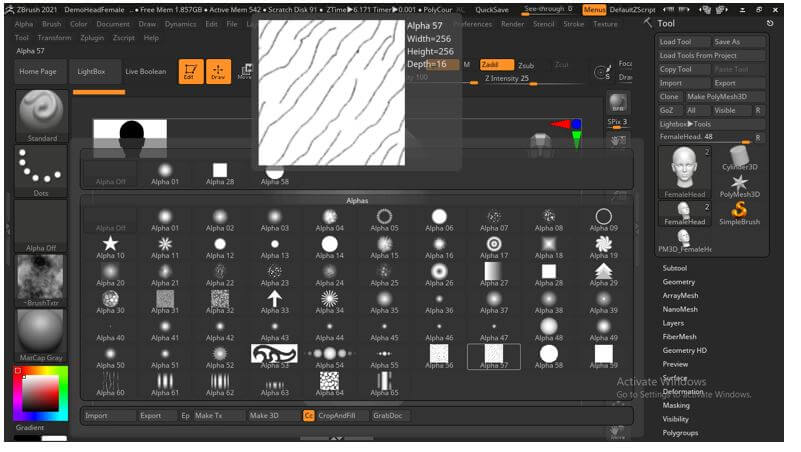
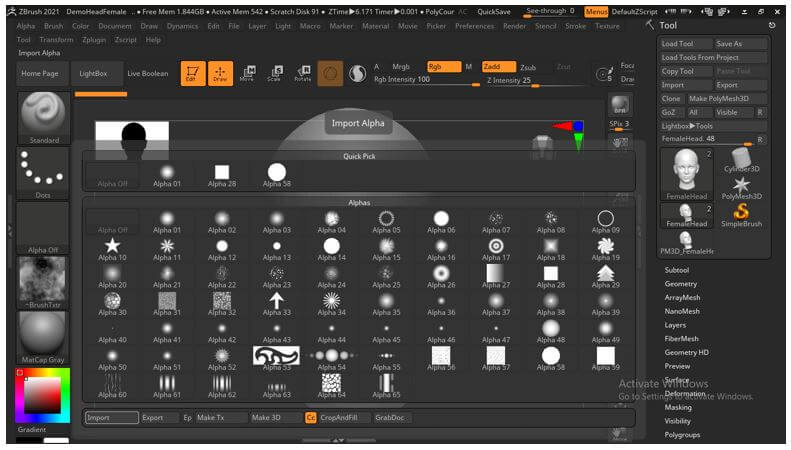
For applying alpha to your model, go to the Alpha tab and click on it. Once you click on it, you will have a number of a preset list of Alpha offers by Zbrush. You can use any preset as per requirement from this list for a different types of purposes.
But we have downloaded skin Alpha from the internet for today’s topic. We have skin alpha for Elephant, Human, and Snake in the downloaded file, but we will see you this through Human skin.
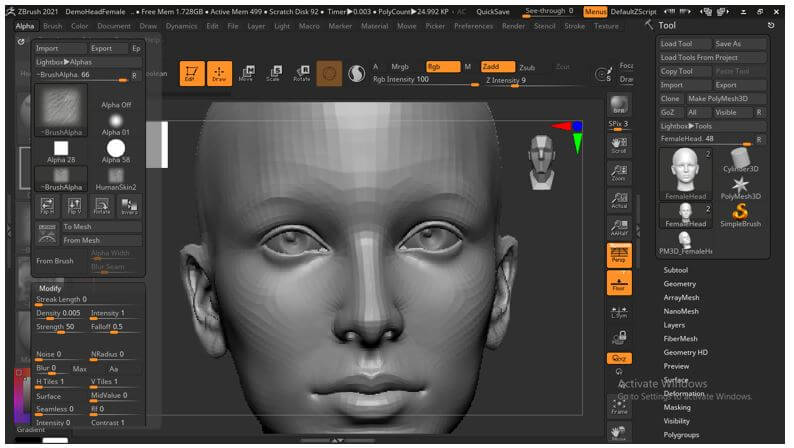
Now let me import this human skin alpha to the Zbrush alpha panel, and for that, we will click on the Import button of the Alpha panel, which is at the bottom of this panel.
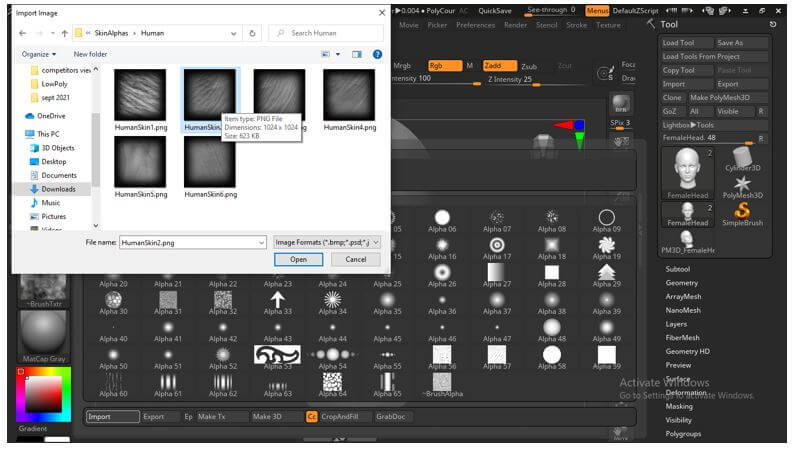
And once we click a Dialog box for importing, our desired alpha skin file will be open. We will choose the second one from this list from its saved location. You can use any other alpha skin which you have in your collection.
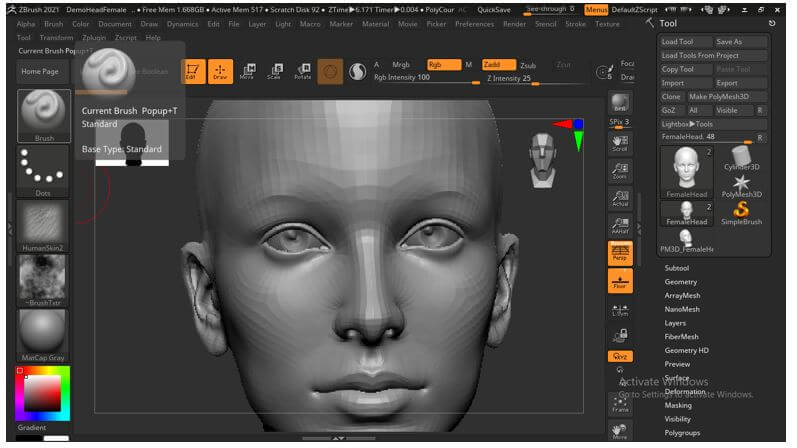
Now in the same tab bar, we have a brush tab, so if you have not selected standard brush here, go to the list and select Standard brush for this purpose.
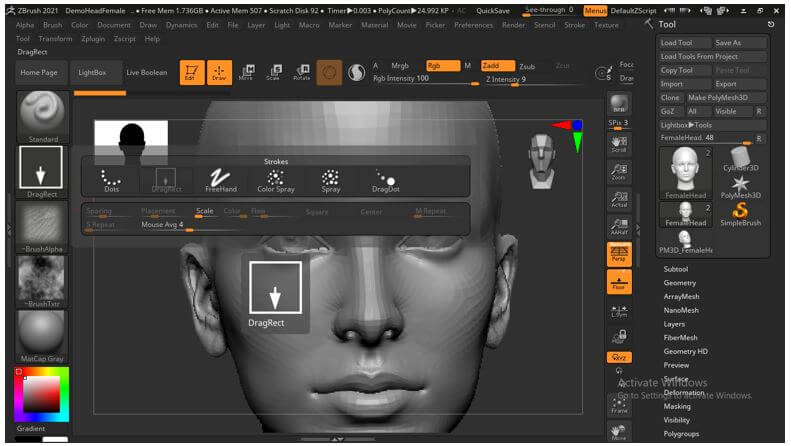
In the tab below to Brush, the tab chooses the DrawRect option from the list of it. This list will come once you click on this tab.
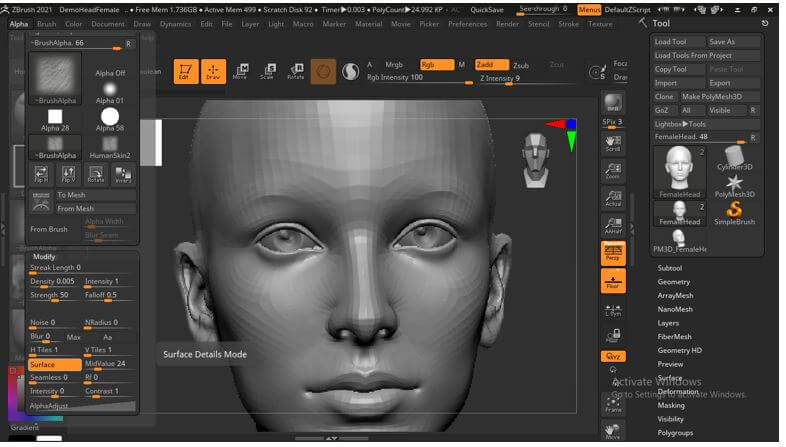
Now go to the Alpha menu of the menu bar, which is in the menu bar section of this software. The menu bar is at the top of the working screen. In this bar, go to Modify button and click on it. If you doesn’t see the button, then scroll down in this panel.
Now in the Modify button, there is a Surface button, so click on it so that we can apply the alpha channel to our model.
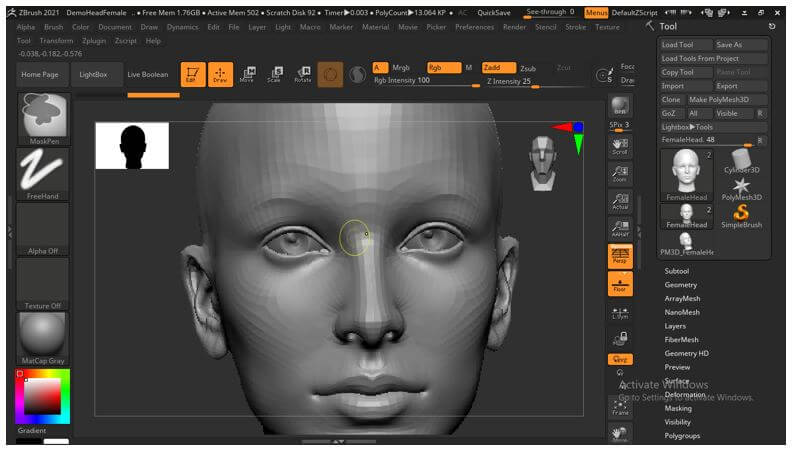
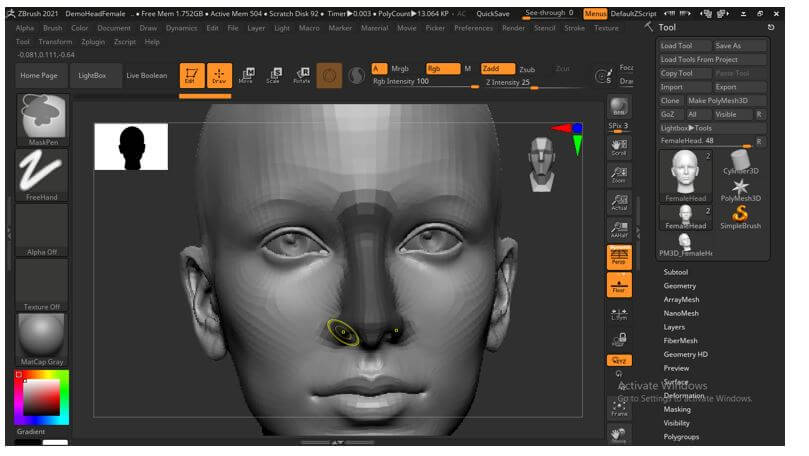
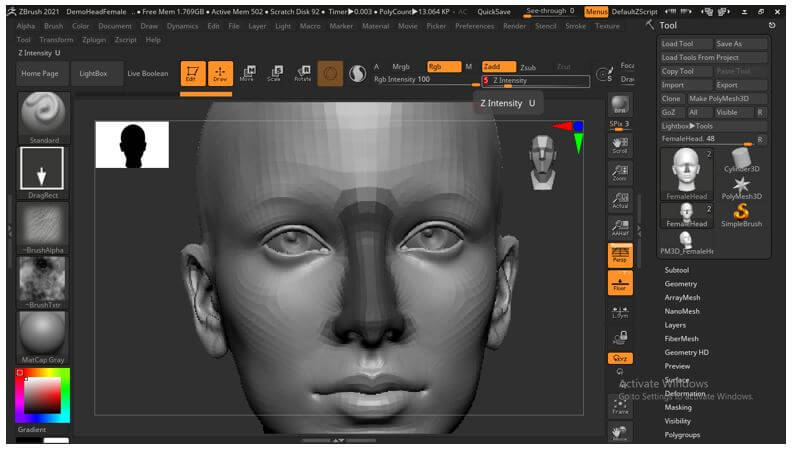
Before applying alpha skin to your selected model, mask the area you don’t want to apply that alpha skin. So for that, we will hold the Ctrl button of the keyboard, and it will turn the mouse into a masking pen. You can identify it by the yellow color of the mouse cursor.
We will mask this nose area because we don’t want to apply alpha skin here. You can mask areas on your model according to your requirement. You can apply other alpha skin to the mask area later on.
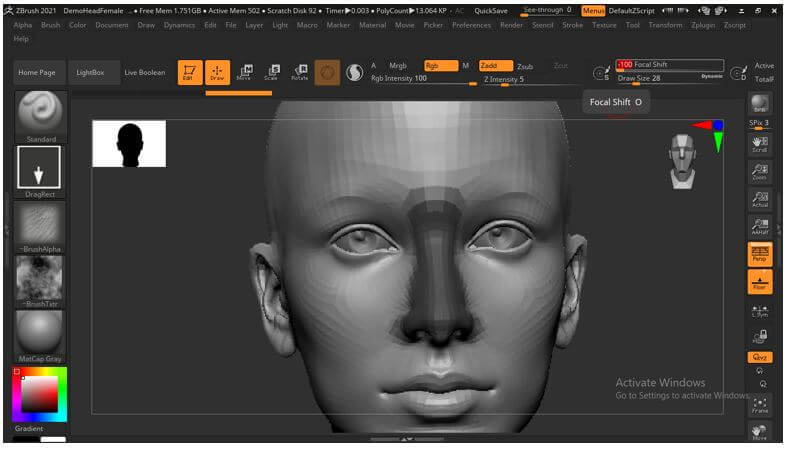
Now go to the top of the workspace and adjust the intensity of the brush as per your requirement, which means how much press you want to use on the brush tip so that it will paint alpha skin with that intensity.
From the same bar, adjust the focal shift so that we can apply alpha skin properly. We will set it as -100 by entering this value in the slider of the Focal Shift option.
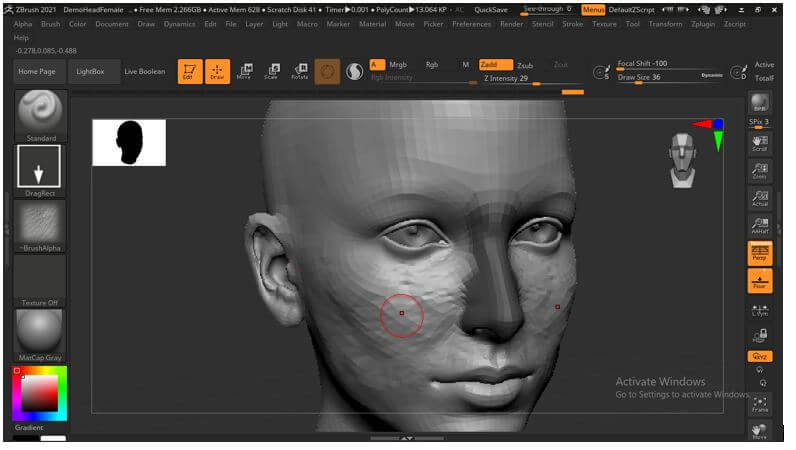
Now drag the mouse cursor on the area of skin where you want to apply this alpha skin. You can apply it by continuously moving the mouse cursor or in one by one step.
This way, you can apply alpha skin to your model. Not only on human skin, but you can also apply it on other creatures’ skin for enhancing detailing on the skin’s surface.
Conclusion
After going through this article, you must find a number of helpful information and can analyze them for better understanding. You can follow the same procedure for applying alpha skin on other creatures rather than human skin if you want. You can manipulate parameters during going through this process to have more variation and effective results.
Recommended Articles
This is a guide to ZBrush Alpha Skin. Here we discuss the introduction and how to use alpha skin in ZBrush? for better understanding. You may also have a look at the following articles to learn more –


